(How We Spent Our 2018 Summer)
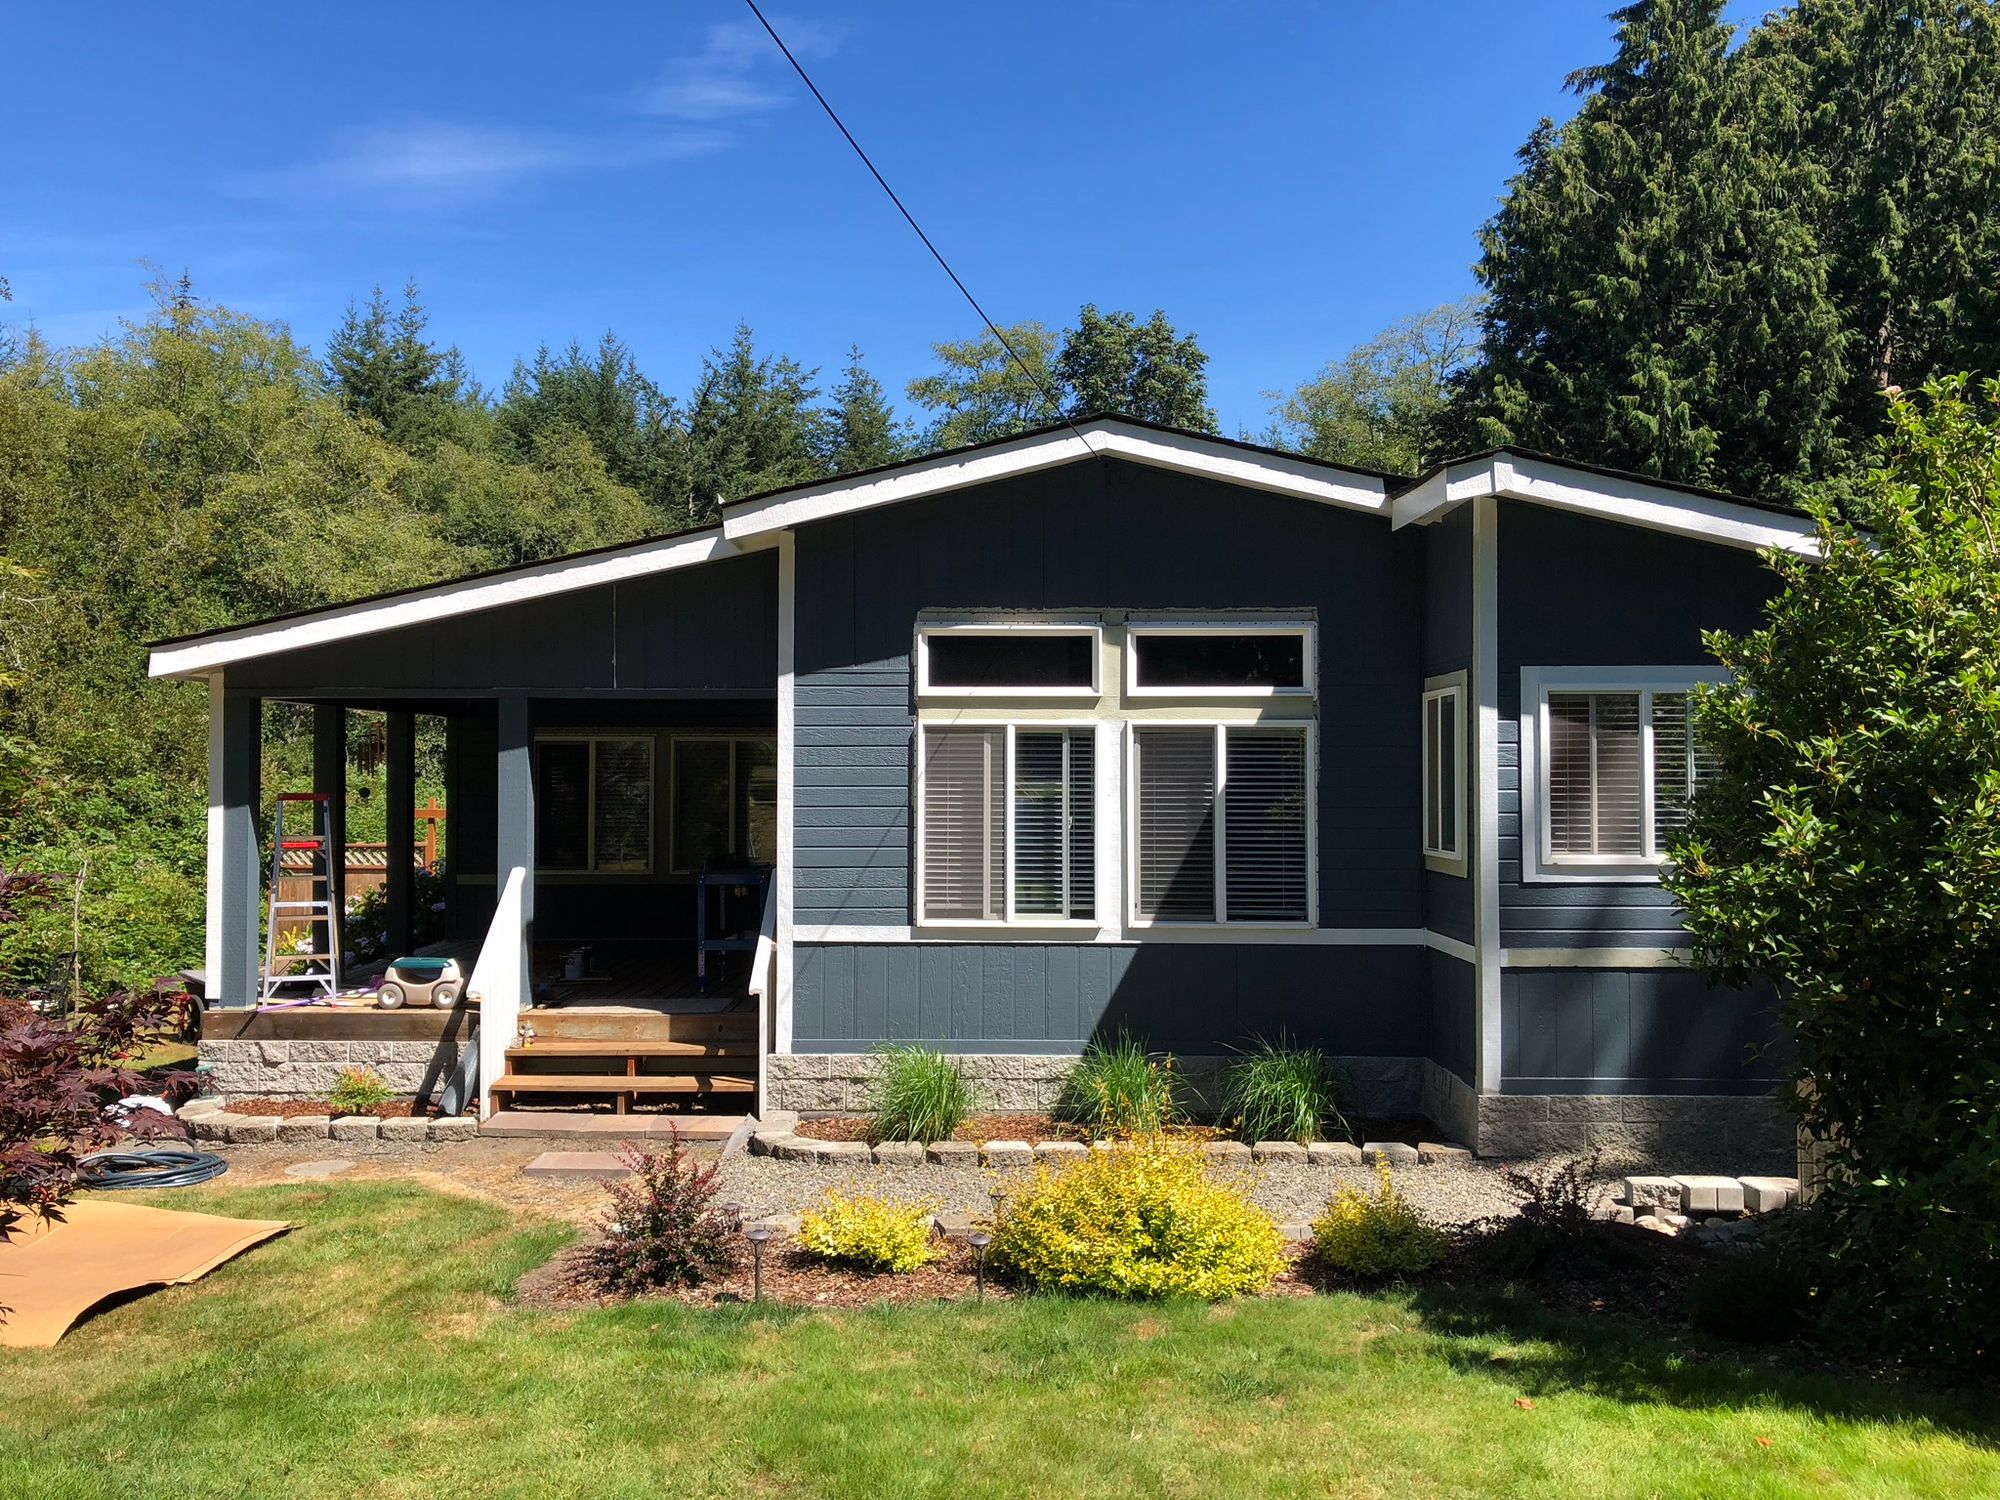
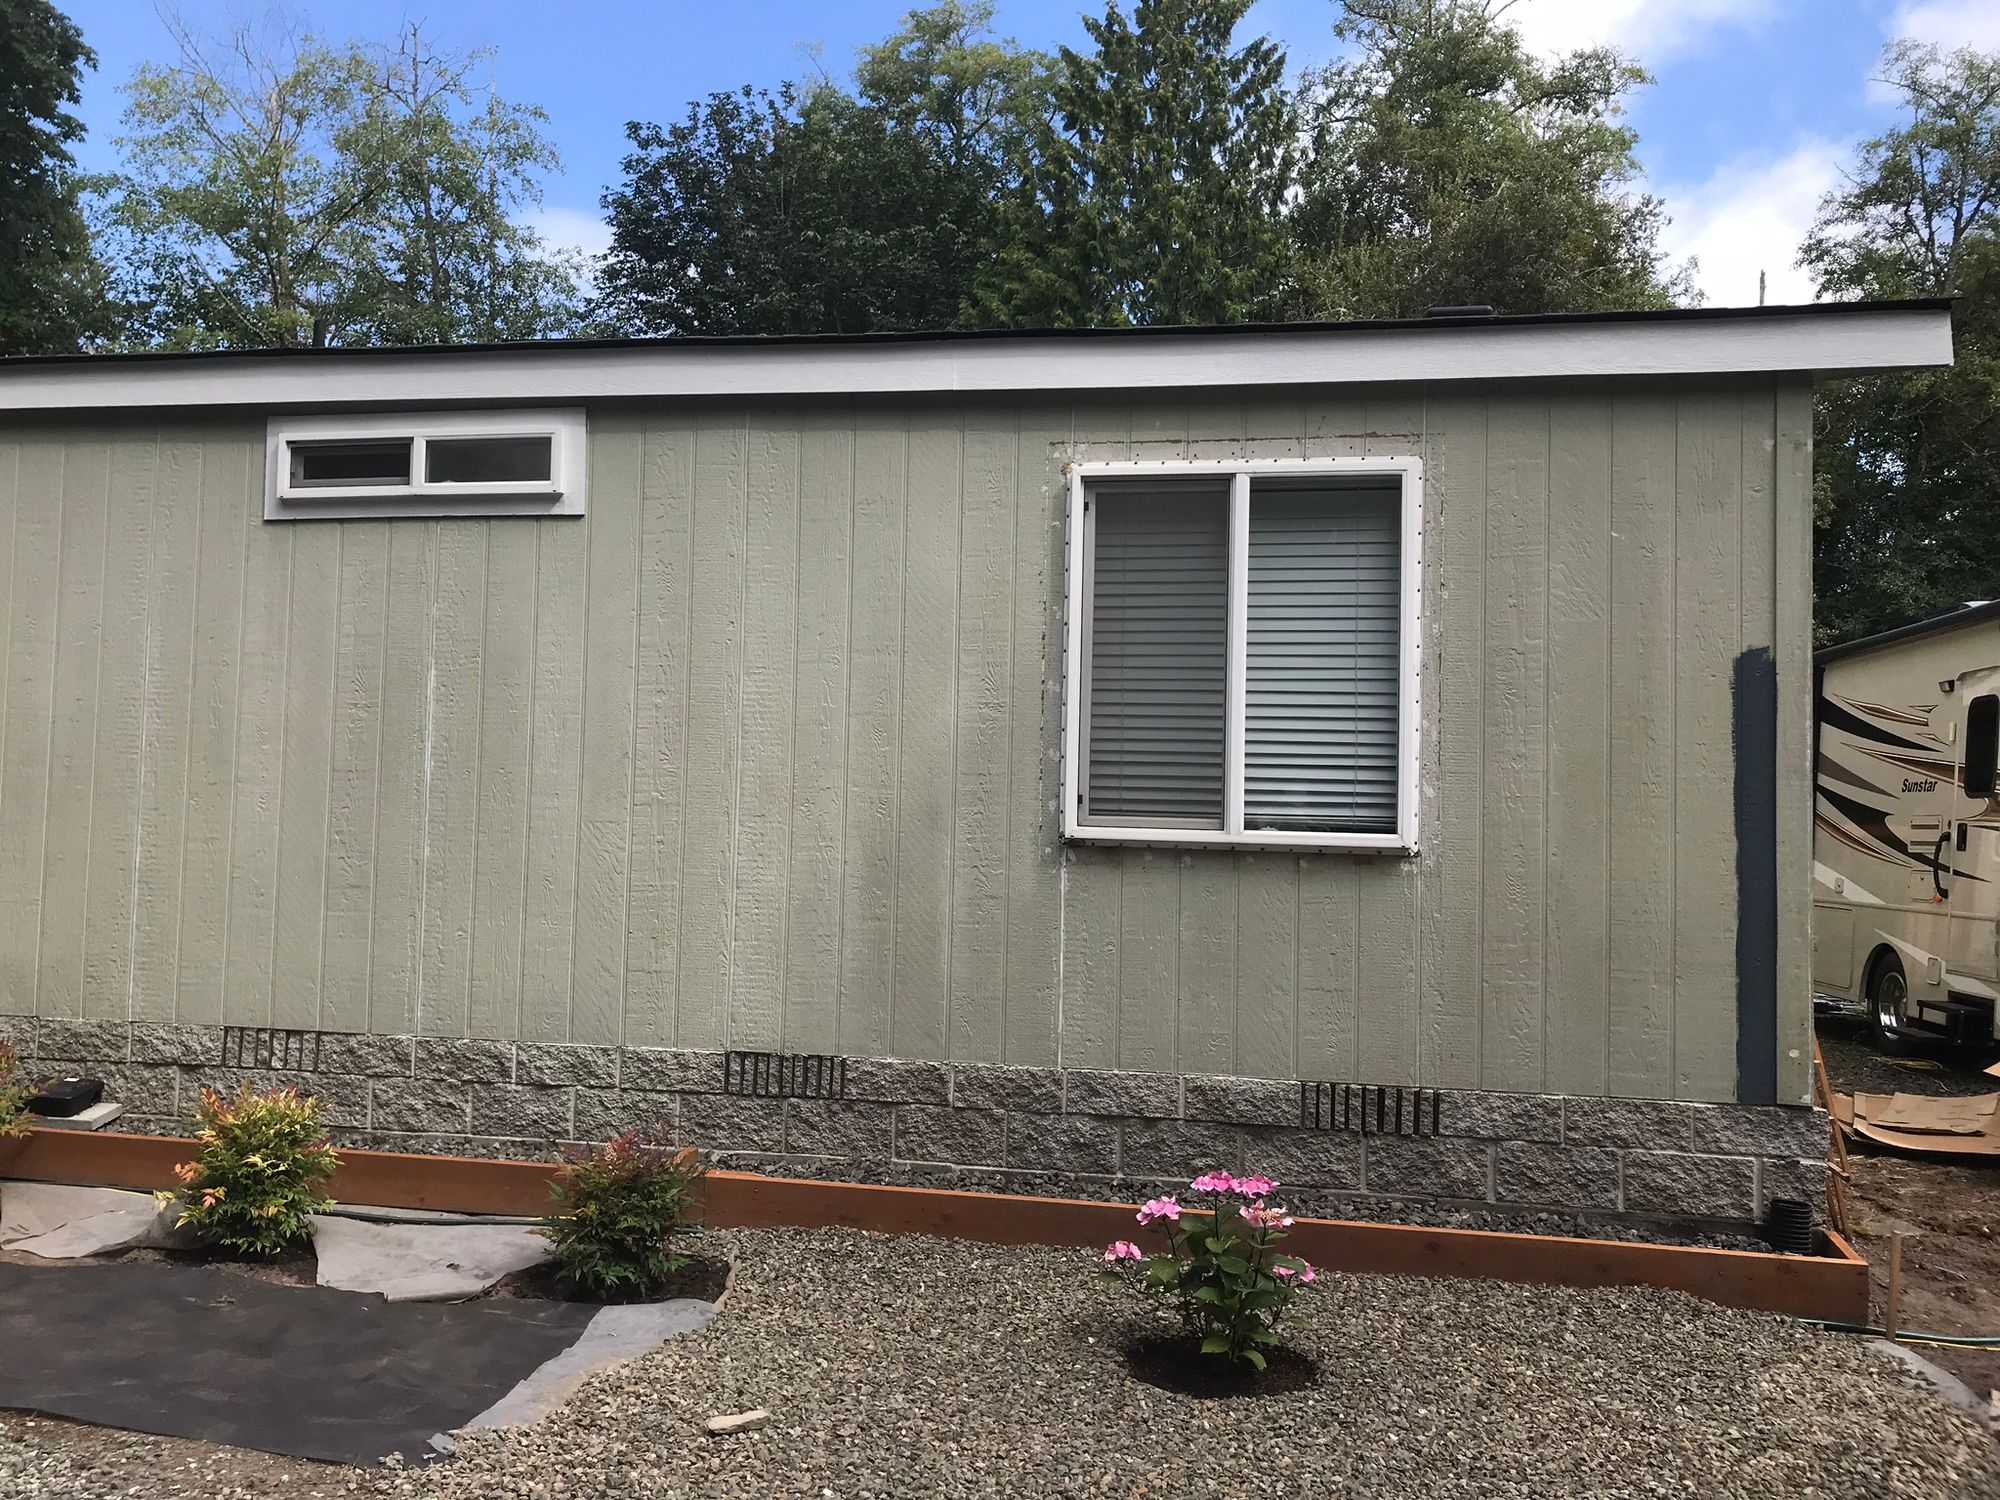
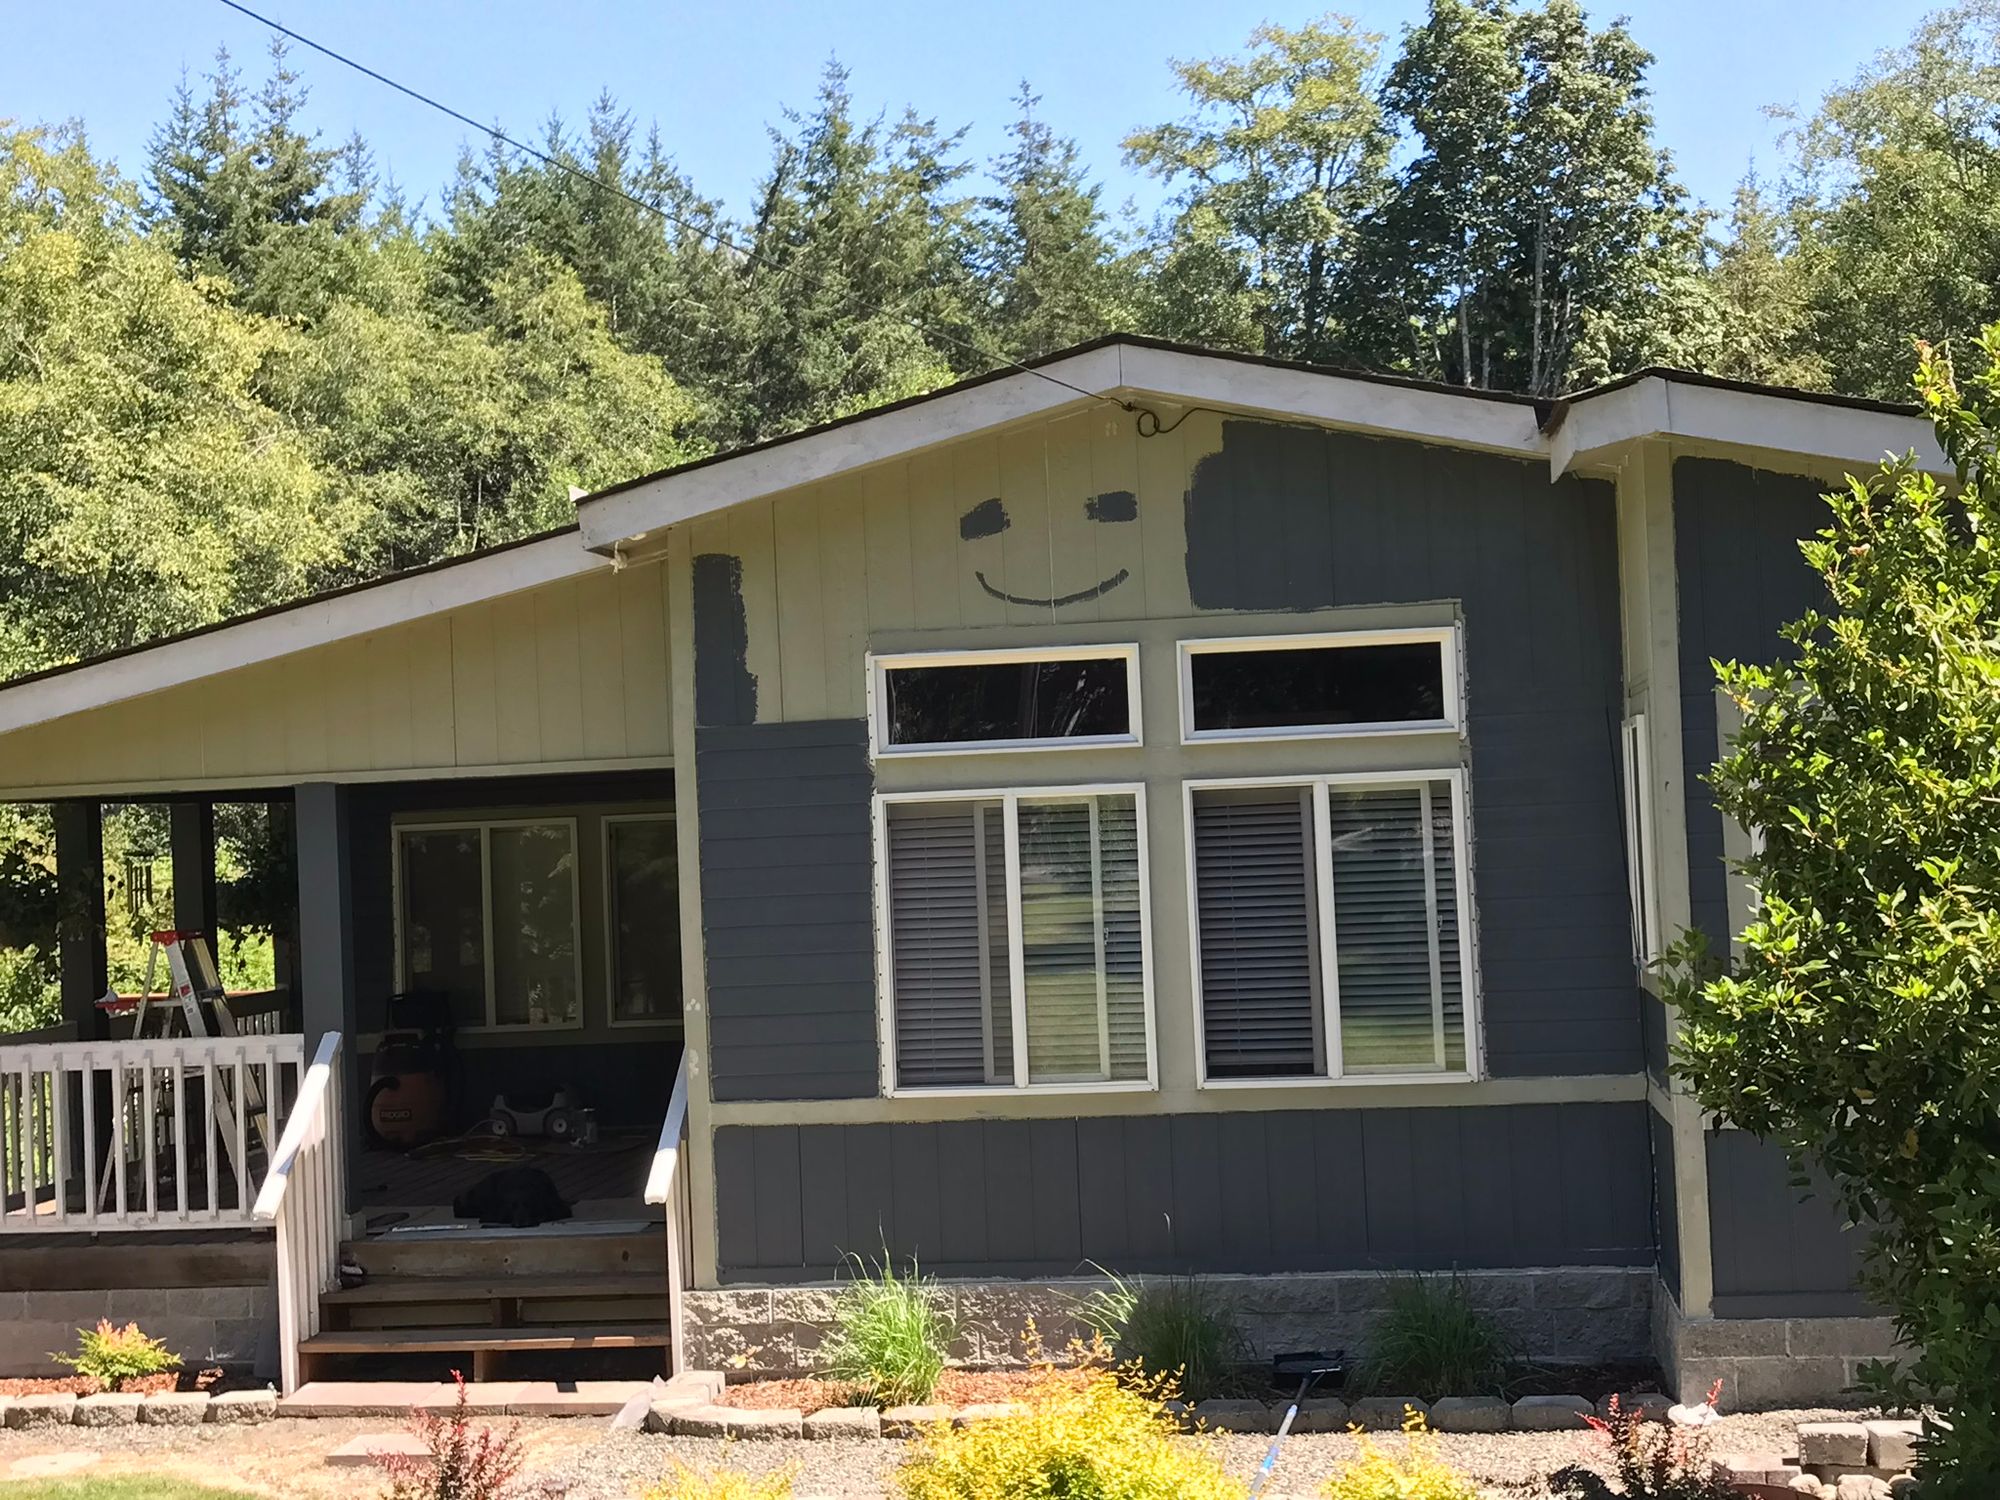
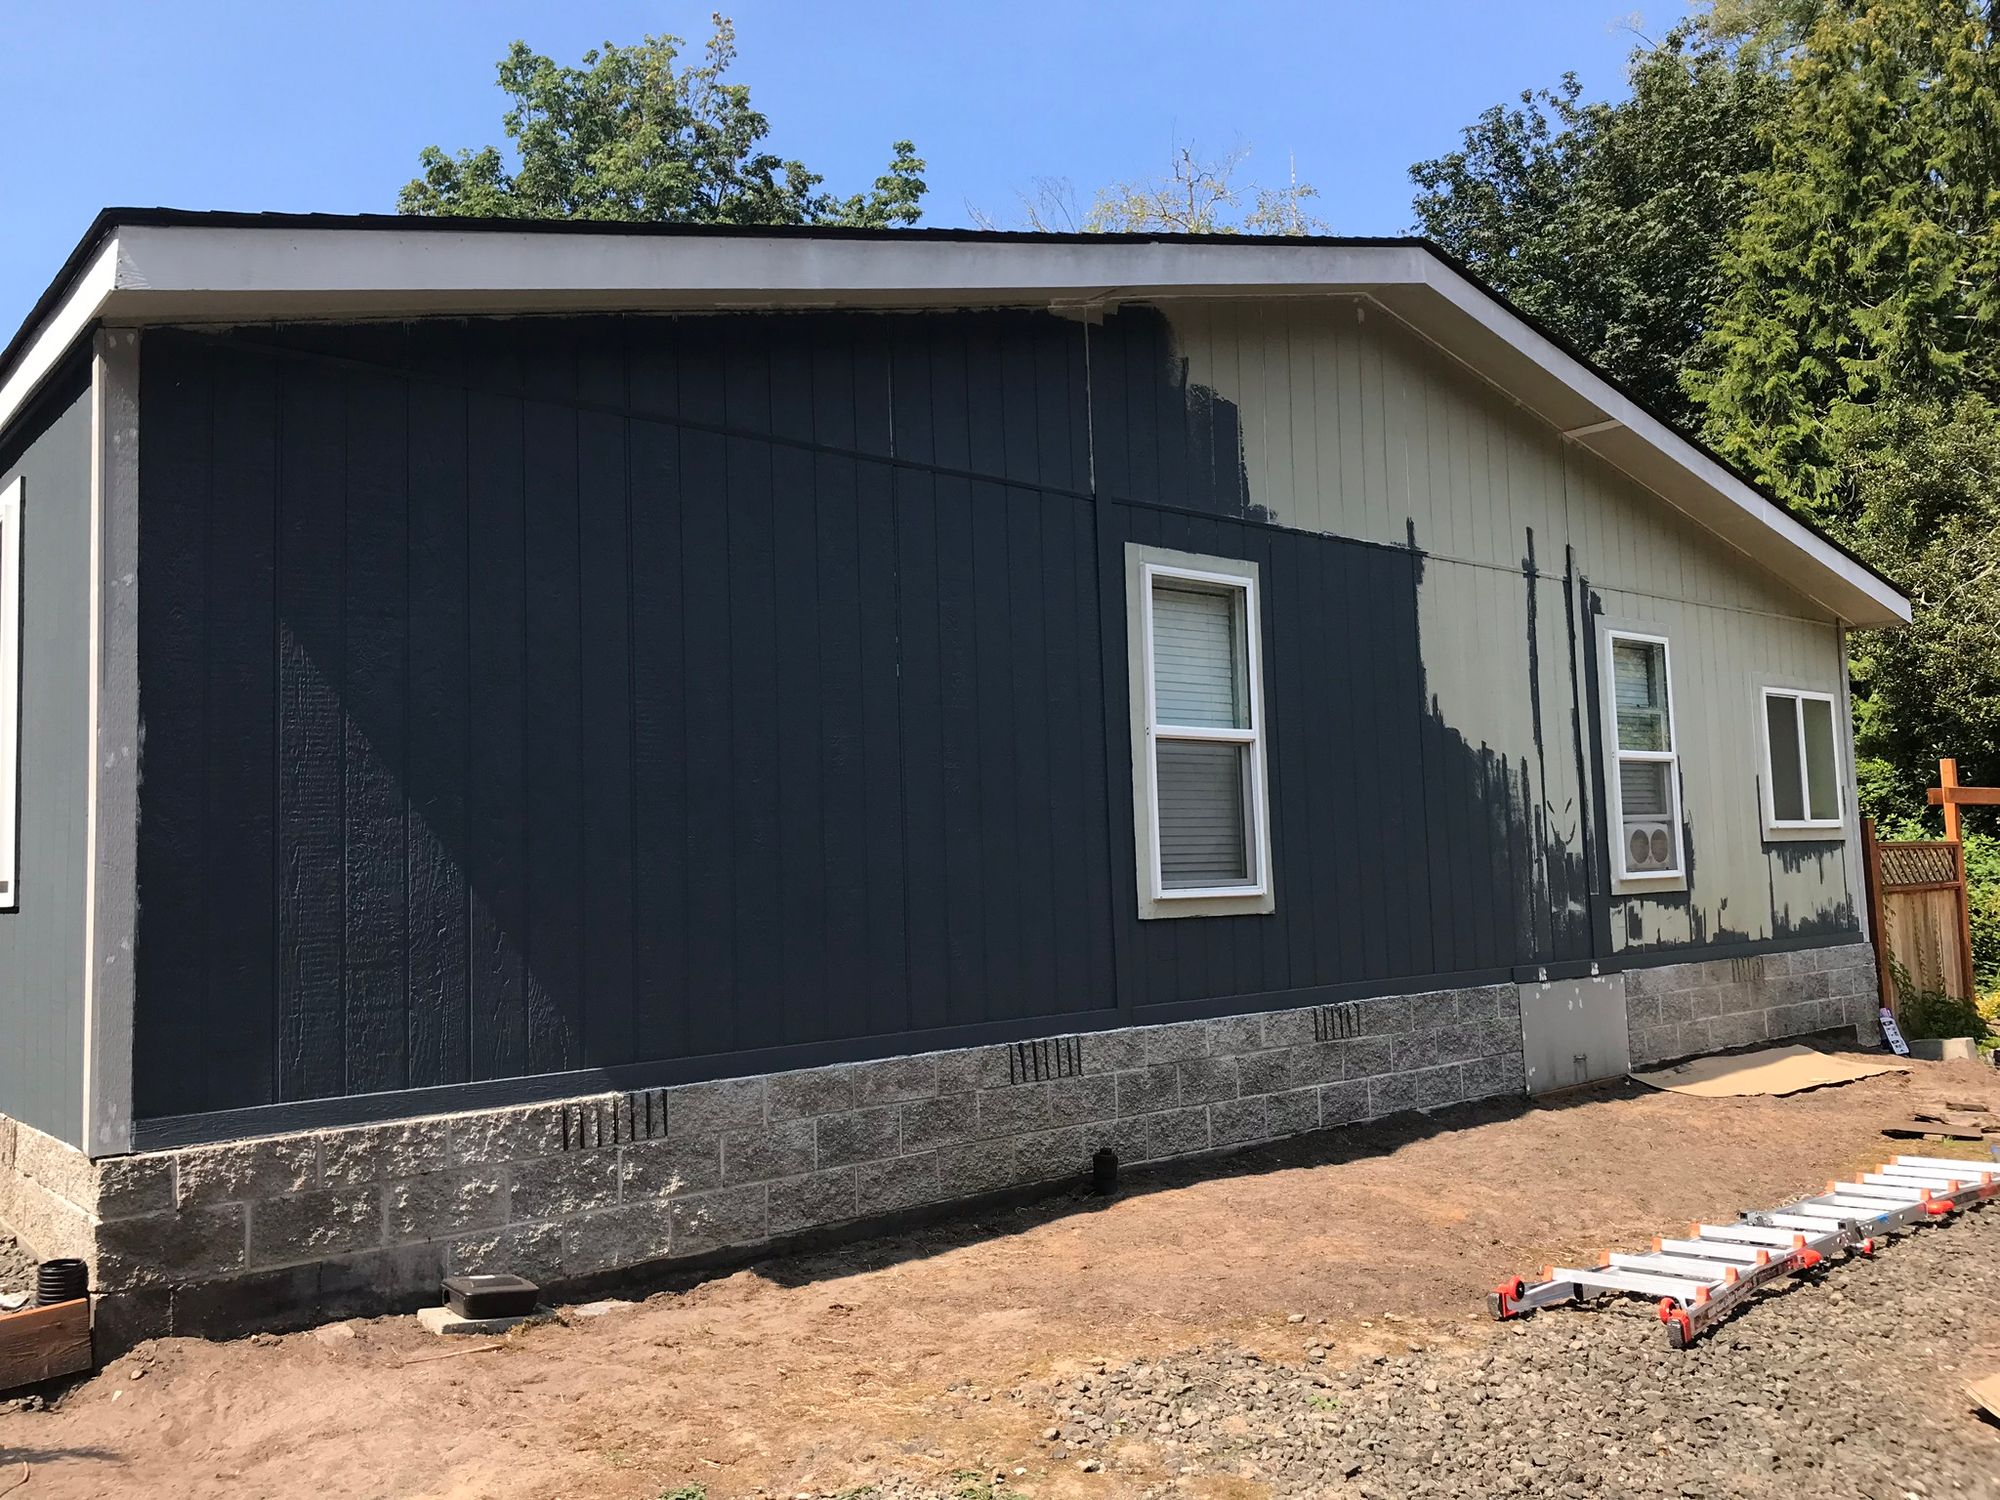
What an undertaking! We knew when we purchased the house two years ago that it needed re-painted, both due to wear and we also wanted it a different color. After many color samples, we decided on Harbor Gray as the color.
Spray, or roll and brush? Before it came time to start, I queried Google to see what it could tell me about the pros and cons of spraying versus rolling and brushing. After reading many articles and opinions, we decided to roll and brush. Most stated that spraying was the fastest method, but on the con side, spraying would use more paint, not provide as good coverage, and also require more prep due to overspray. Rolling and brushing would get a better coat of paint on the surface but they were not as fast as spraying. Our next step was to decide what supplies we would need and order them from Amazon. I have listed our supplies at the end of this article, check them out.
We had already ordered new gutters and downspouts through Lowe’s and we wanted to get a good coat of paint on the fascia before the new gutters were installed. That meant I had to remove the existing gutters and patch the mounting holes.
The existing gutters were on the north and south sides of the house. I removed the south side gutters first, using a step ladder to access their mounts. For the north side, they are much higher off the ground so I removed them while working from the roof. I ran across some bees on the north side and thought I was going to be stung, but avoided it, luckily. With the gutters removed, I patched the holes in the fascia with wood putty where the mounts were removed. Since I removed the gutters on the south side after I had pressure washed, there was some remaining dirt that we wiped away.
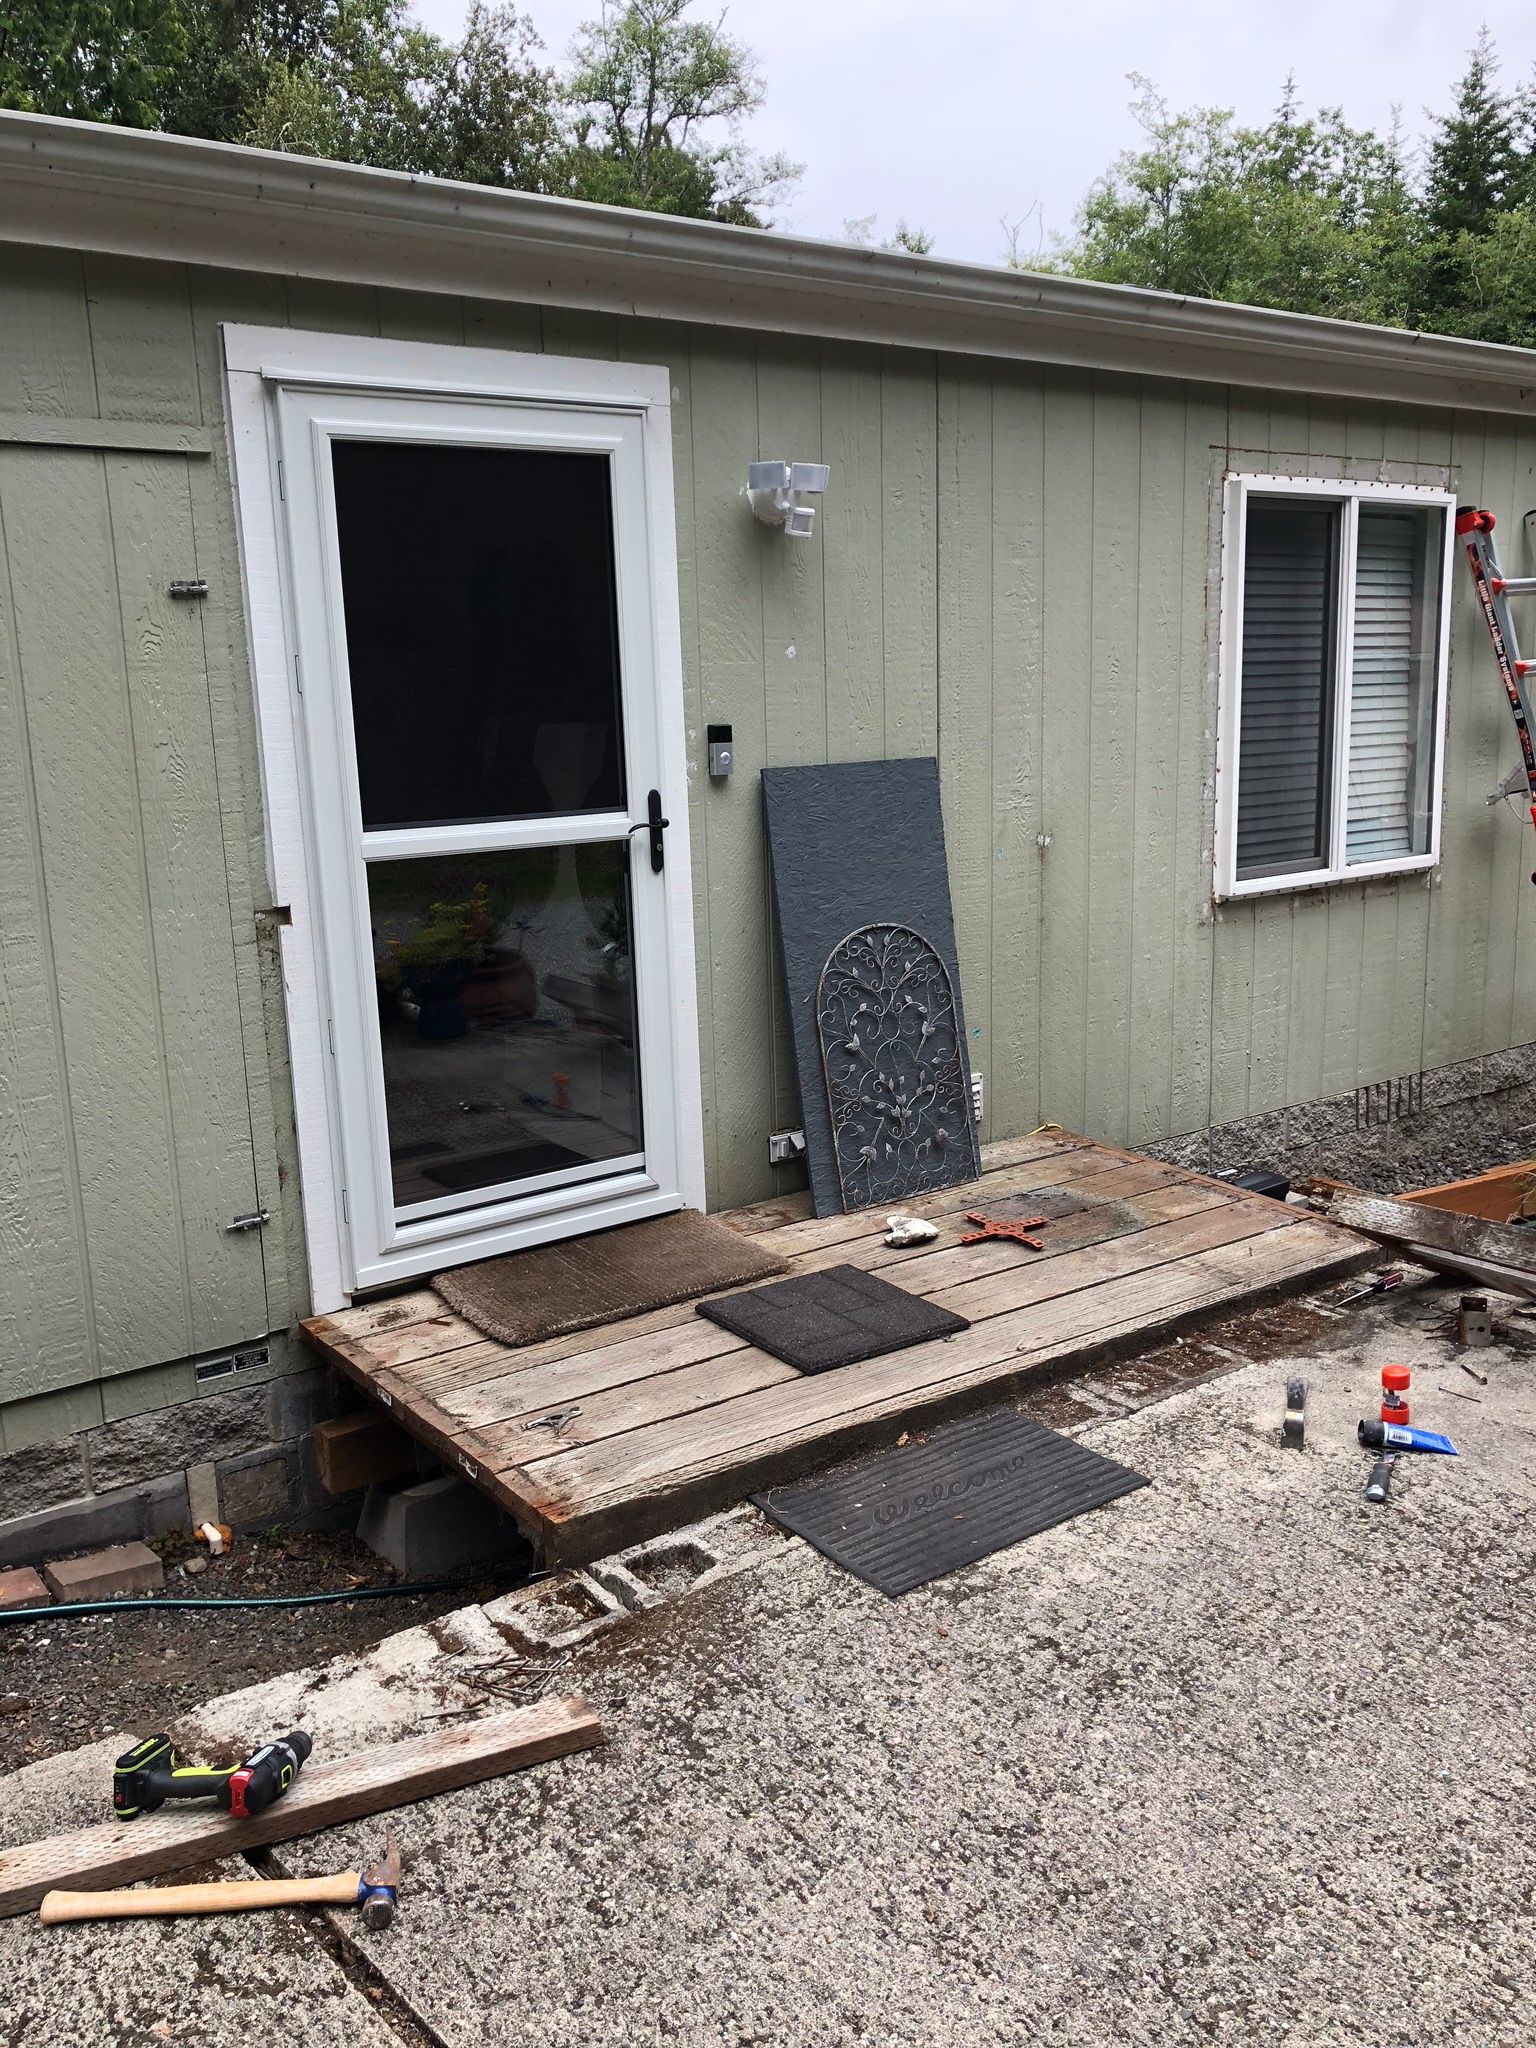
During the home inspection when we were buying the home, the inspector pointed out a couple of trim boards around windows that had rot and needed to be replaced. I decided that I would make these repairs when we re-painted the house. In addition to the boards pointed out originally, I found more around other windows, as well as the trim boards at the corners of the house. At all of these corners were downspouts and water must have run behind the downspouts and rotted the wood over time. The wood originally used was a fiber-board type and not real wood. This is much more susceptible to water damage and rot. I used real wood to replace the bad pieces. In total, we replaced over 200 feet of 4” wood trim. I worked my way around the house removing the bad boards ahead of the painting.
We started the project on July 4, 2018, by power washing two of the four sides. Rose said we needed to paint the west and south sides first as the west faces the road and our driveway is along the south. This made perfect sense, so those are the two sides we washed first and would prep and paint first.
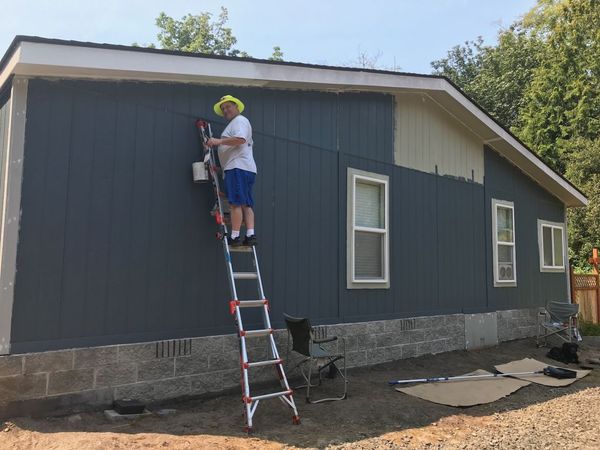
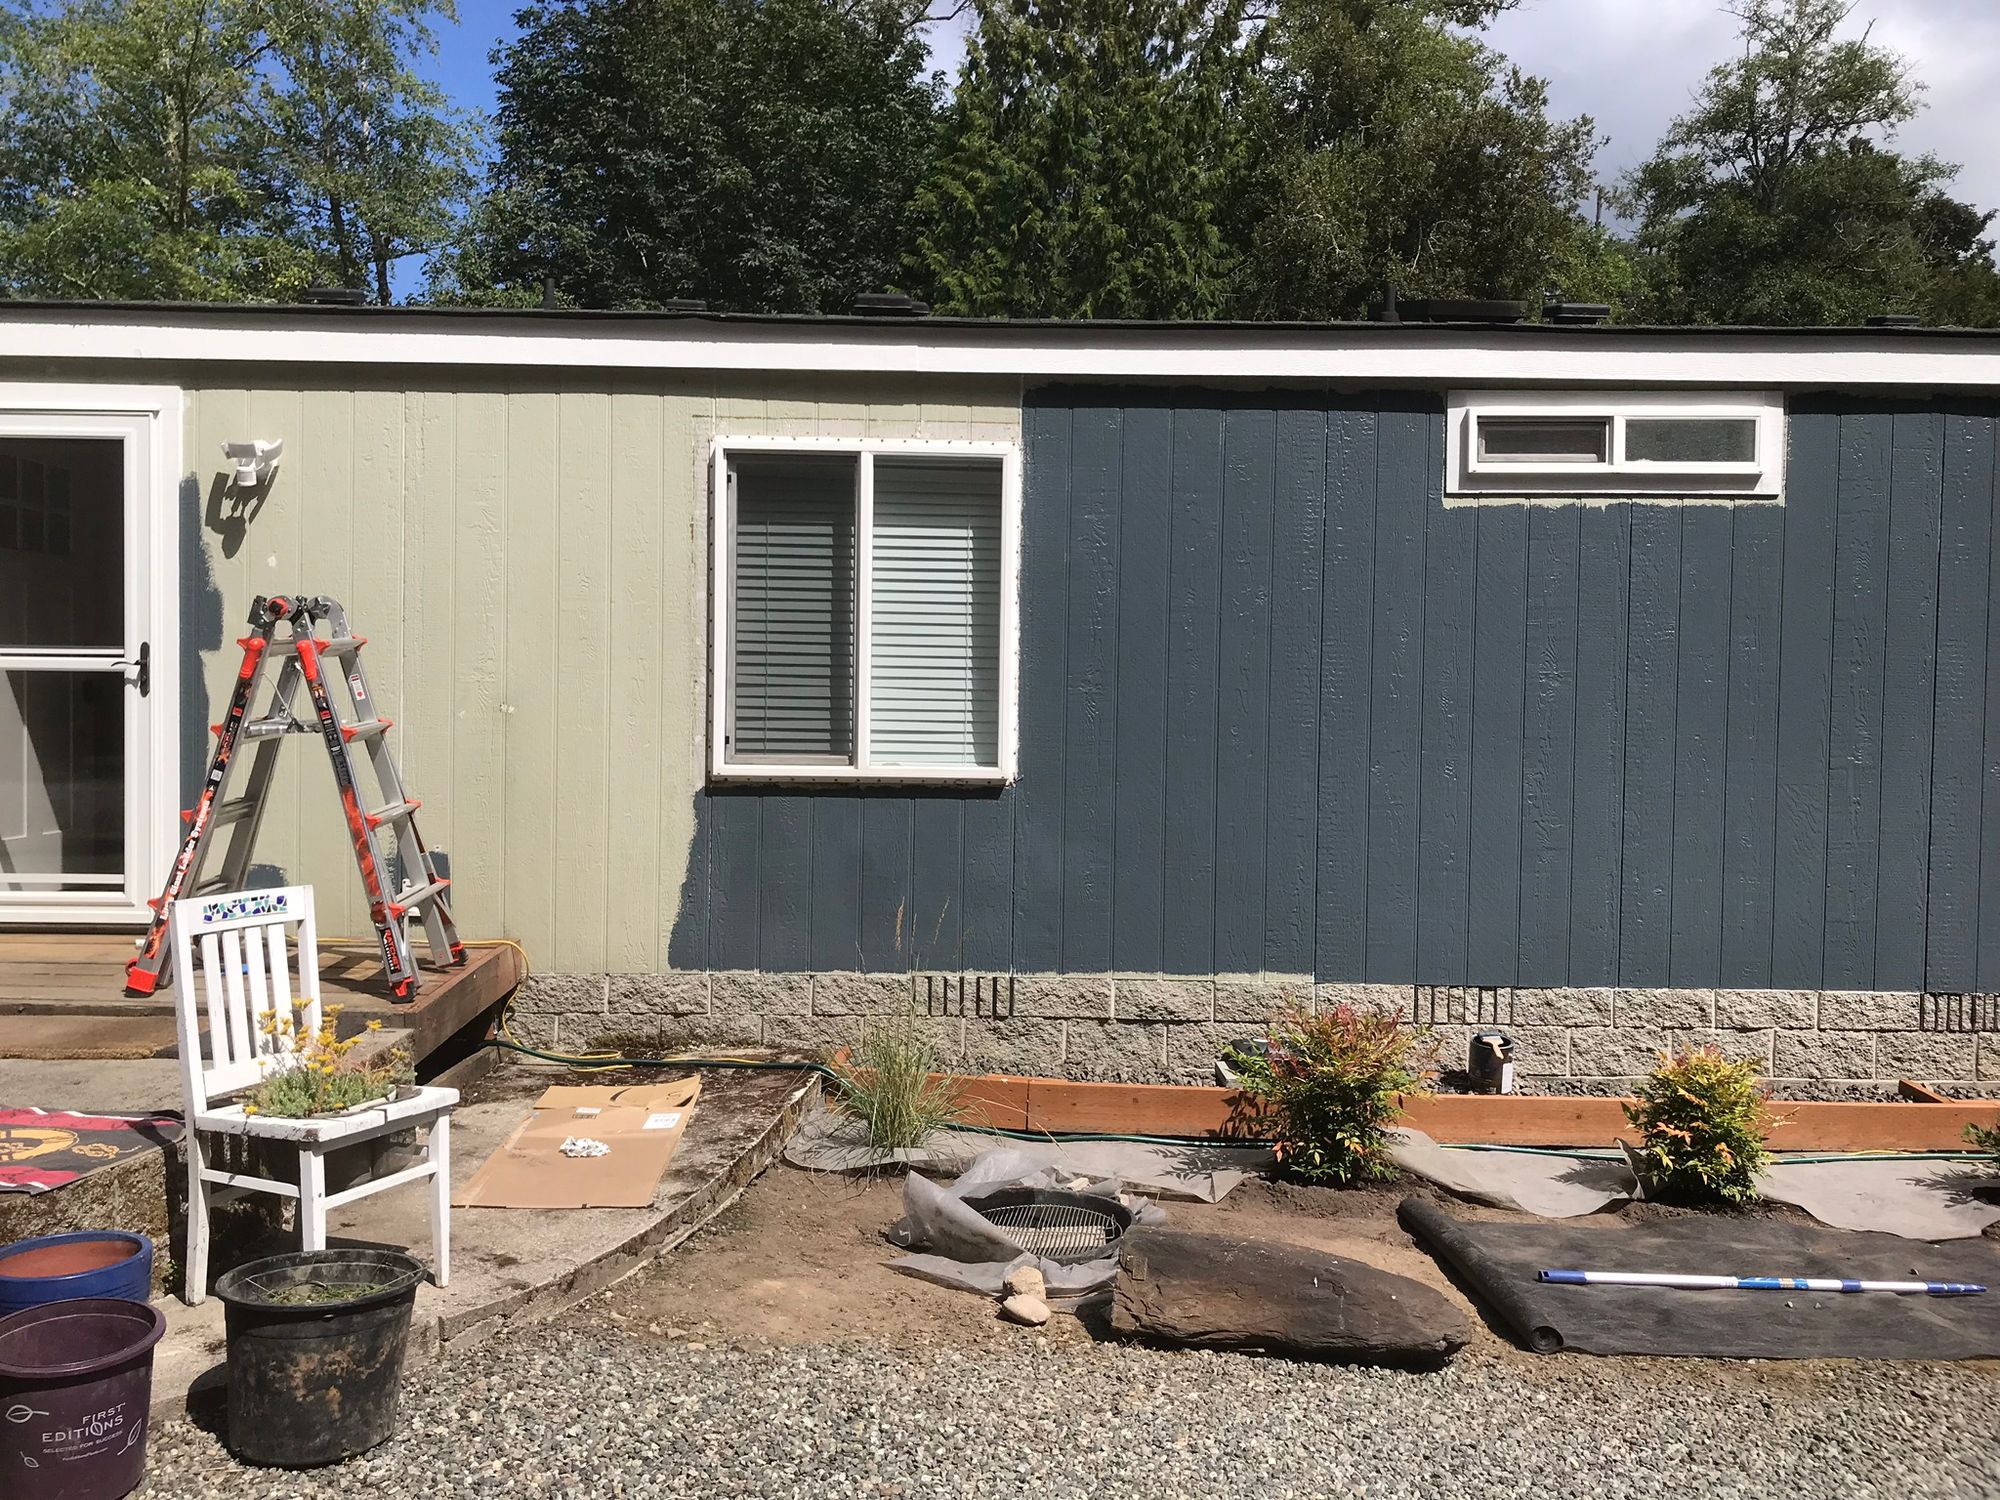
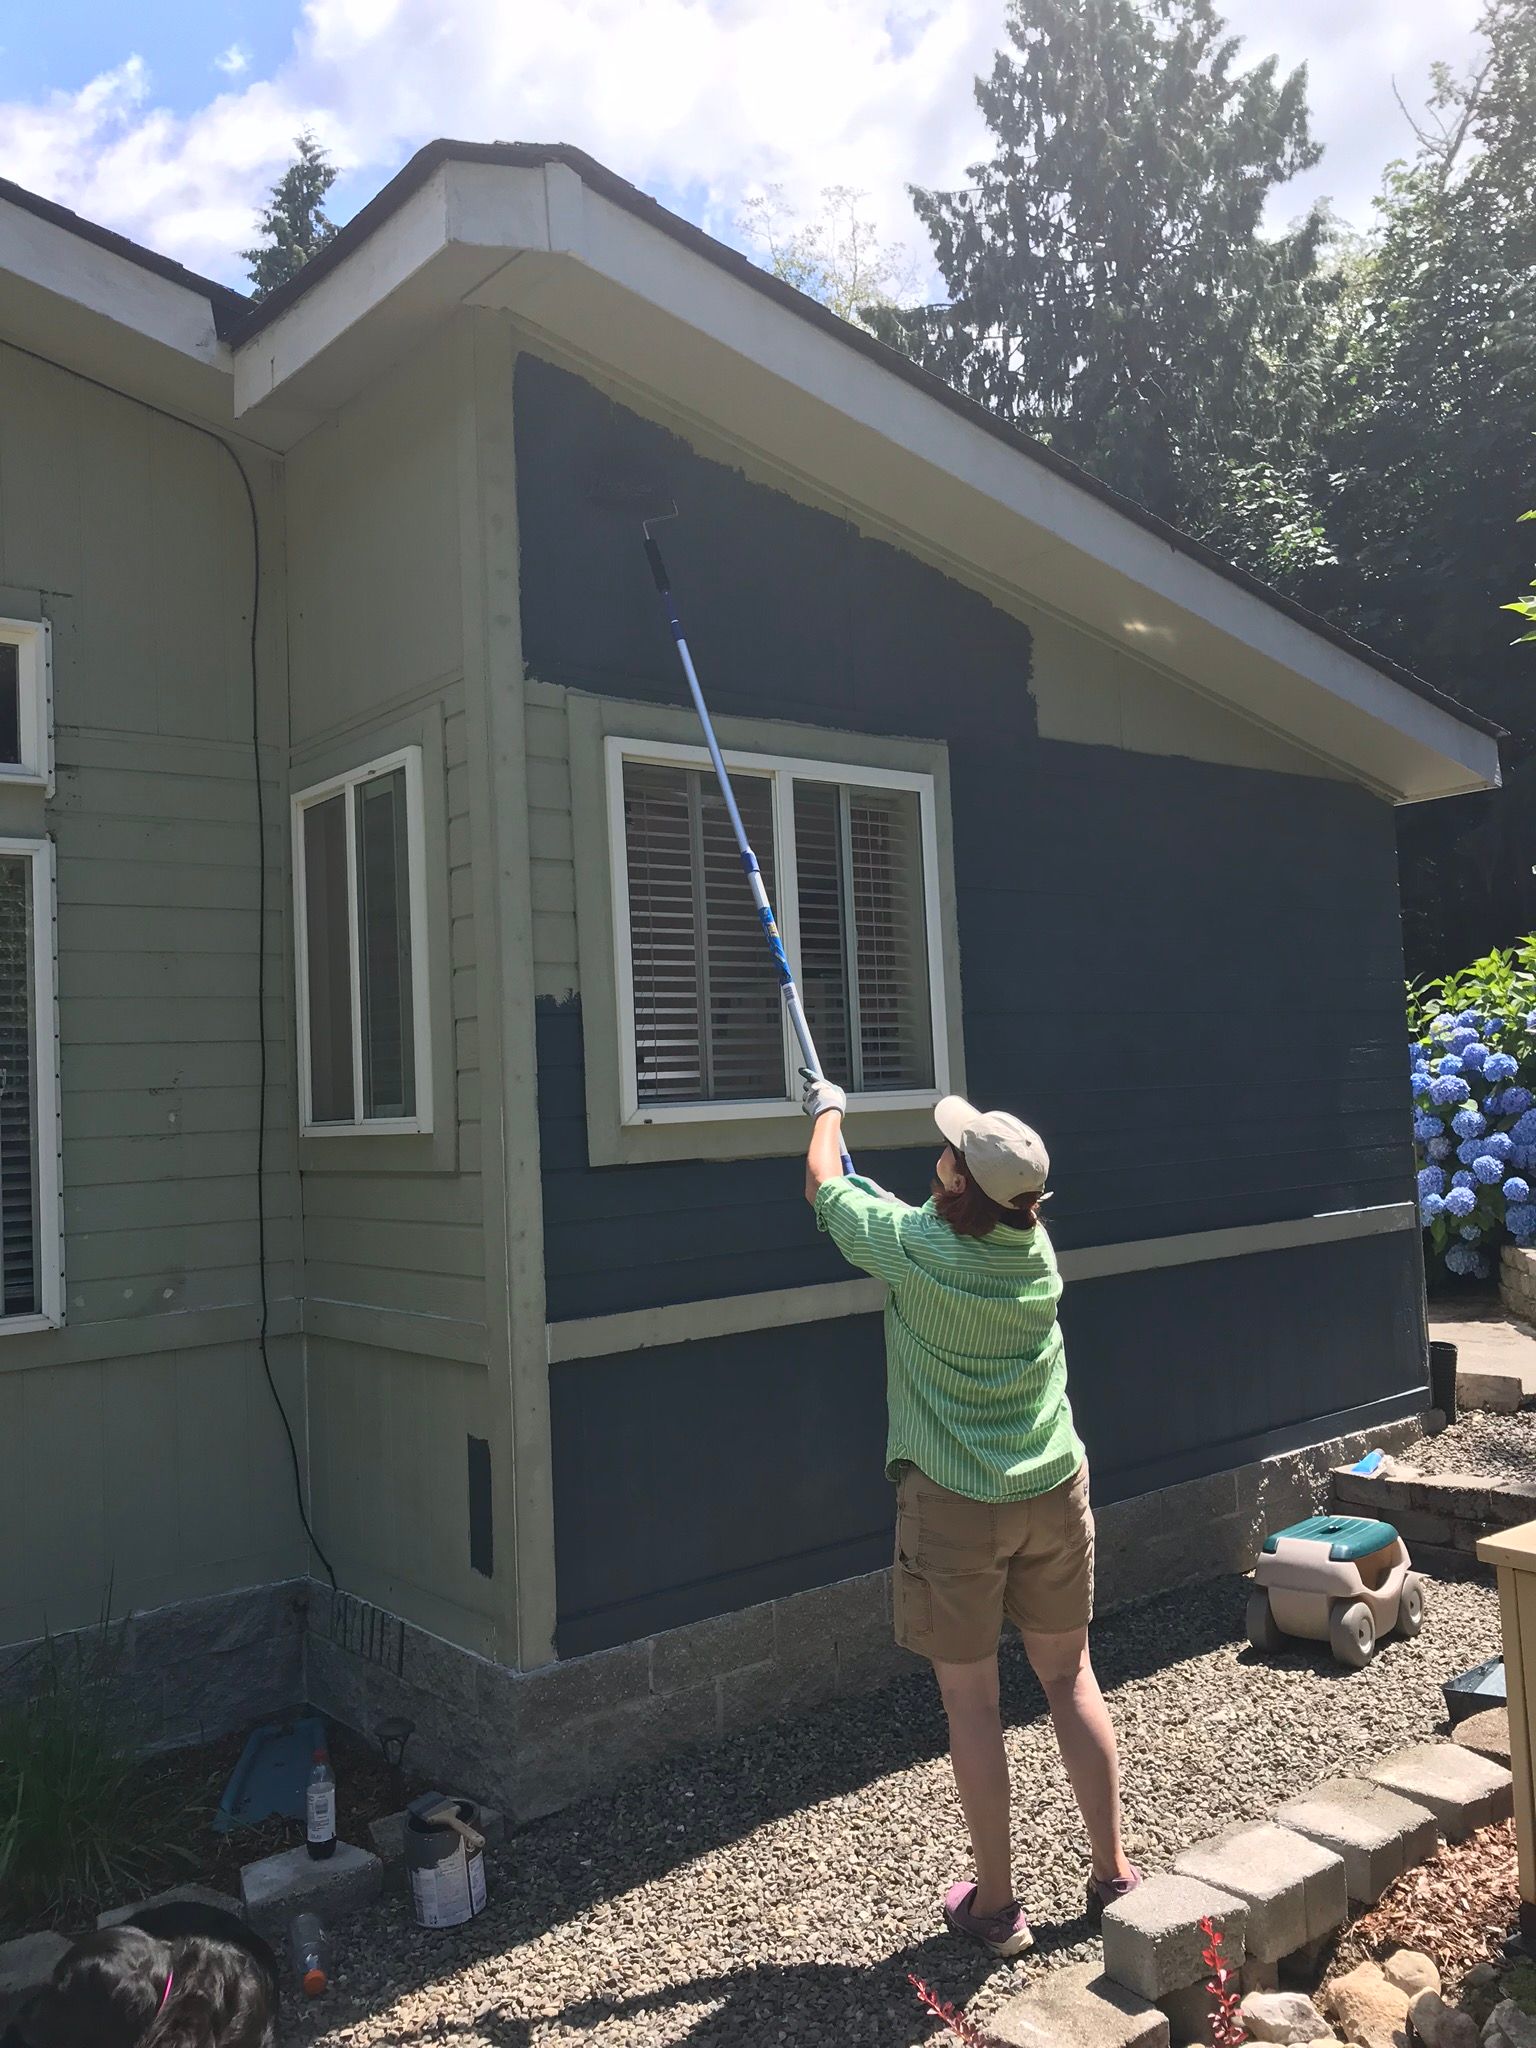
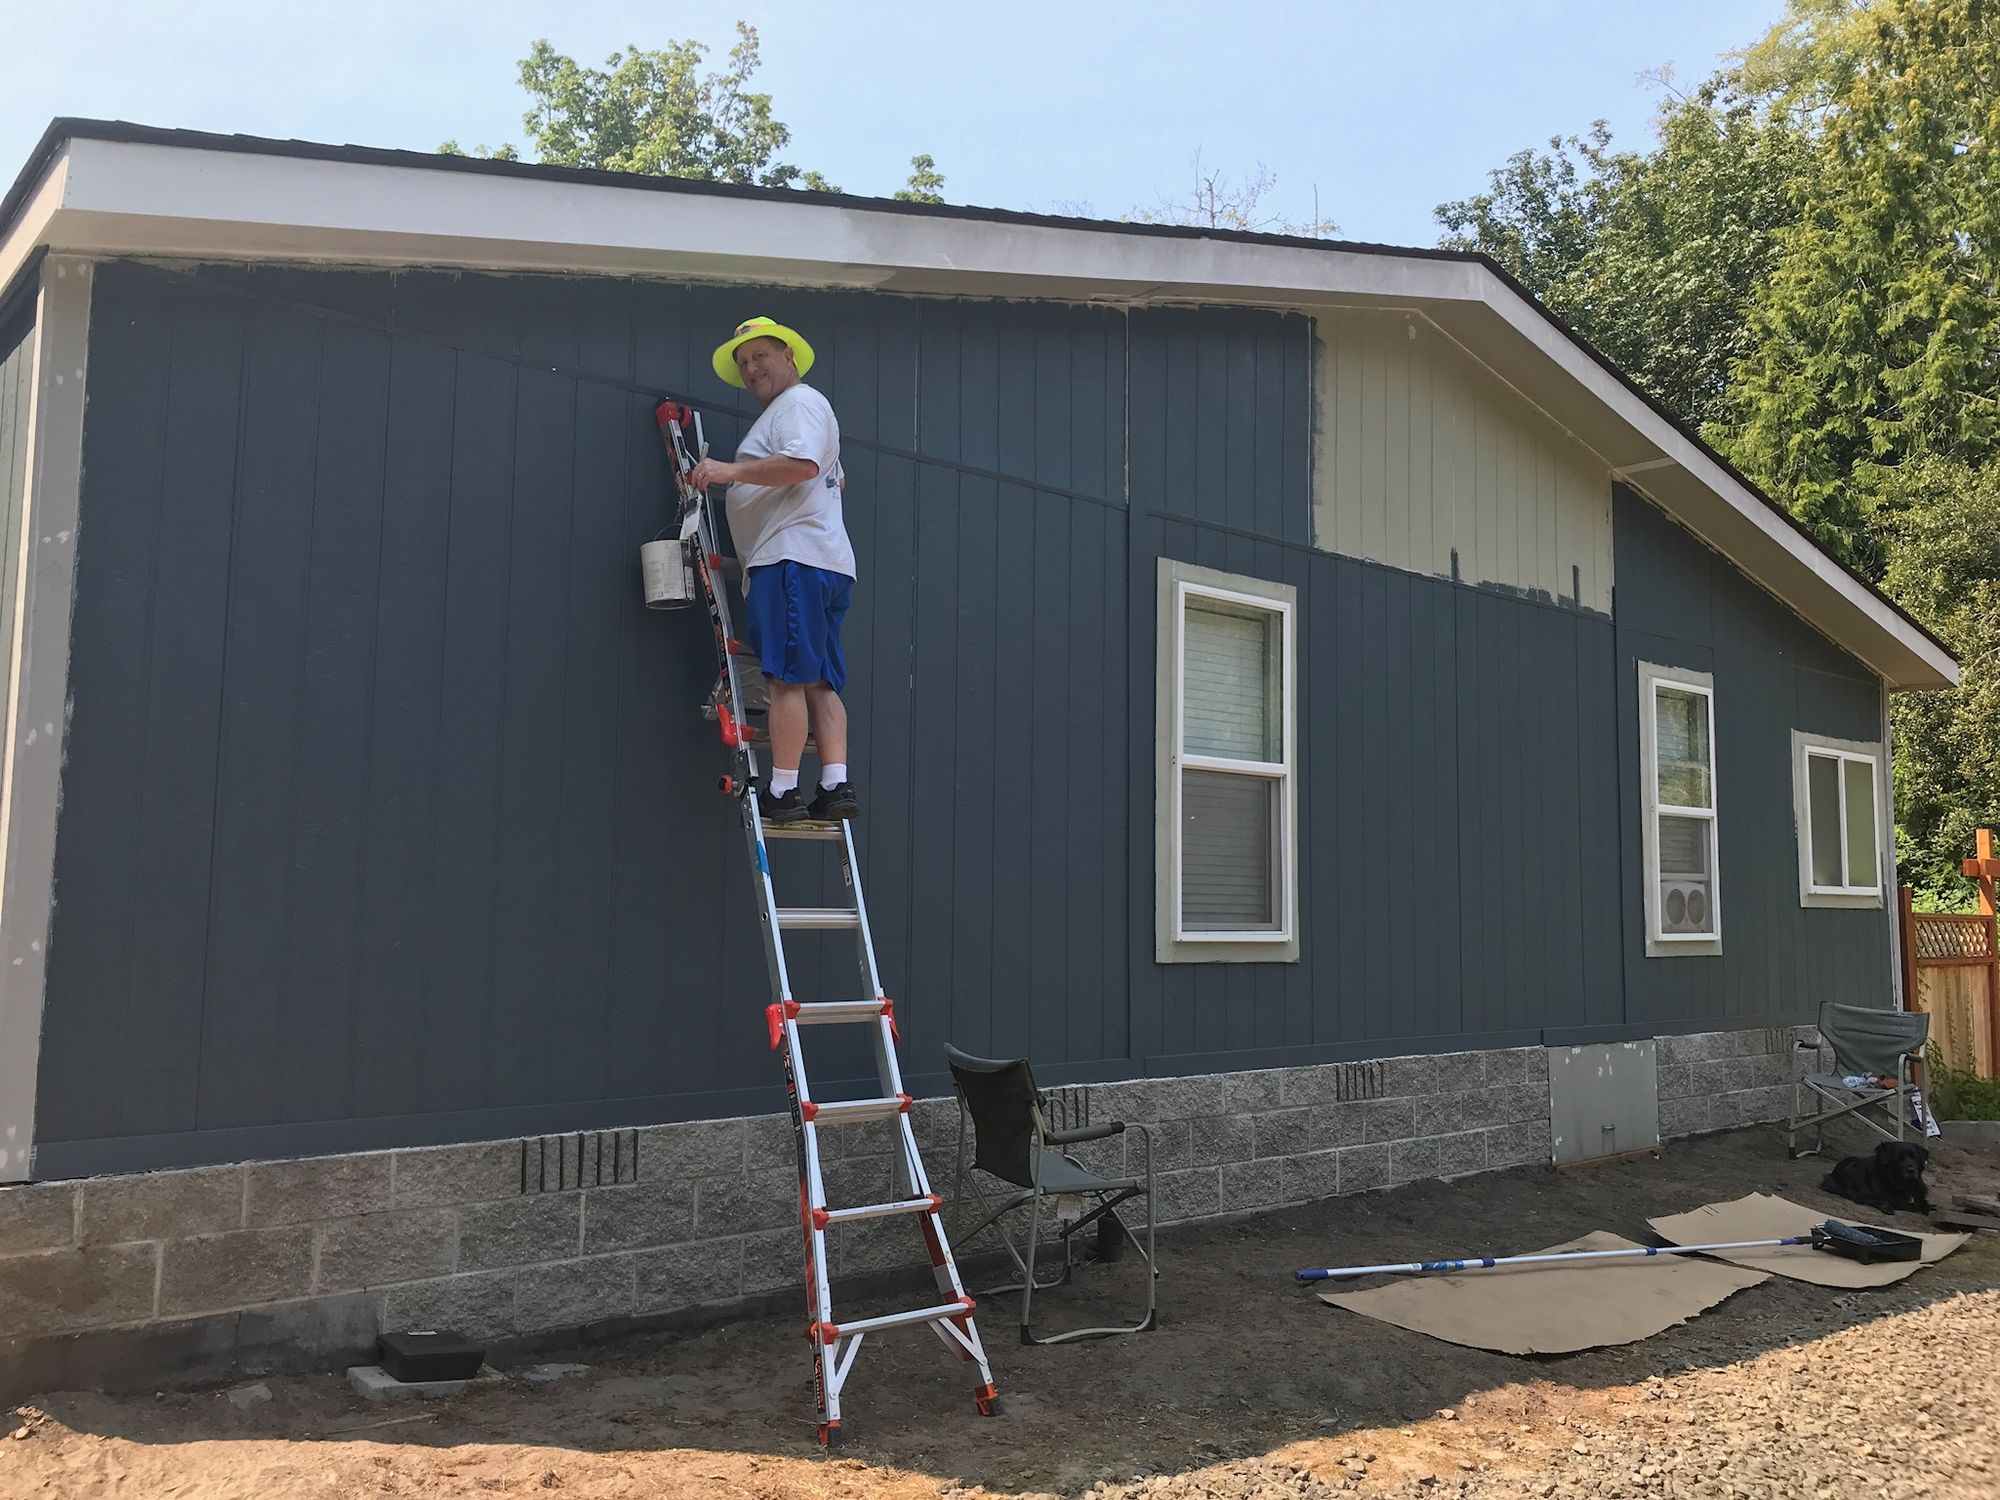
Just like when we paint inside, I was going to be in charge of cut-in and working off the ladder. Rose was going to do the rolling. Using an extension, she was able to get 98% of everything while standing on the ground. She is really good at rolling and fast too. It took me much longer to paint the soffit and fascia and then cut in the gray along the soffit. She had the south and west sides rolled in a matter of a day or a little more.
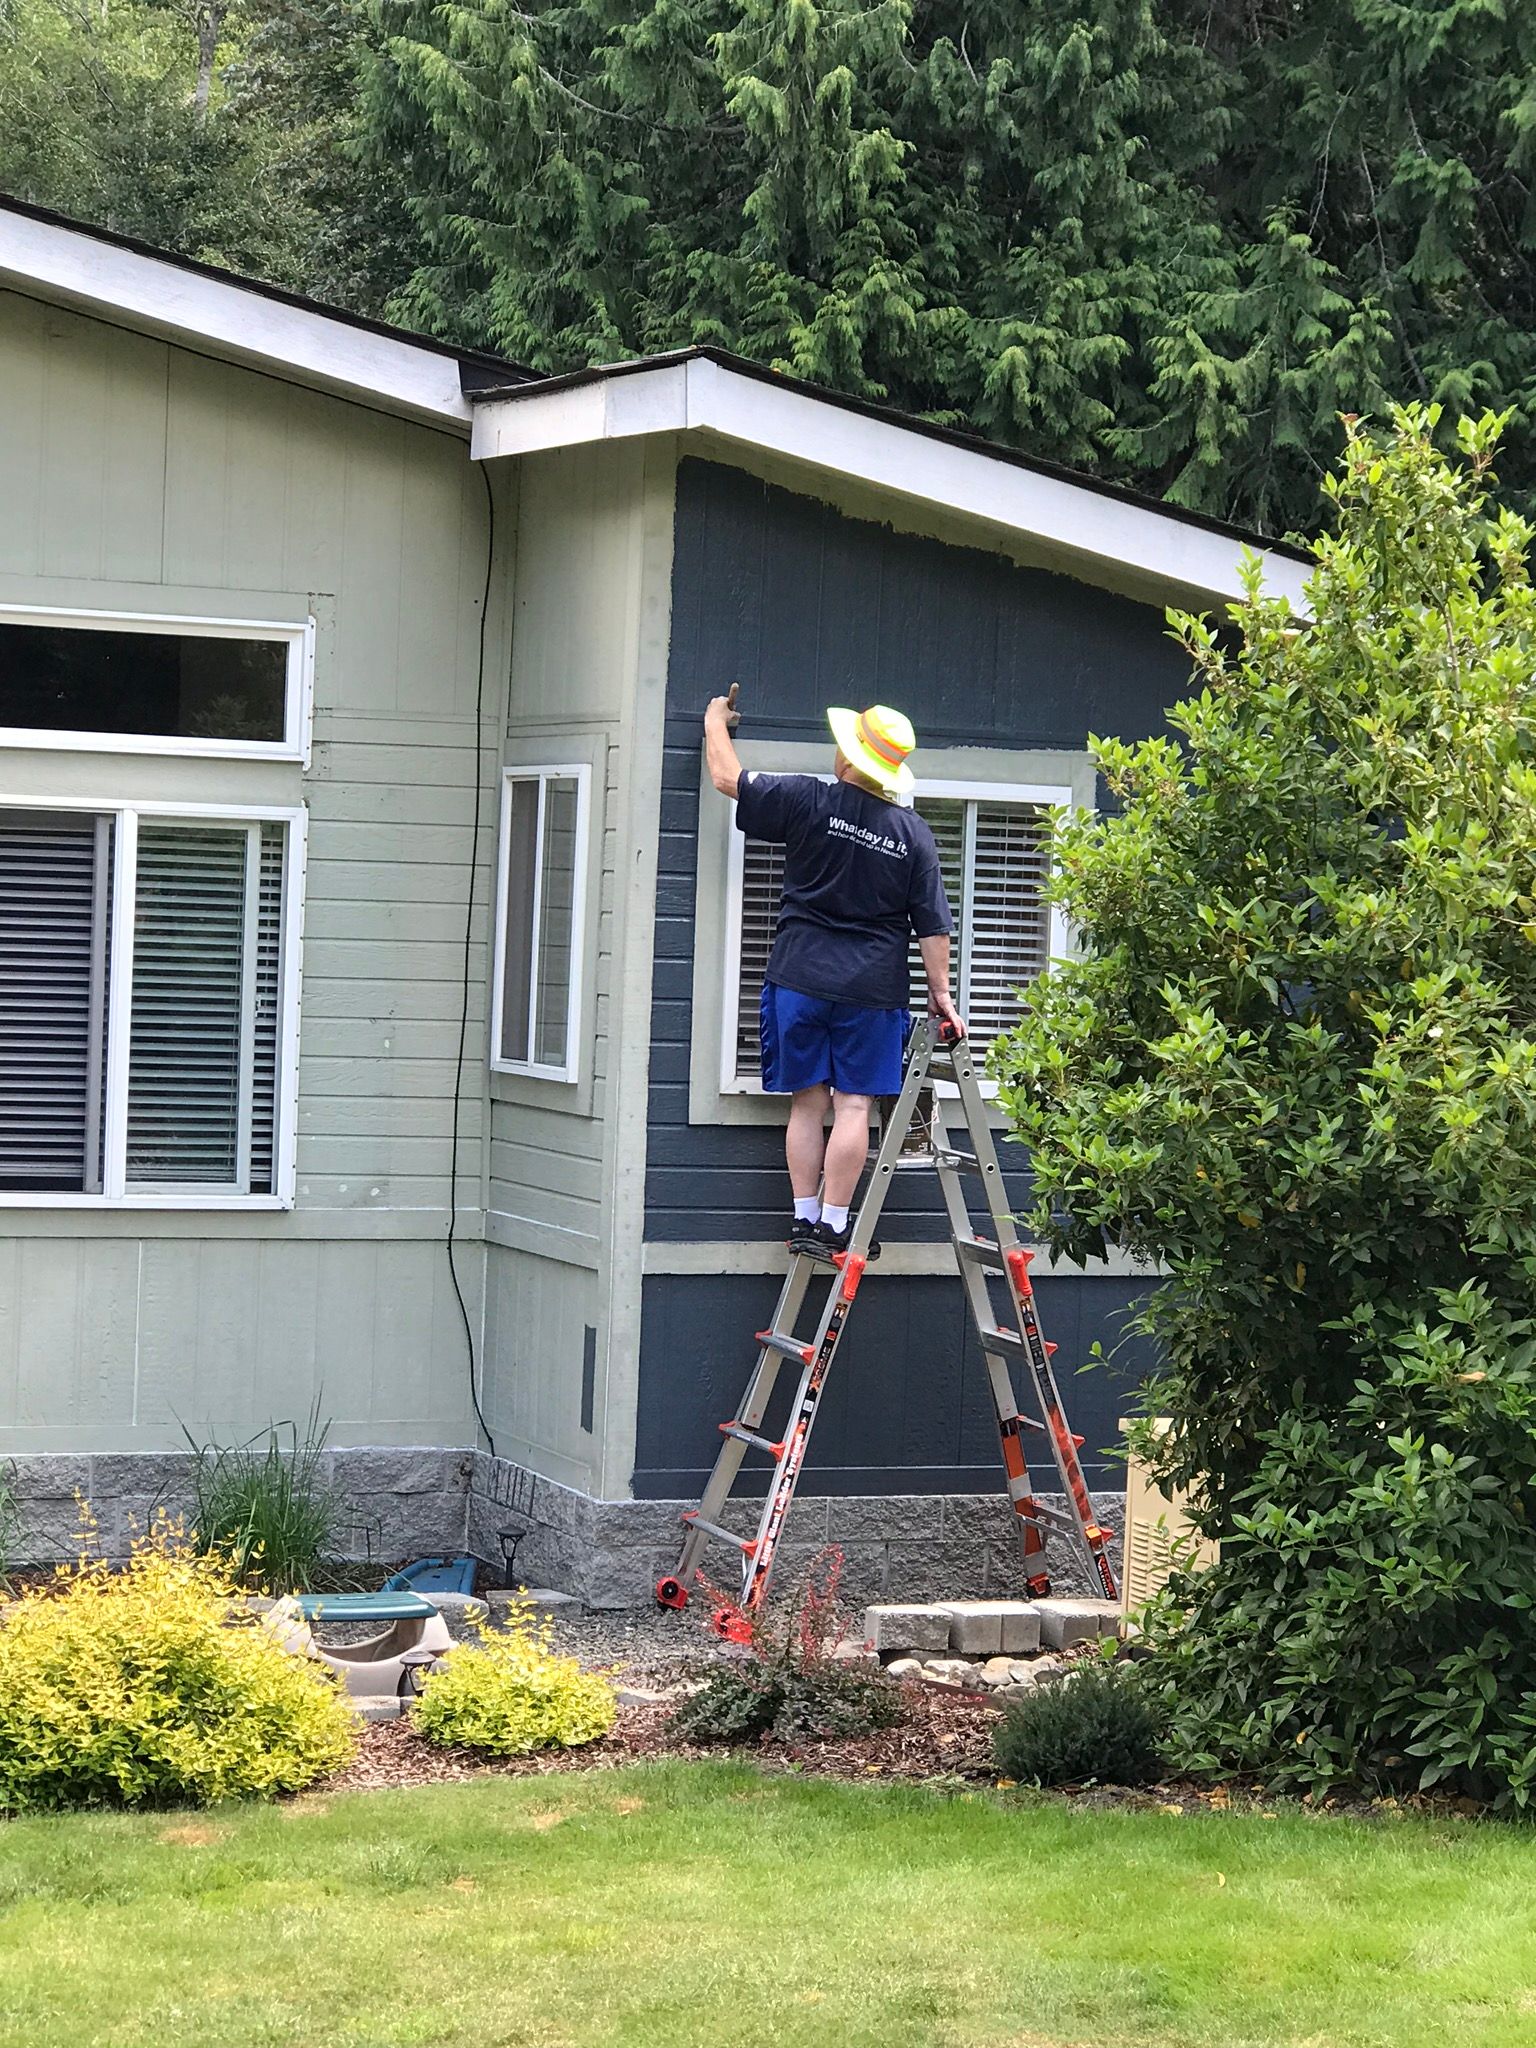
The south side of the house is close to the ground and while I had to use the ladder, I wasn’t very high off of the ground. This changed when I moved to the west side. The west and east sides are the gabled ends and have the highest areas of the roof and associated soffit and fascia. I felt like I was living on that ladder! I would paint on the weekends and for 2-3 hours most evenings after work. The nice thing about living so far north is that during the summer, it doesn’t get dark until after 9:00 pm.
On the west side, we painted the siding in the porch area and had to paint the ceiling white which required two coats before it looked acceptable. Rose did a great job rolling it, and I would later do the cut-in with the gray walls. I could do all of this work from a step ladder and since it was enclosed, the weather wasn’t a factor. We then removed the hand railings around the porch and pressure washed them.
Before any painting could take place, I had to apply caulking in all the cracks and crevices. Doing what I could reach from the ground was the easy part, but there was a lot of work that required a ladder. The soffit and fascia had gaps almost throughout and had to be caulked. I even had to use expanding spray foam in a half-dozen locations for the larger gaps. Overall, the caulking around all the windows was still in great condition and pliable, but some did require new caulking. Getting that old caulking off was a pain until I thought of a better way: using a cordless oscillating tool made by Dewalt. I bought a scraping blade and together this removed the old caulk like a hot knife through butter.
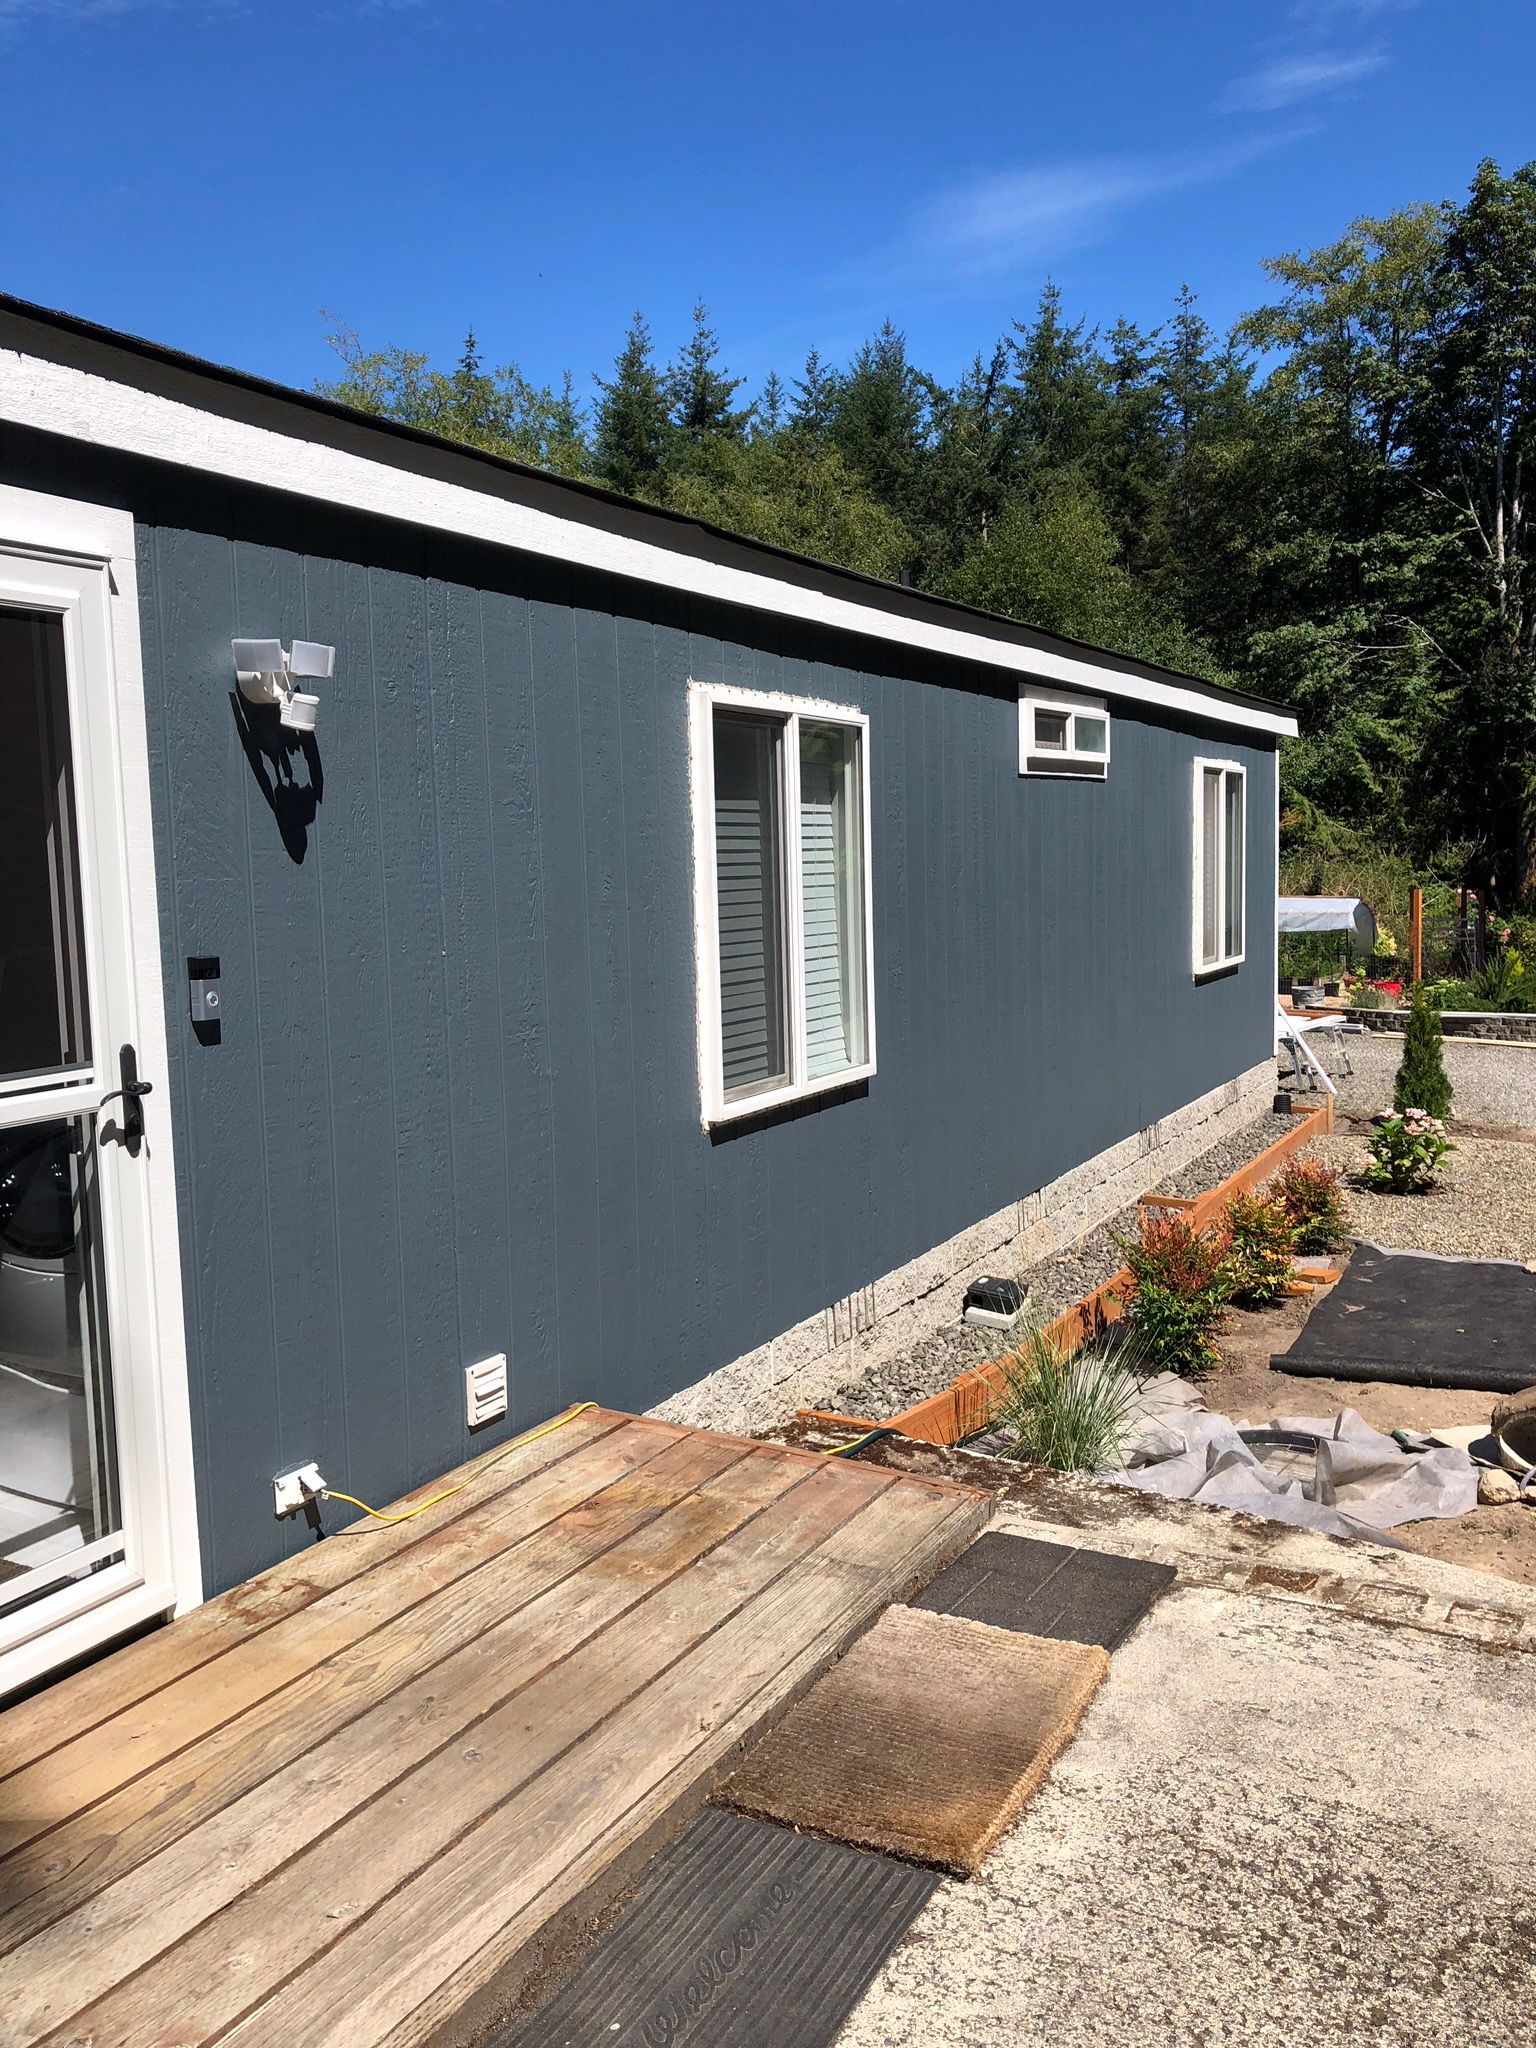
We got out the pressure washer again, this time cleaning the north and east sides of the house. We then moved to the north side. I knew from removing the gutters that one piece of fascia was rotted and would have to be replaced. What I didn’t plan on was the other rot in the actual siding that was found.
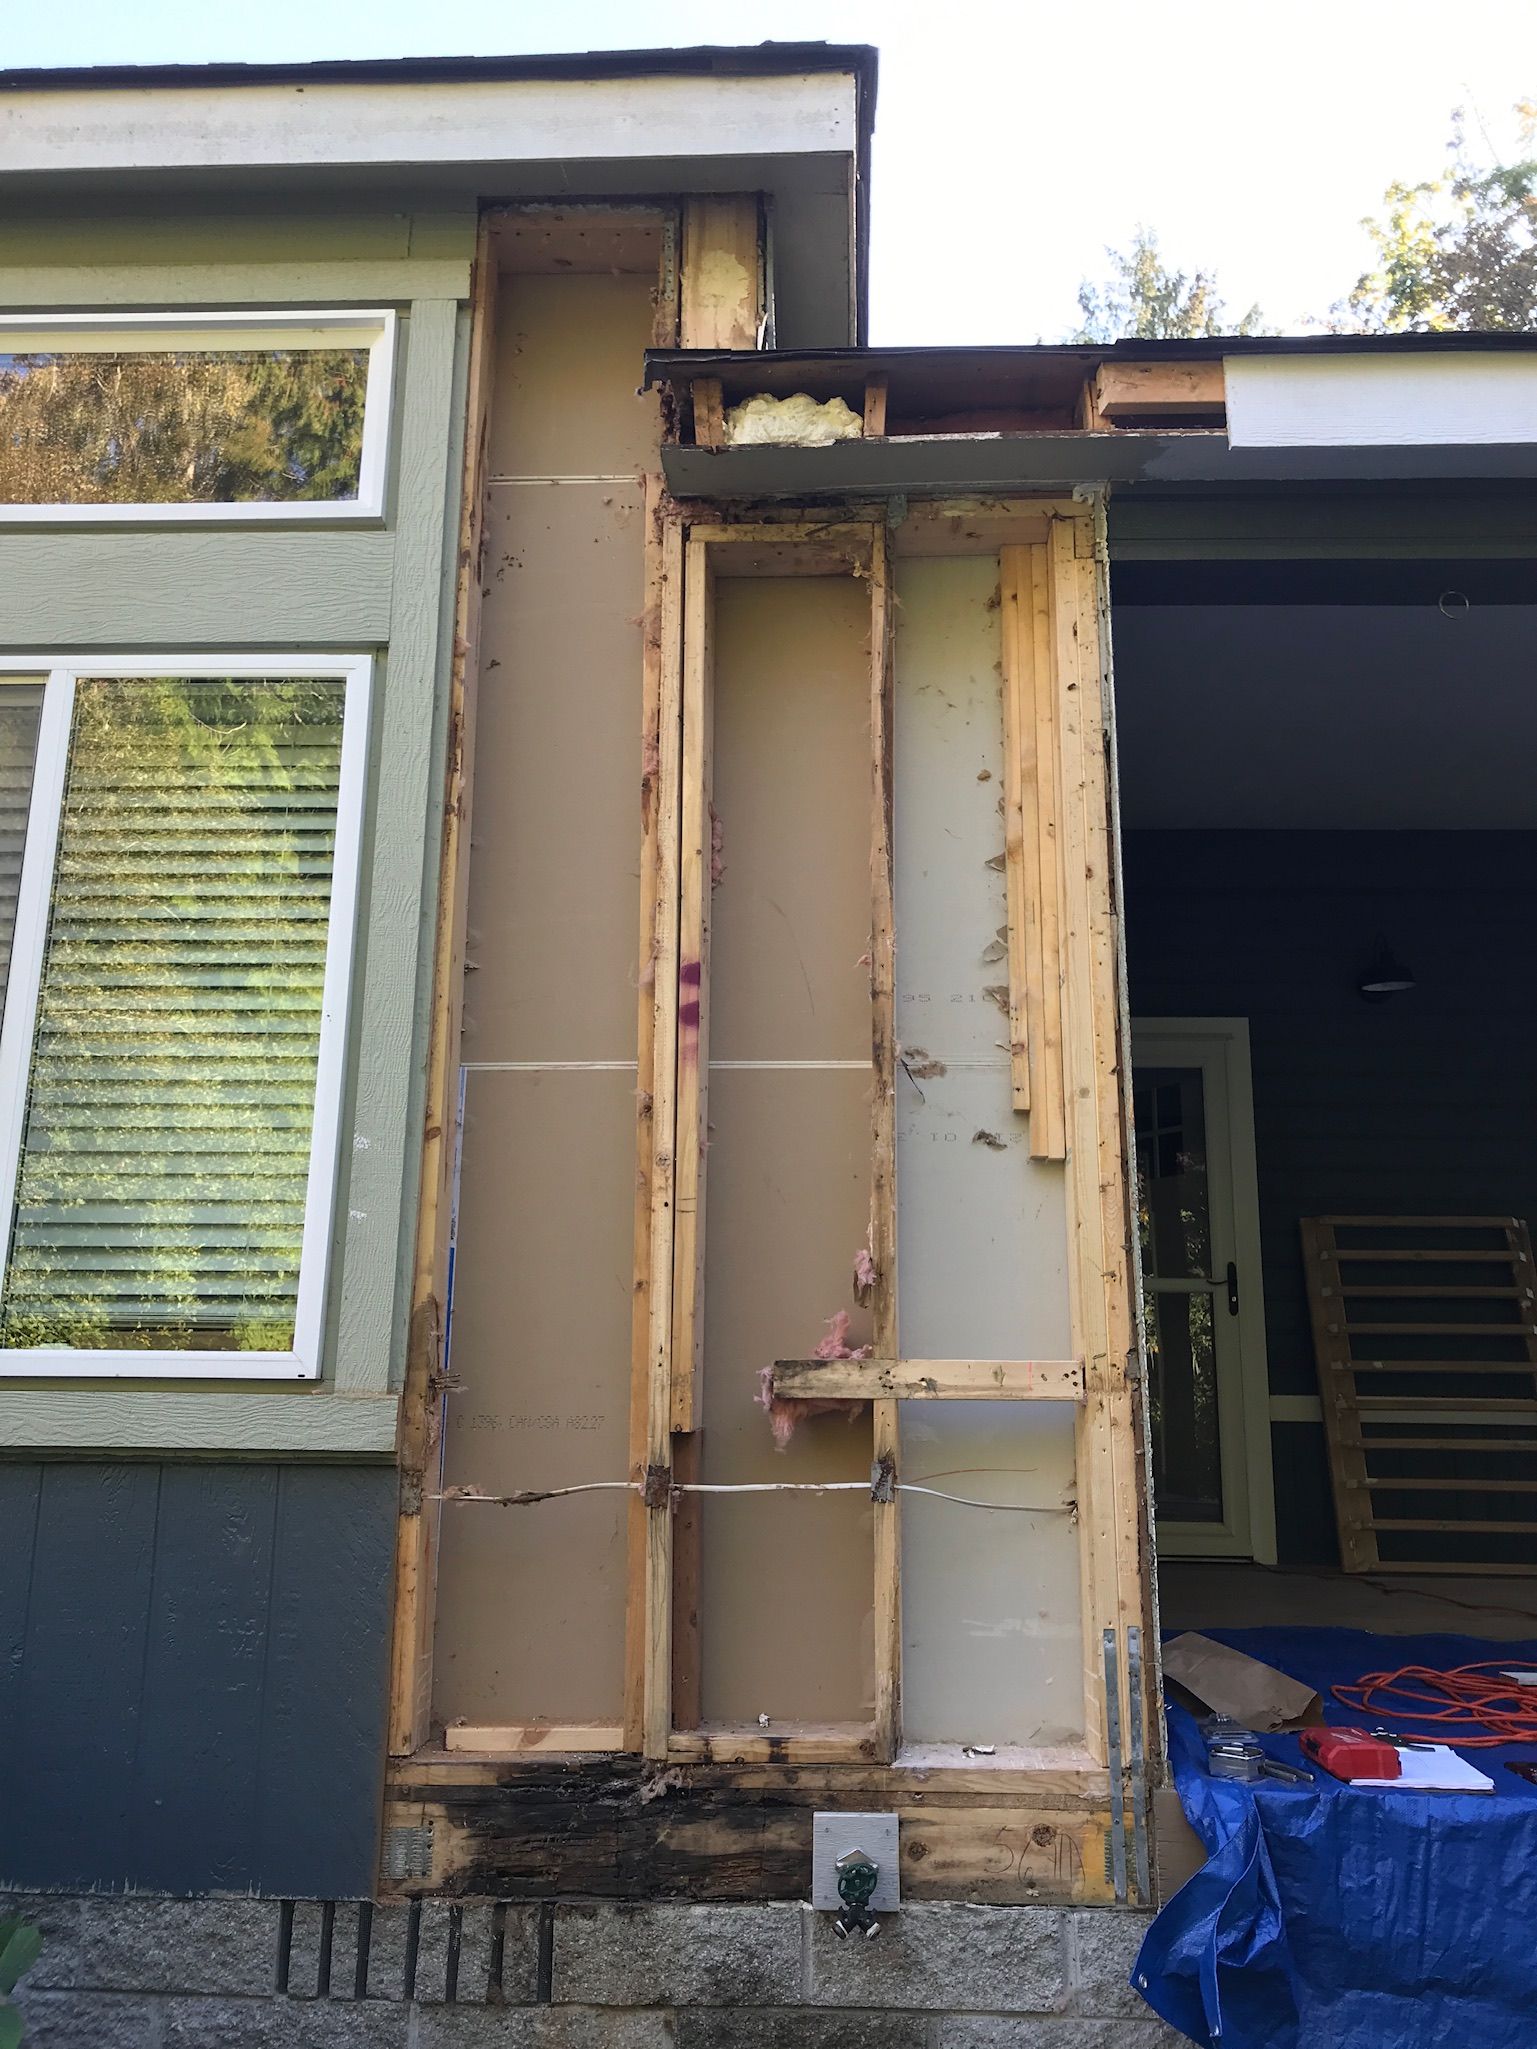
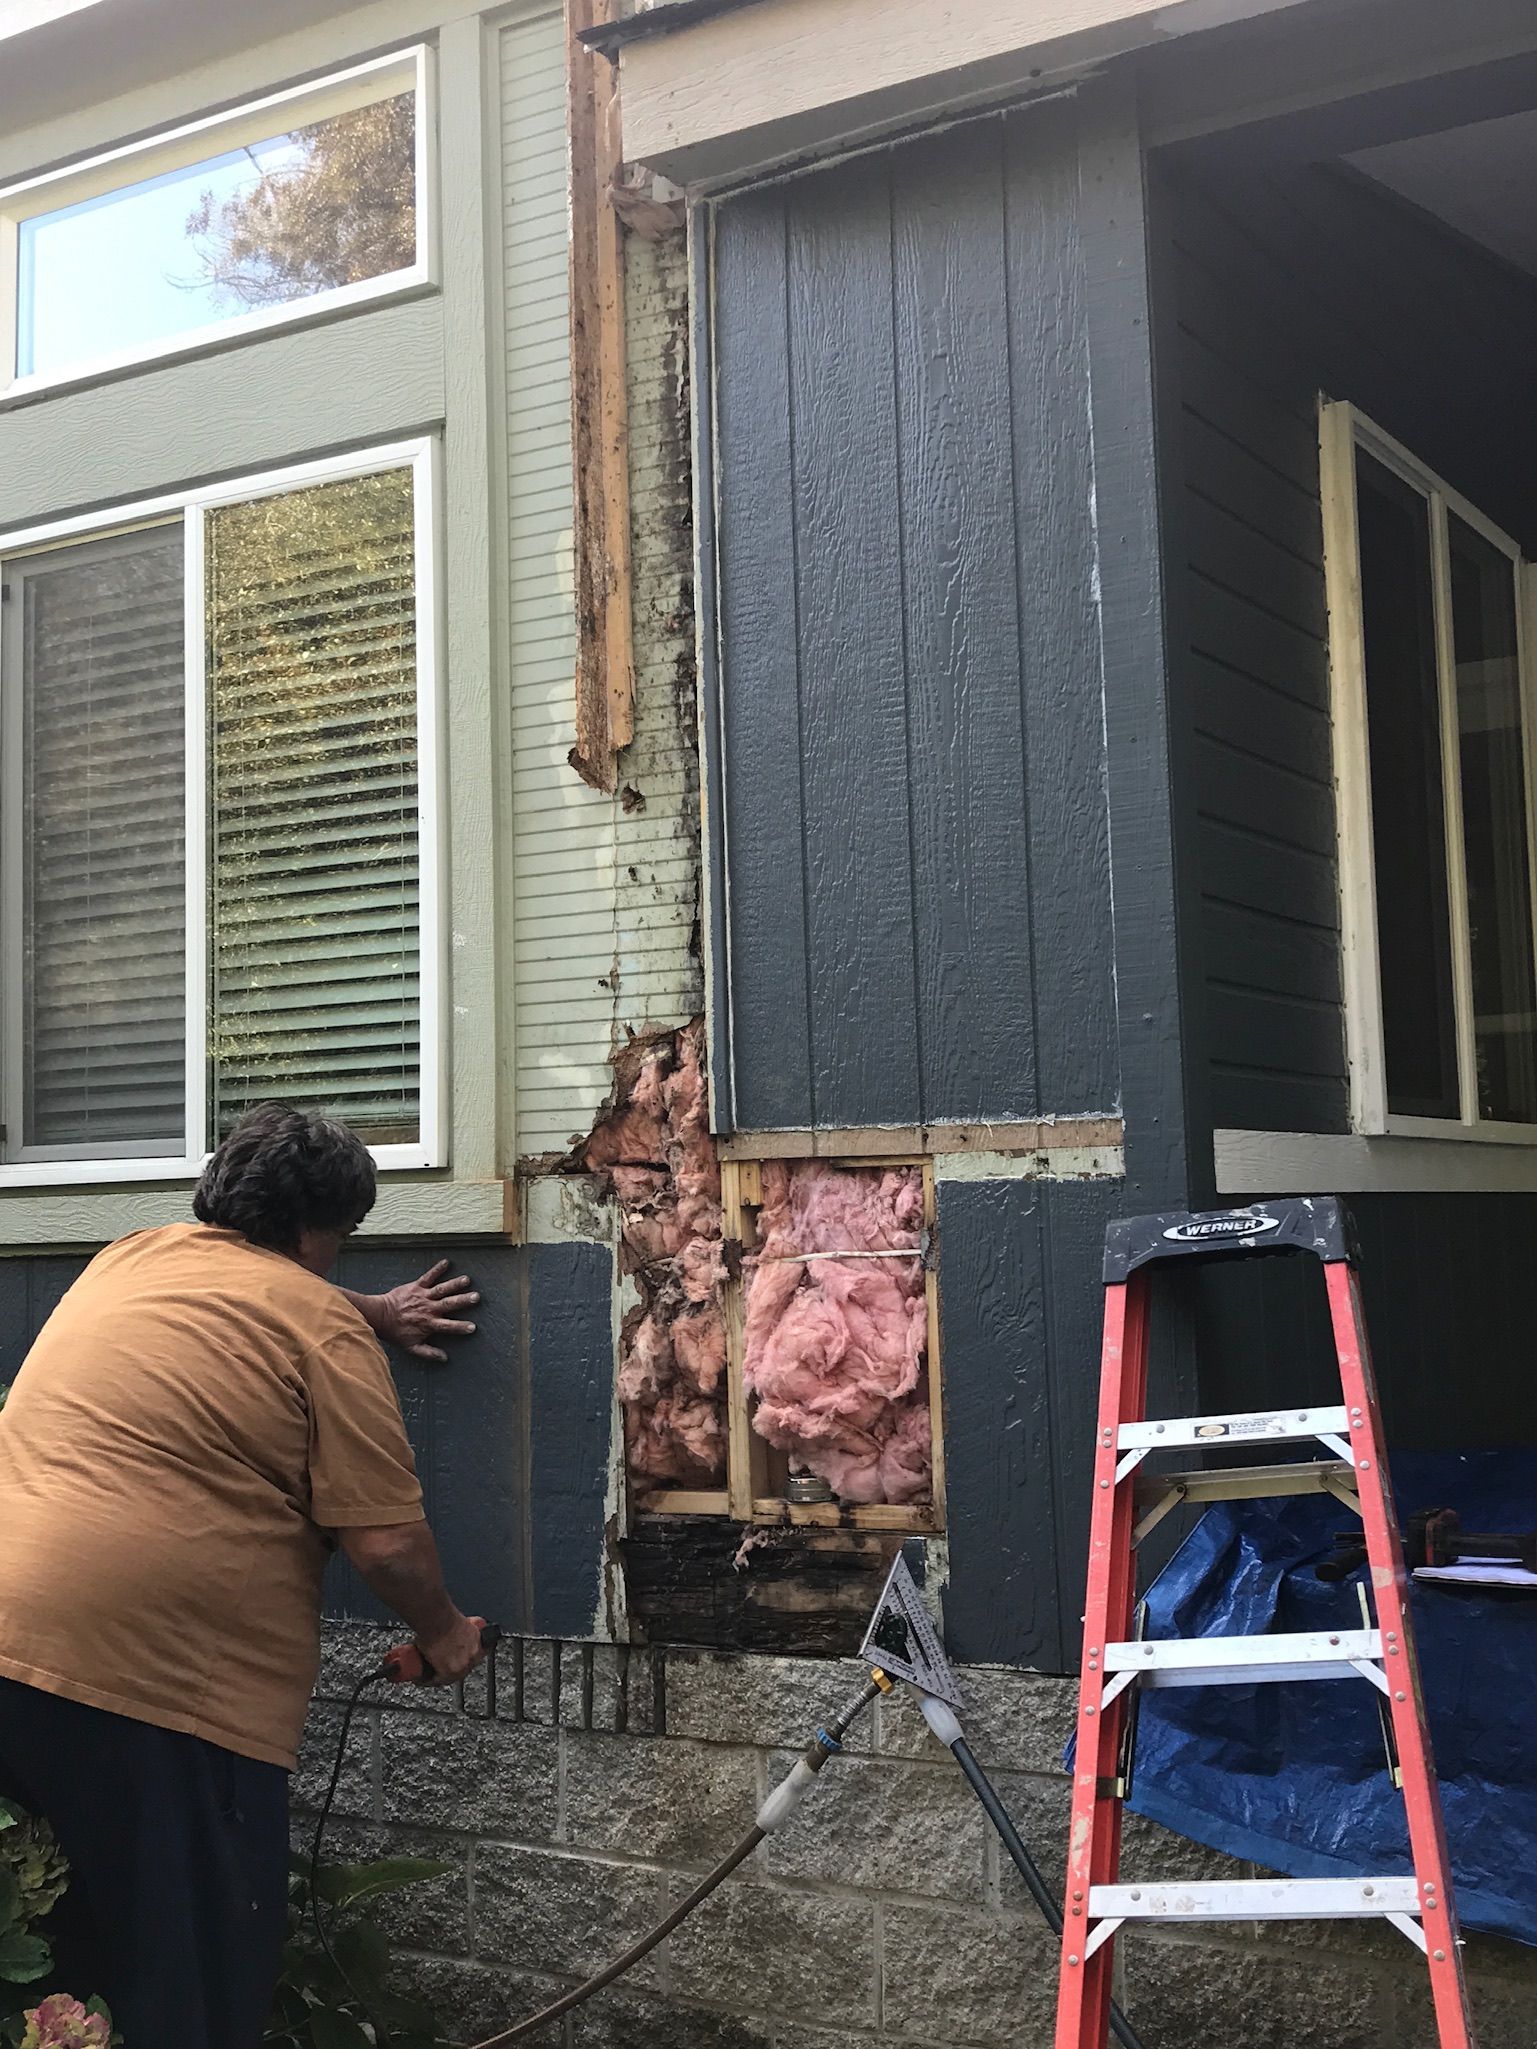
We called the insurance company and an adjuster showed up within a few days. Ultimately, the damage was not covered by the Homeowner’s Policy since it was not caused by a single event, like a hailstorm, a fire, wind, etc. It was caused over multiple years. I called in a guy who people I know at work have used at their homes. He came by, got an estimate and agreed on him doing the work, but then he disappeared! He never called me back, so we had to change to another contractor. It took over a month or so before we got a contractor hired and it would be another 4-6 weeks until it was all repaired. We were beginning to think it may not happen before the weather changed and the rain started.
We did what we could on the north side, staying clear of the areas where there was damage, but painted what we could.

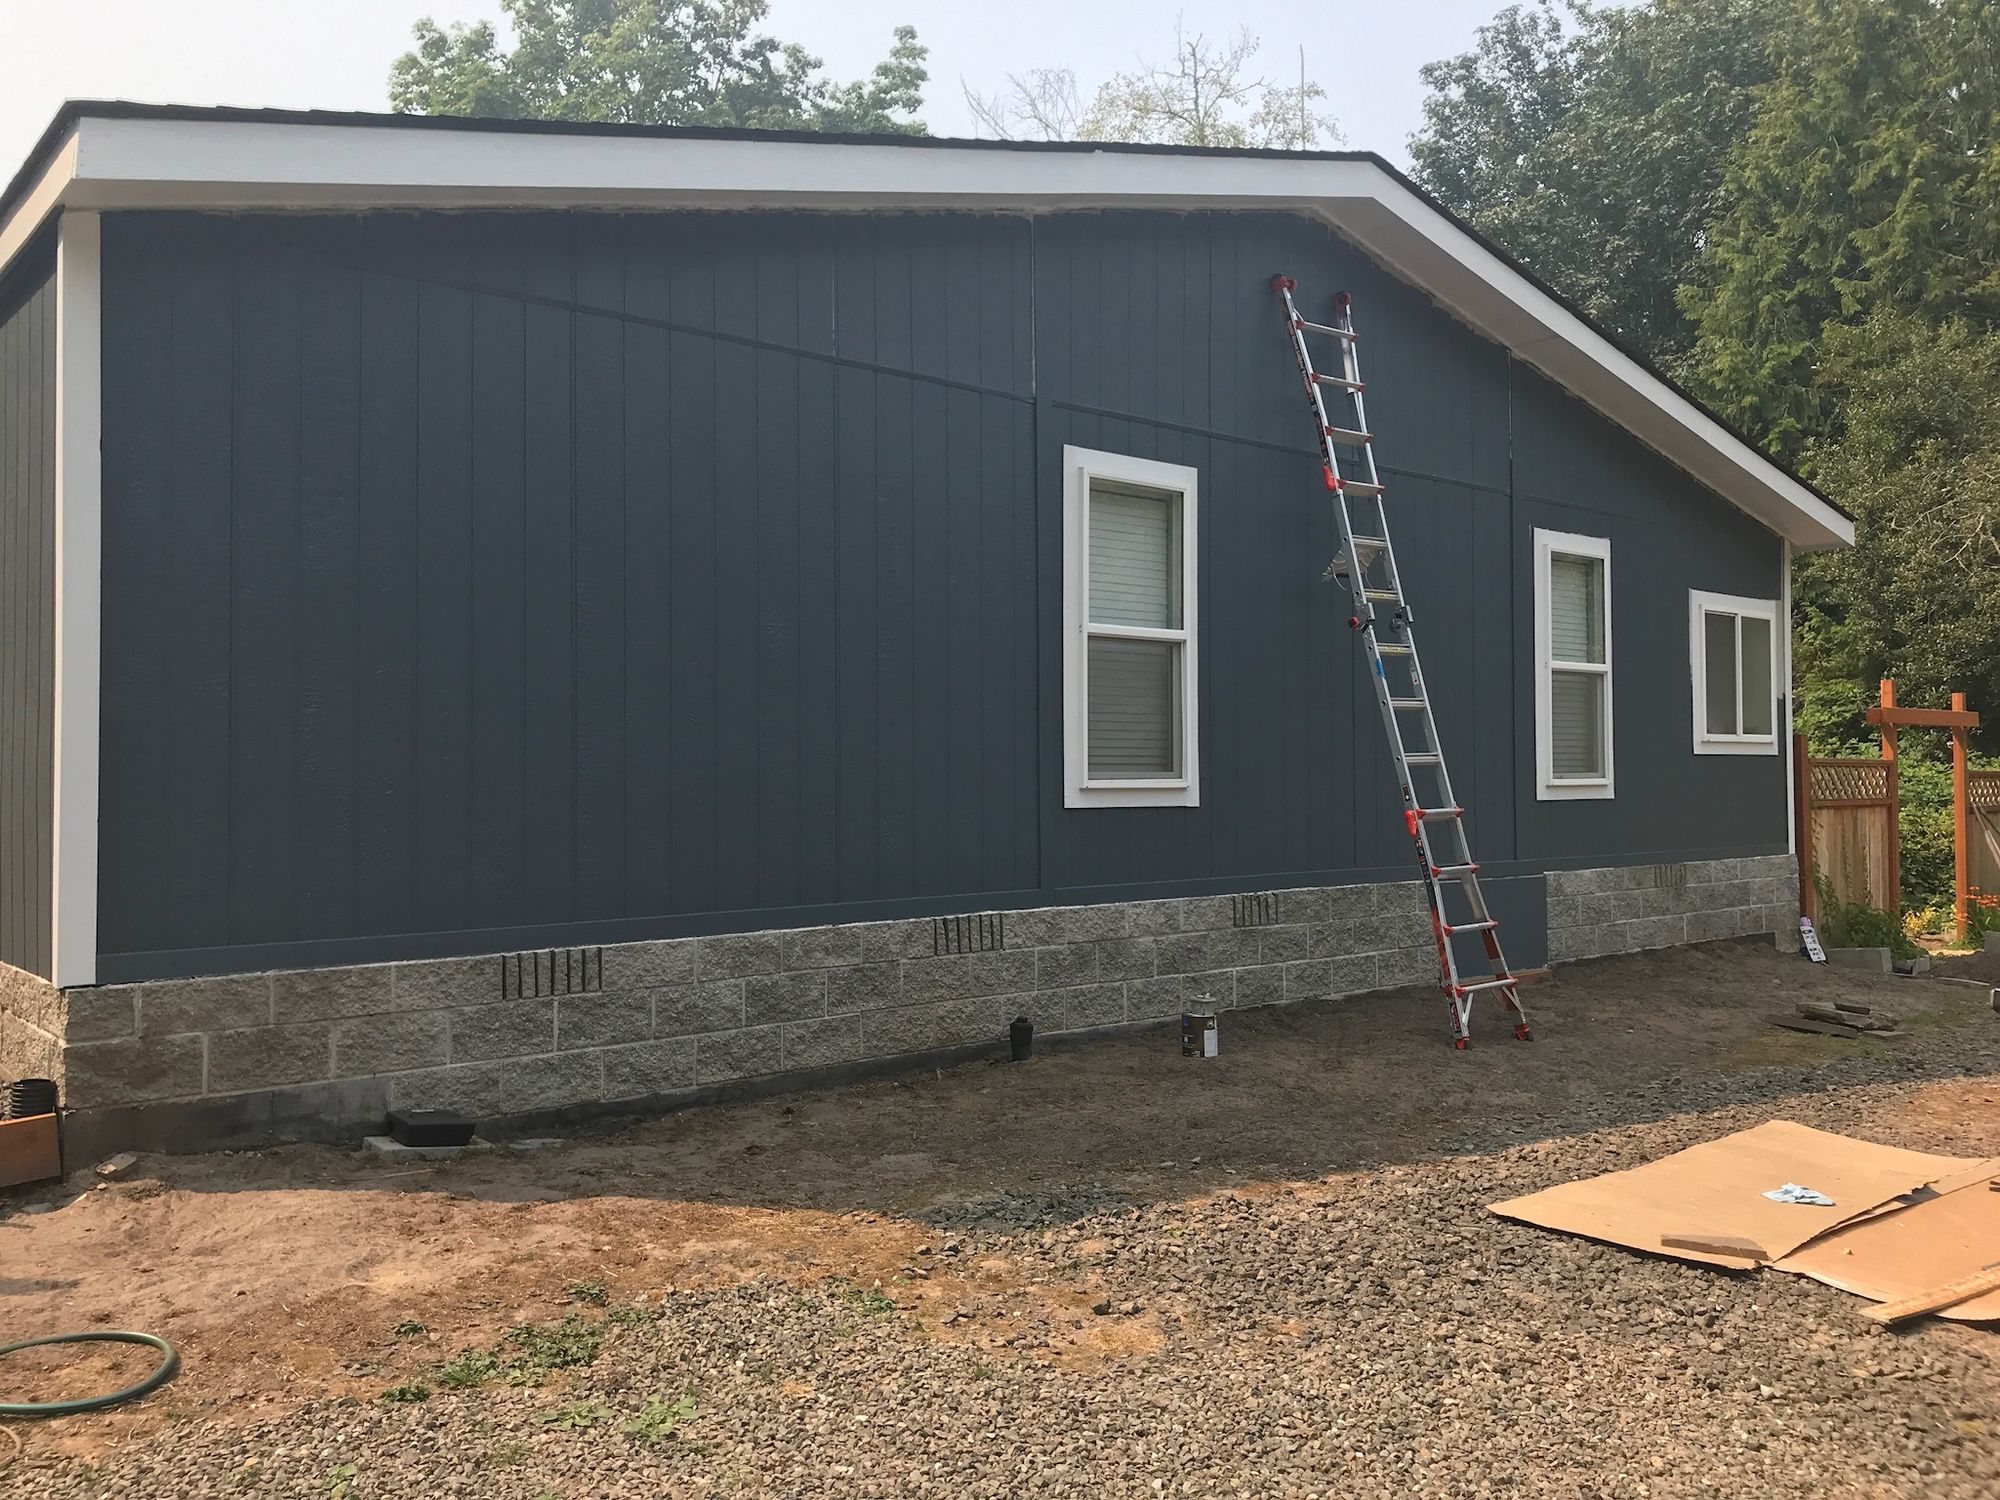
We then moved on to the last side, the east side which is a gabled end and higher. We had a few stumps from bushes that needed to be removed. And there were a couple of shrubs that Rose wanted to relocate. I brought the little backhoe in to do the work. The old stump came out without a problem—much easier than if I had used a shovel. When relocating the shrubs I cut and pulled up some 6” drainage line from the downspout! There are downspouts on the northeast and southeast corners of the house. I was digging near the northeast but that line went underground to the north. I had assumed that the southeast line went to the south or east, but it didn’t. It went to the north along the foundation of the house right where I was digging. It was an easy repair that we made the next weekend, splicing in about five feet of new line and covering it. I brought in more clean fill dirt that we used to build up the east side which was very low. We raked it out and sloped it away from the house.
Rose “+went to town” with the roller on the east side, finishing most of it in a day. Unfortunately, she tried to move a heavy plant by herself and twisted her back. She was in bad pain and had to make more than a few trips to the chiropractor for relief. Being one that has a high tolerance for pain, she had finished rolling that entire side within a week. This allowed me to get all the caulking done ahead of her rolling. I got much of the soffit and fascia done on this side during the weekend and finished it up in the evenings after work. I also did the cut in of the siding to the soffit in the evenings after work.
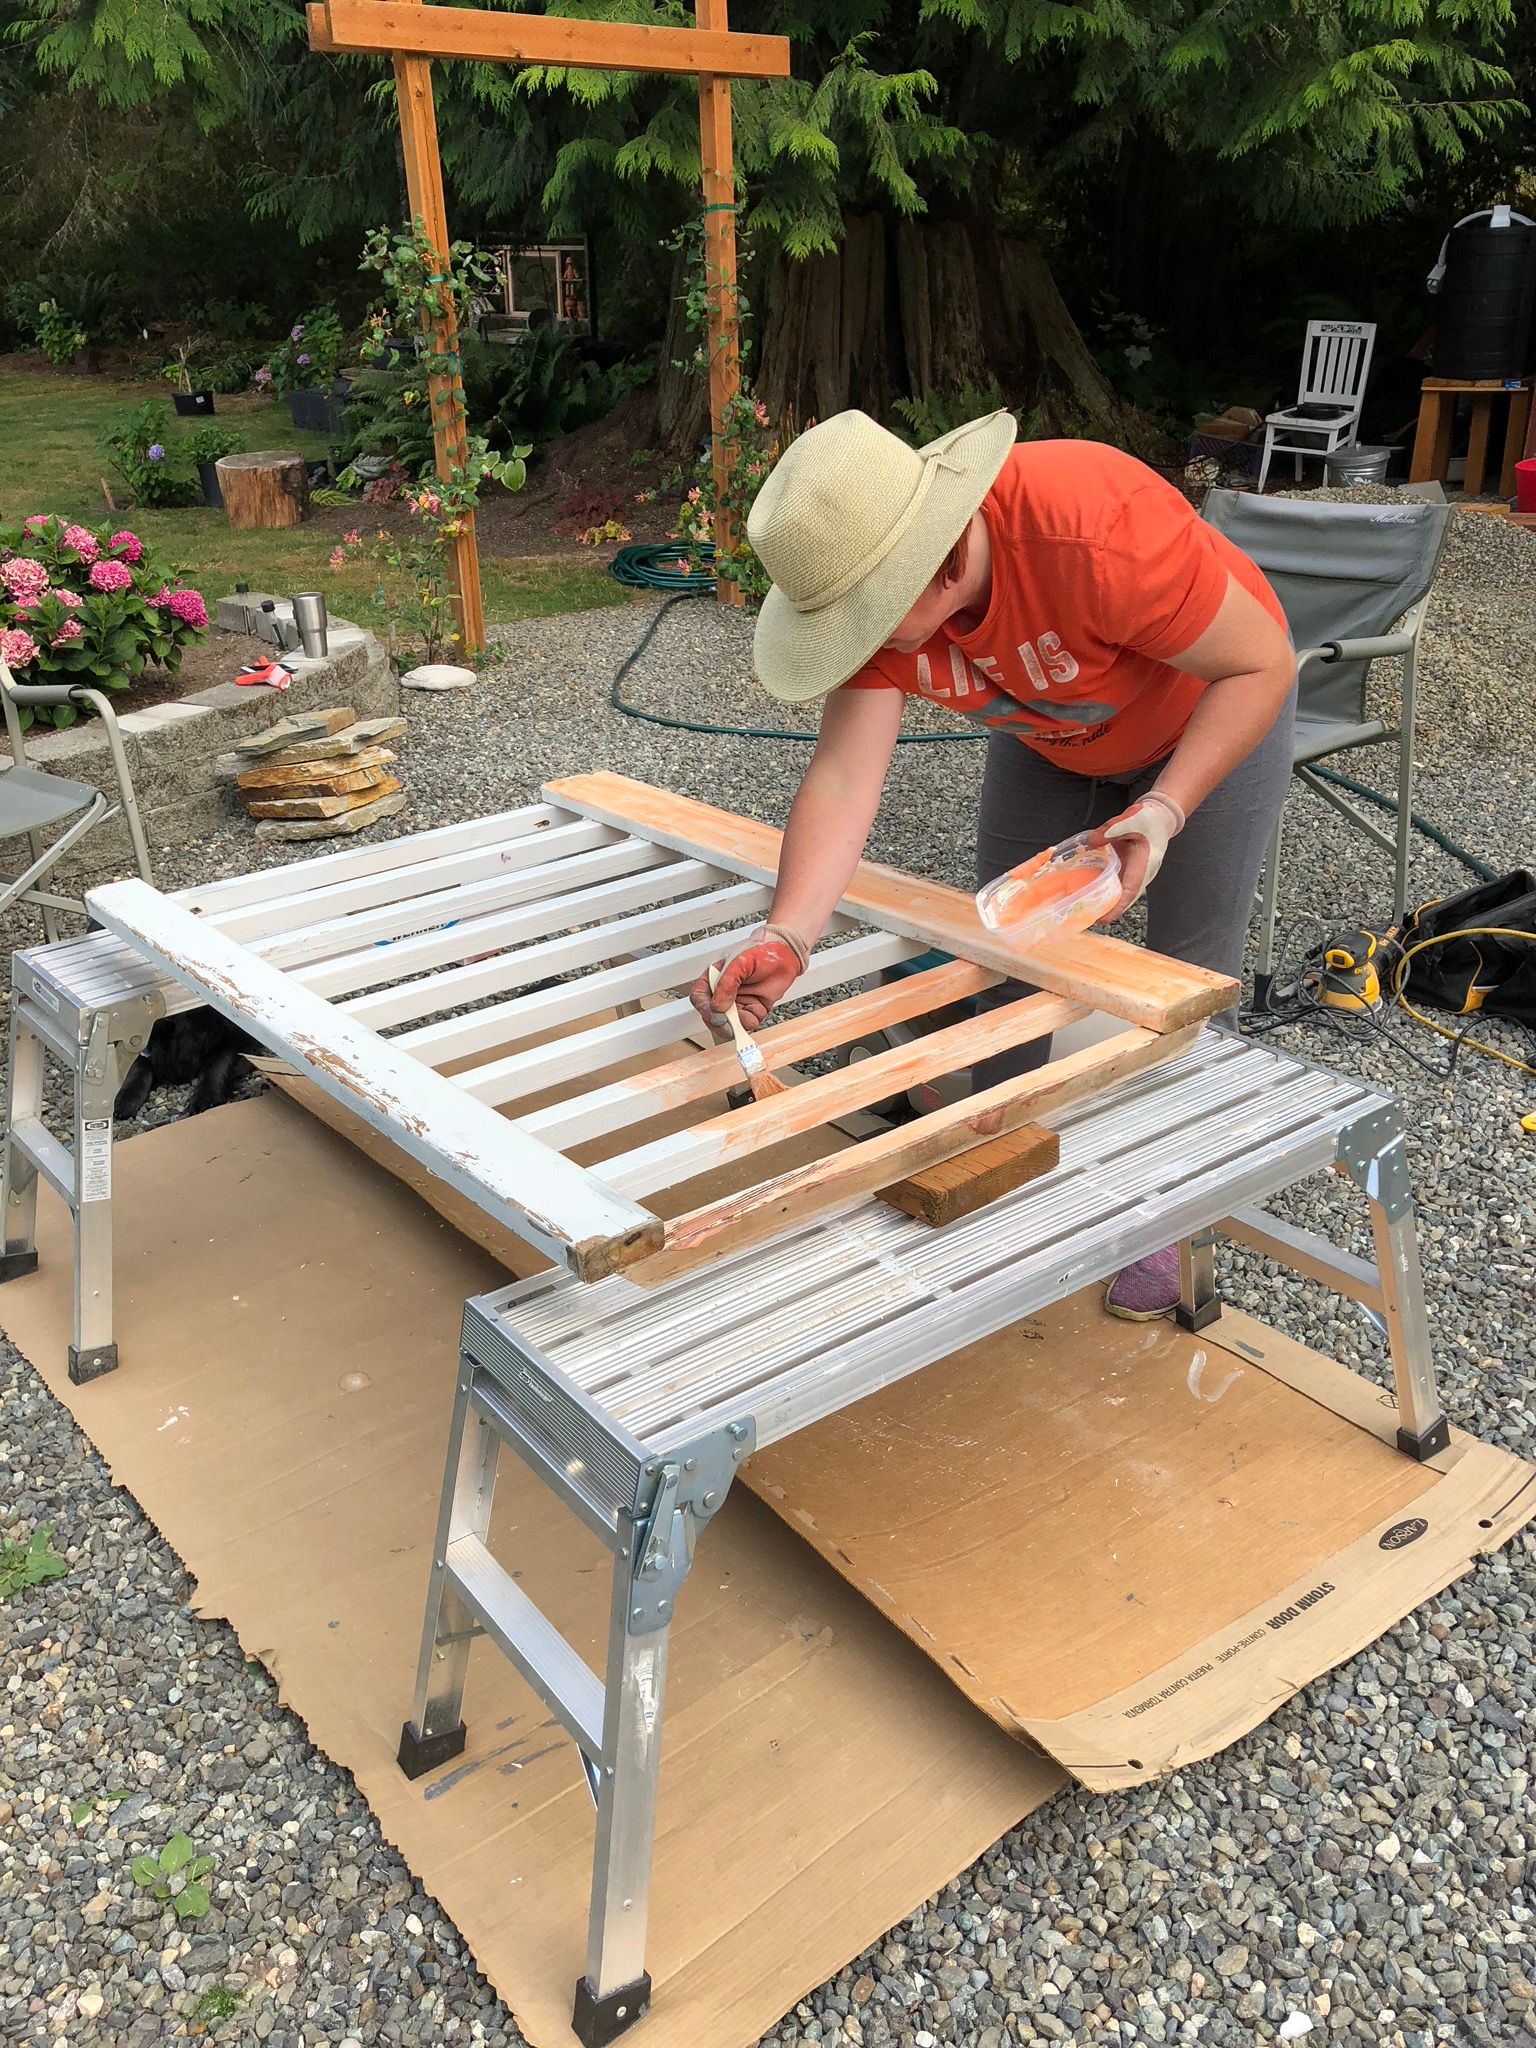
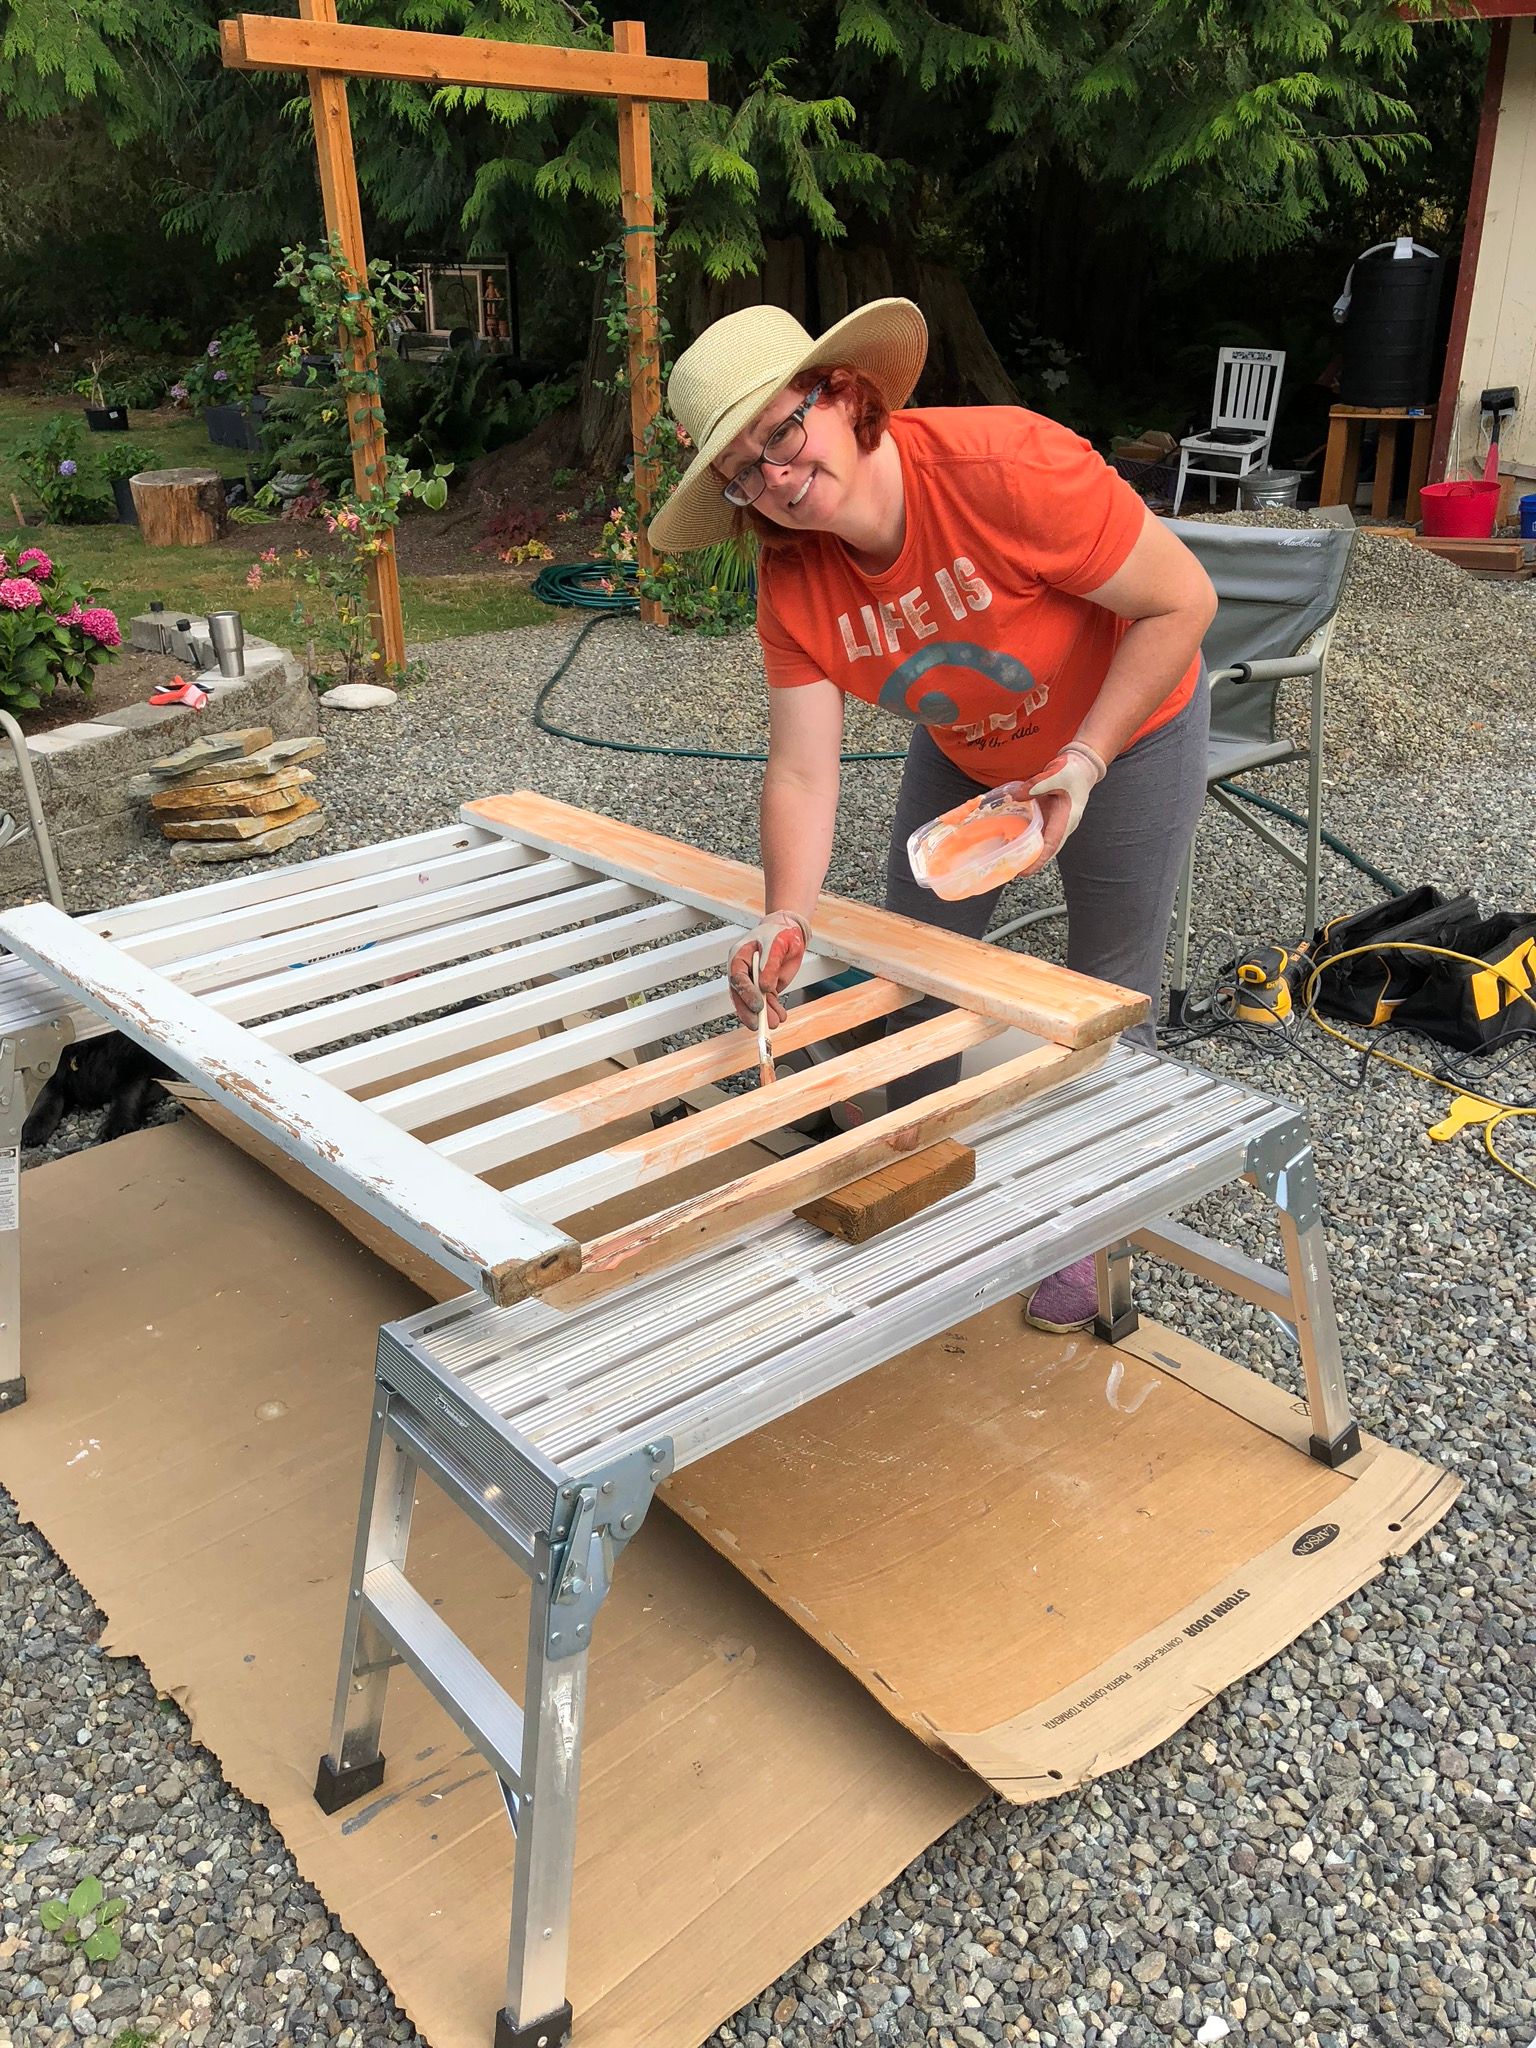
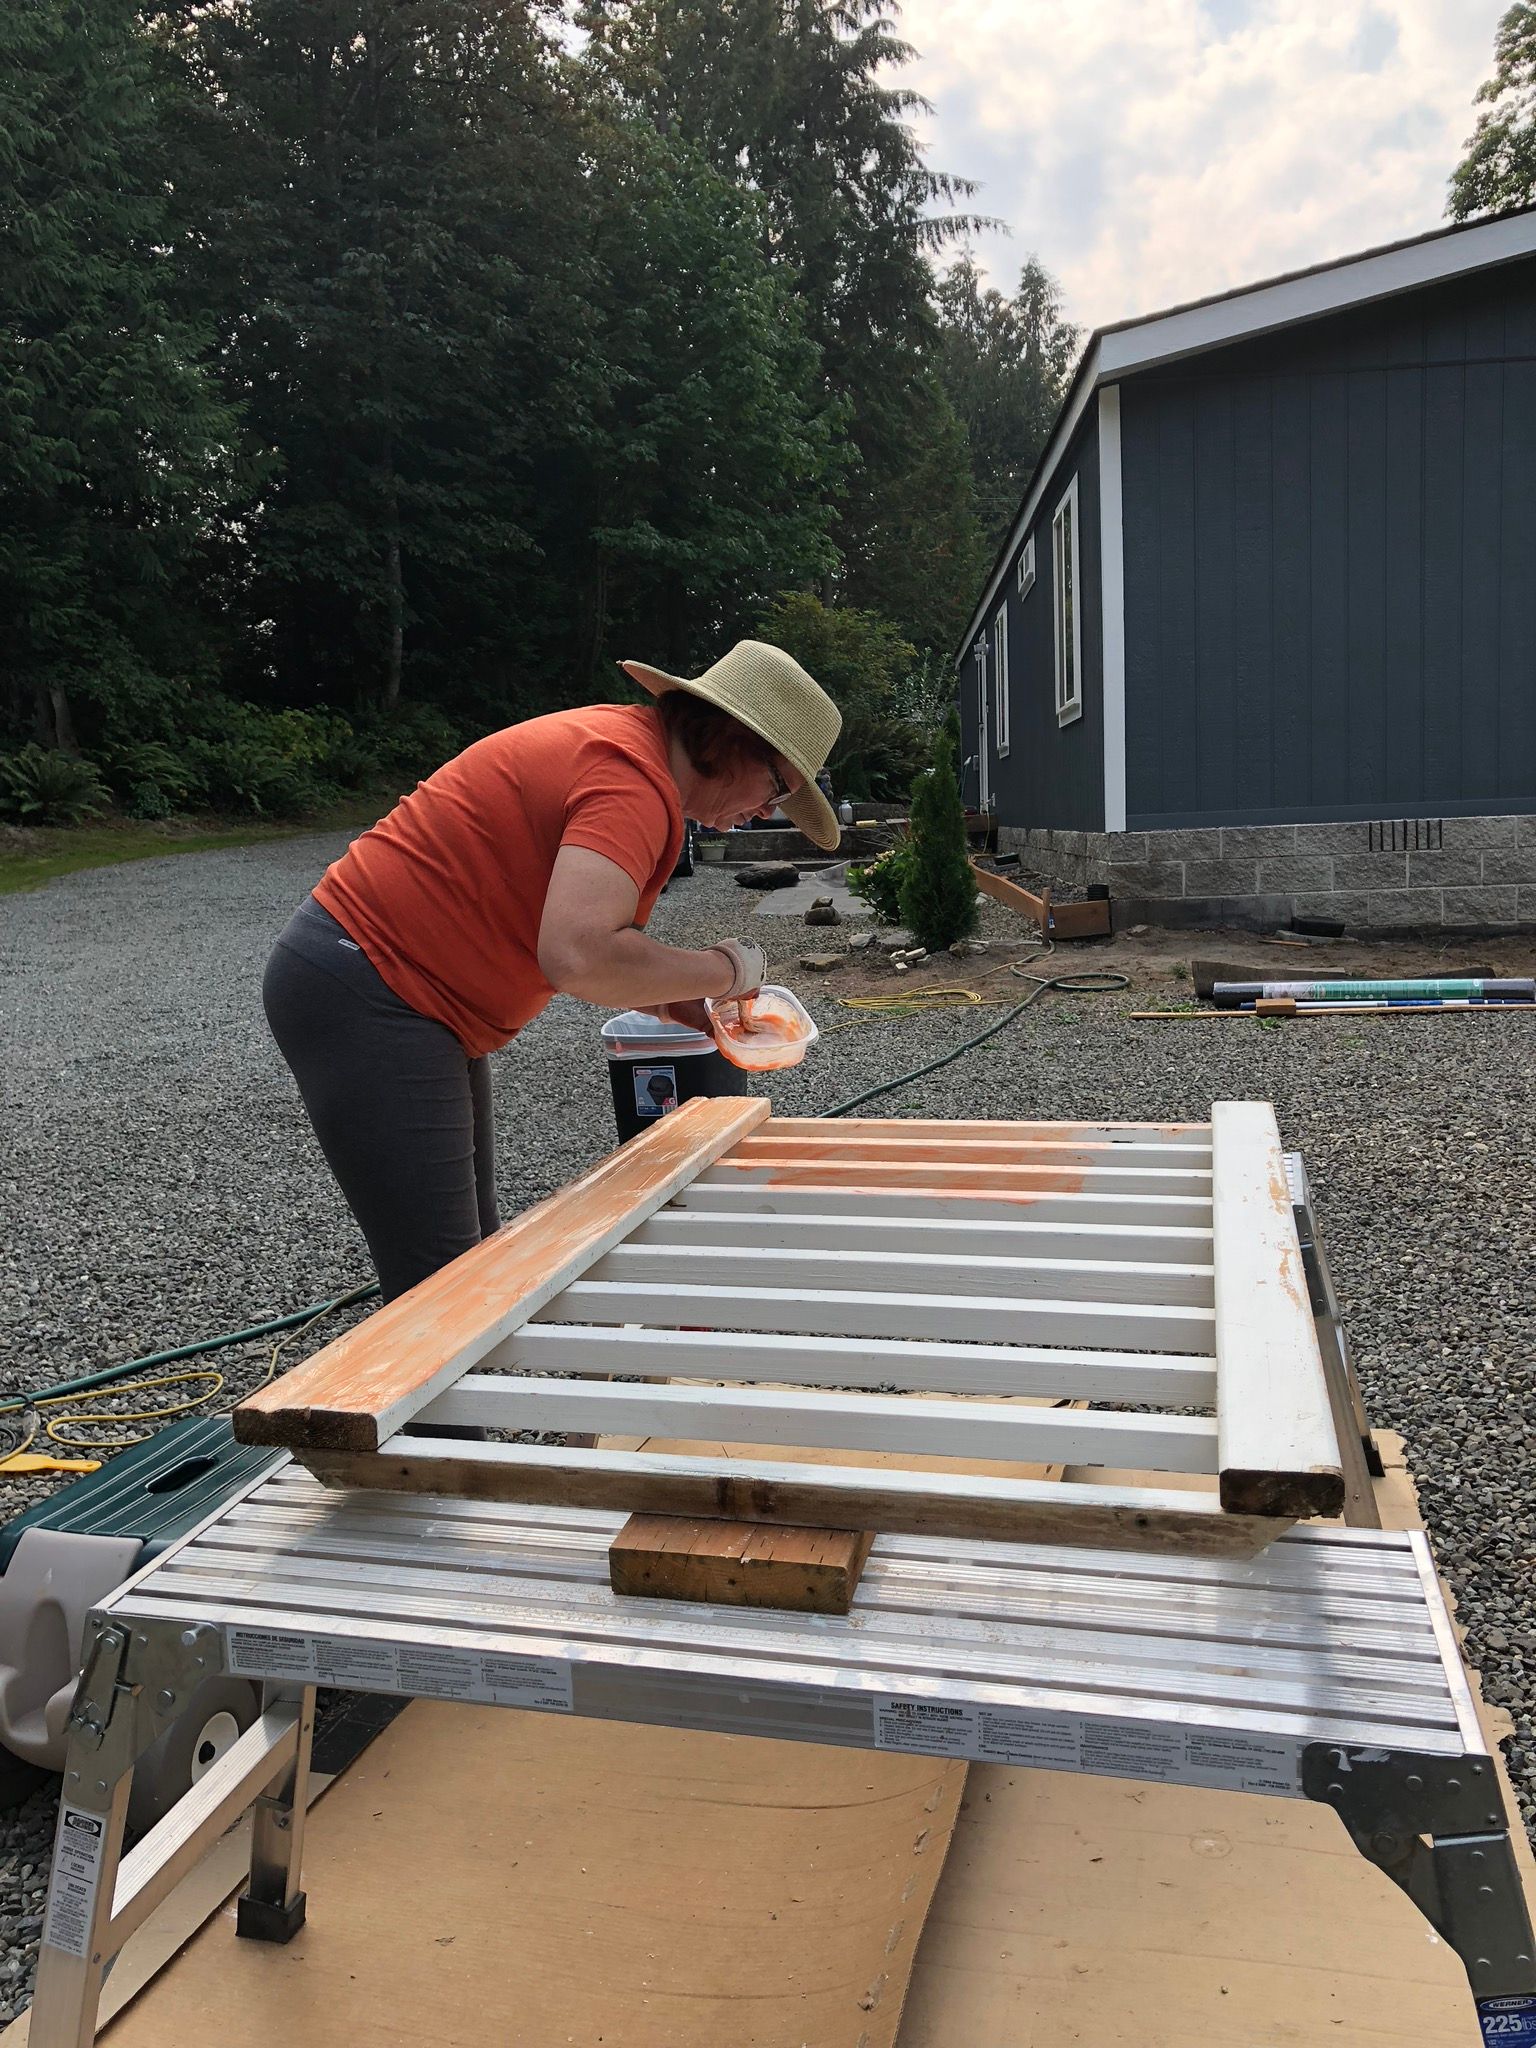
While we were waiting on the repairs to the rotted areas, we turned our attention to the railings I removed from the porch. There are four railings, but we plan to only reinstall three and place a new set of steps where the other railing was removed. Pressure washing removed the worst and poorly bonded paint. Rose used paint stripper to get off as much paint as she could. It worked well in some areas and not so good in others. To remove the remainder of the paint we used a Dewalt 5” orbital sander for the flat area, and a Rockwell Oscillating tool with sanding disc for the areas the Dewalt could not access. We used 80 grit paper, which removed the paint well.
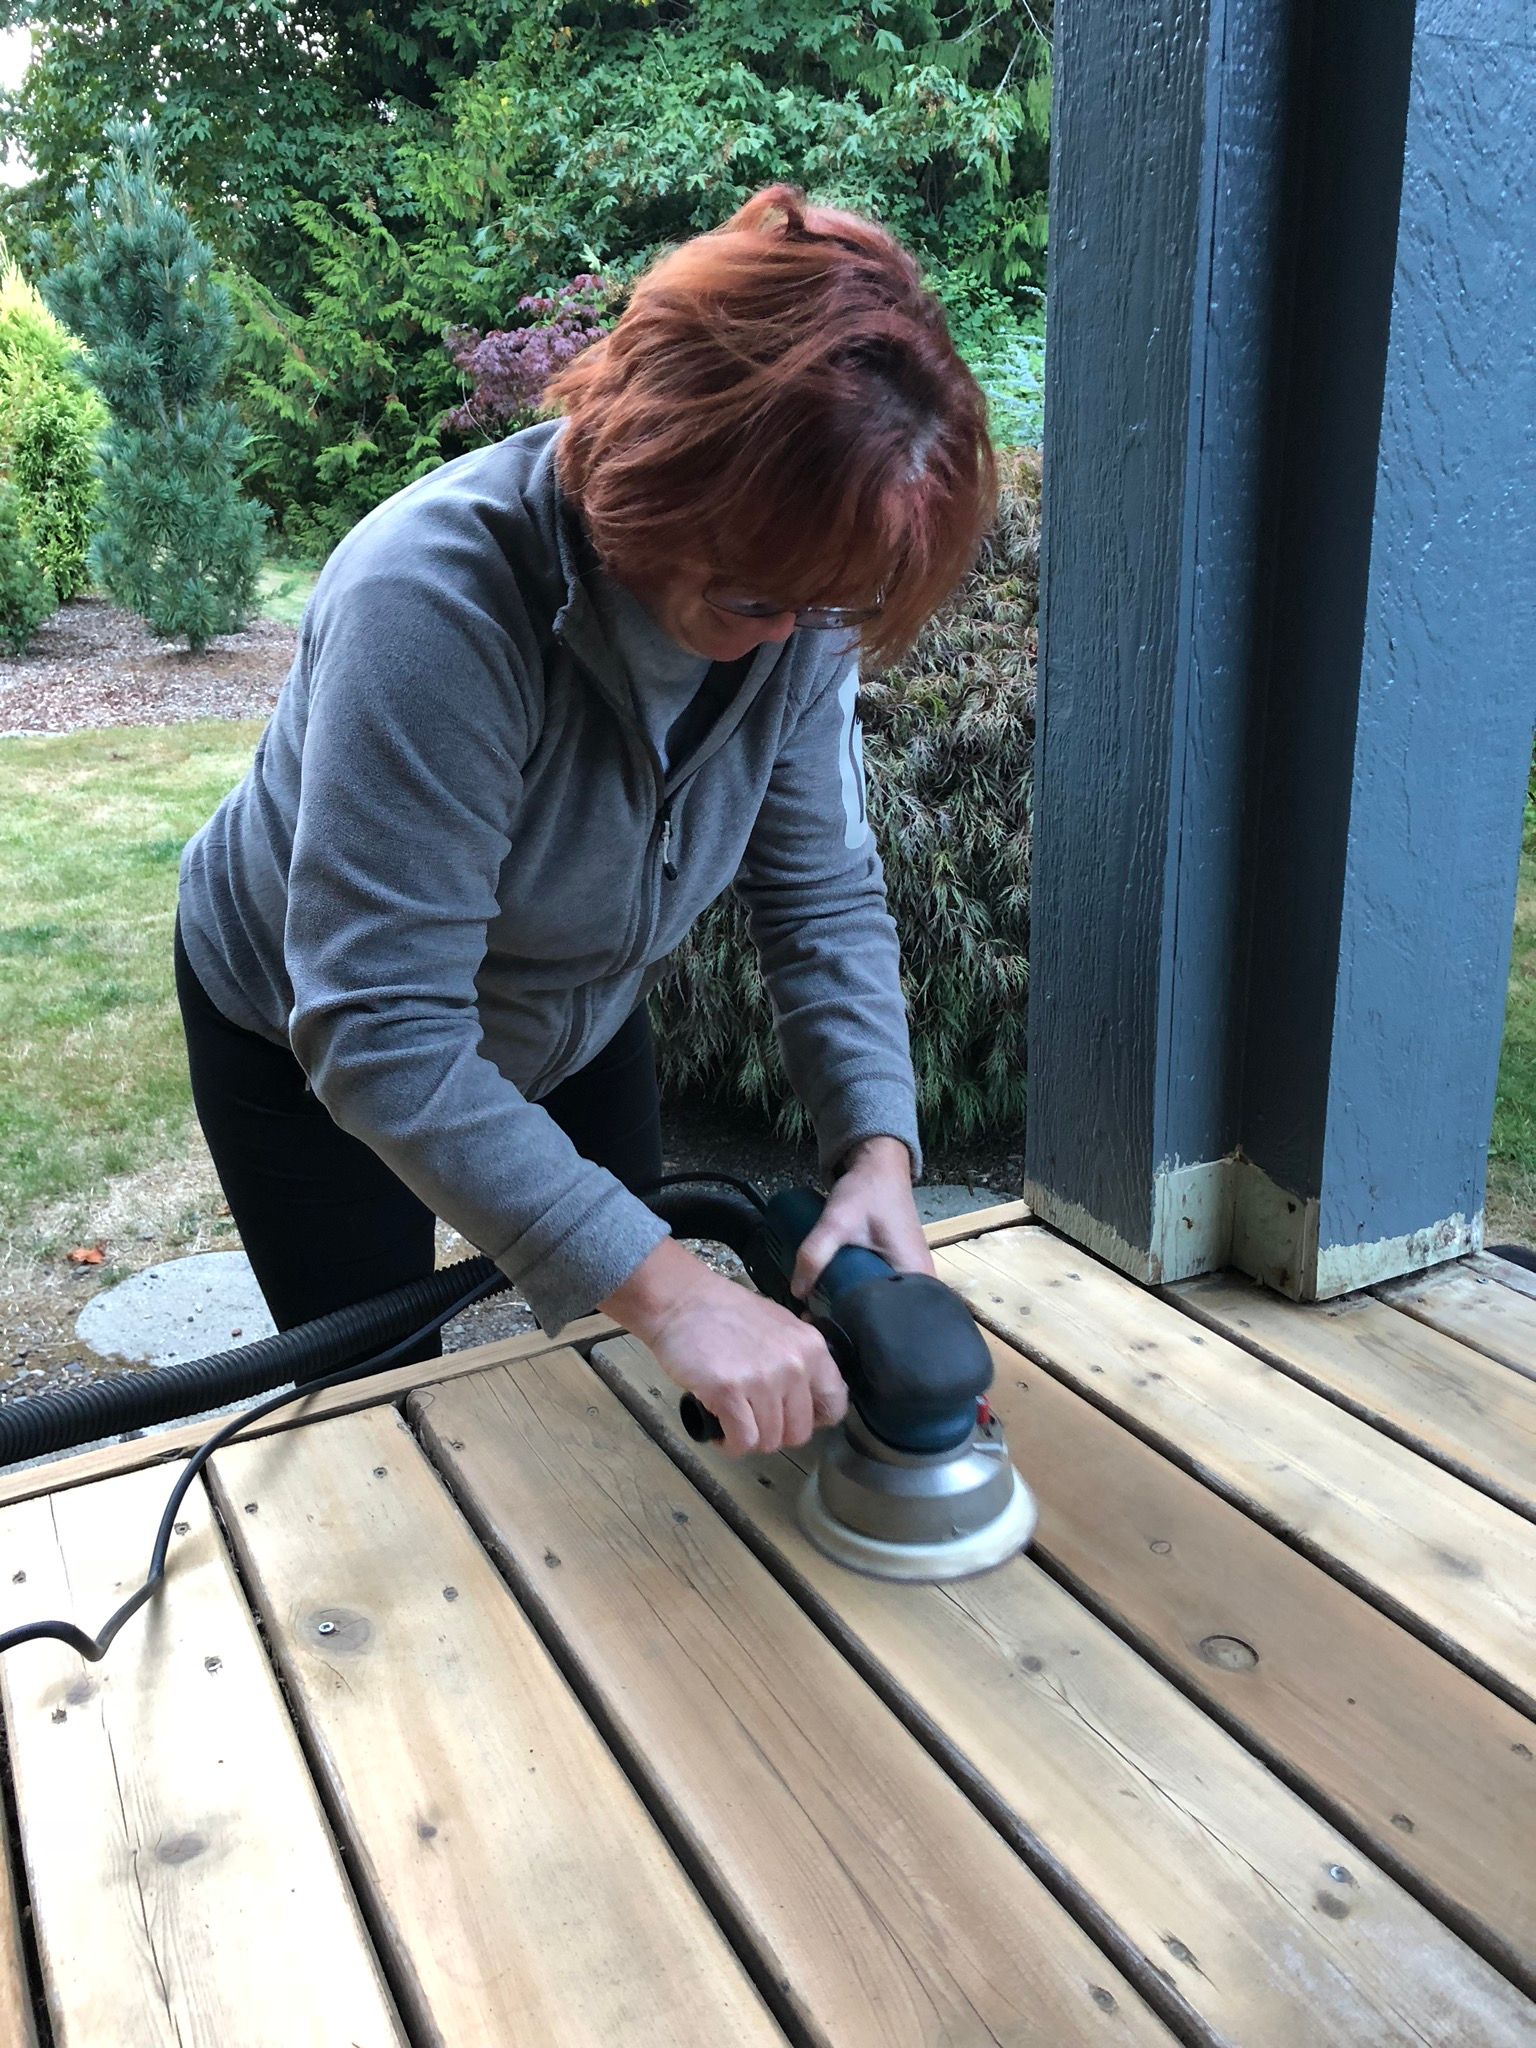
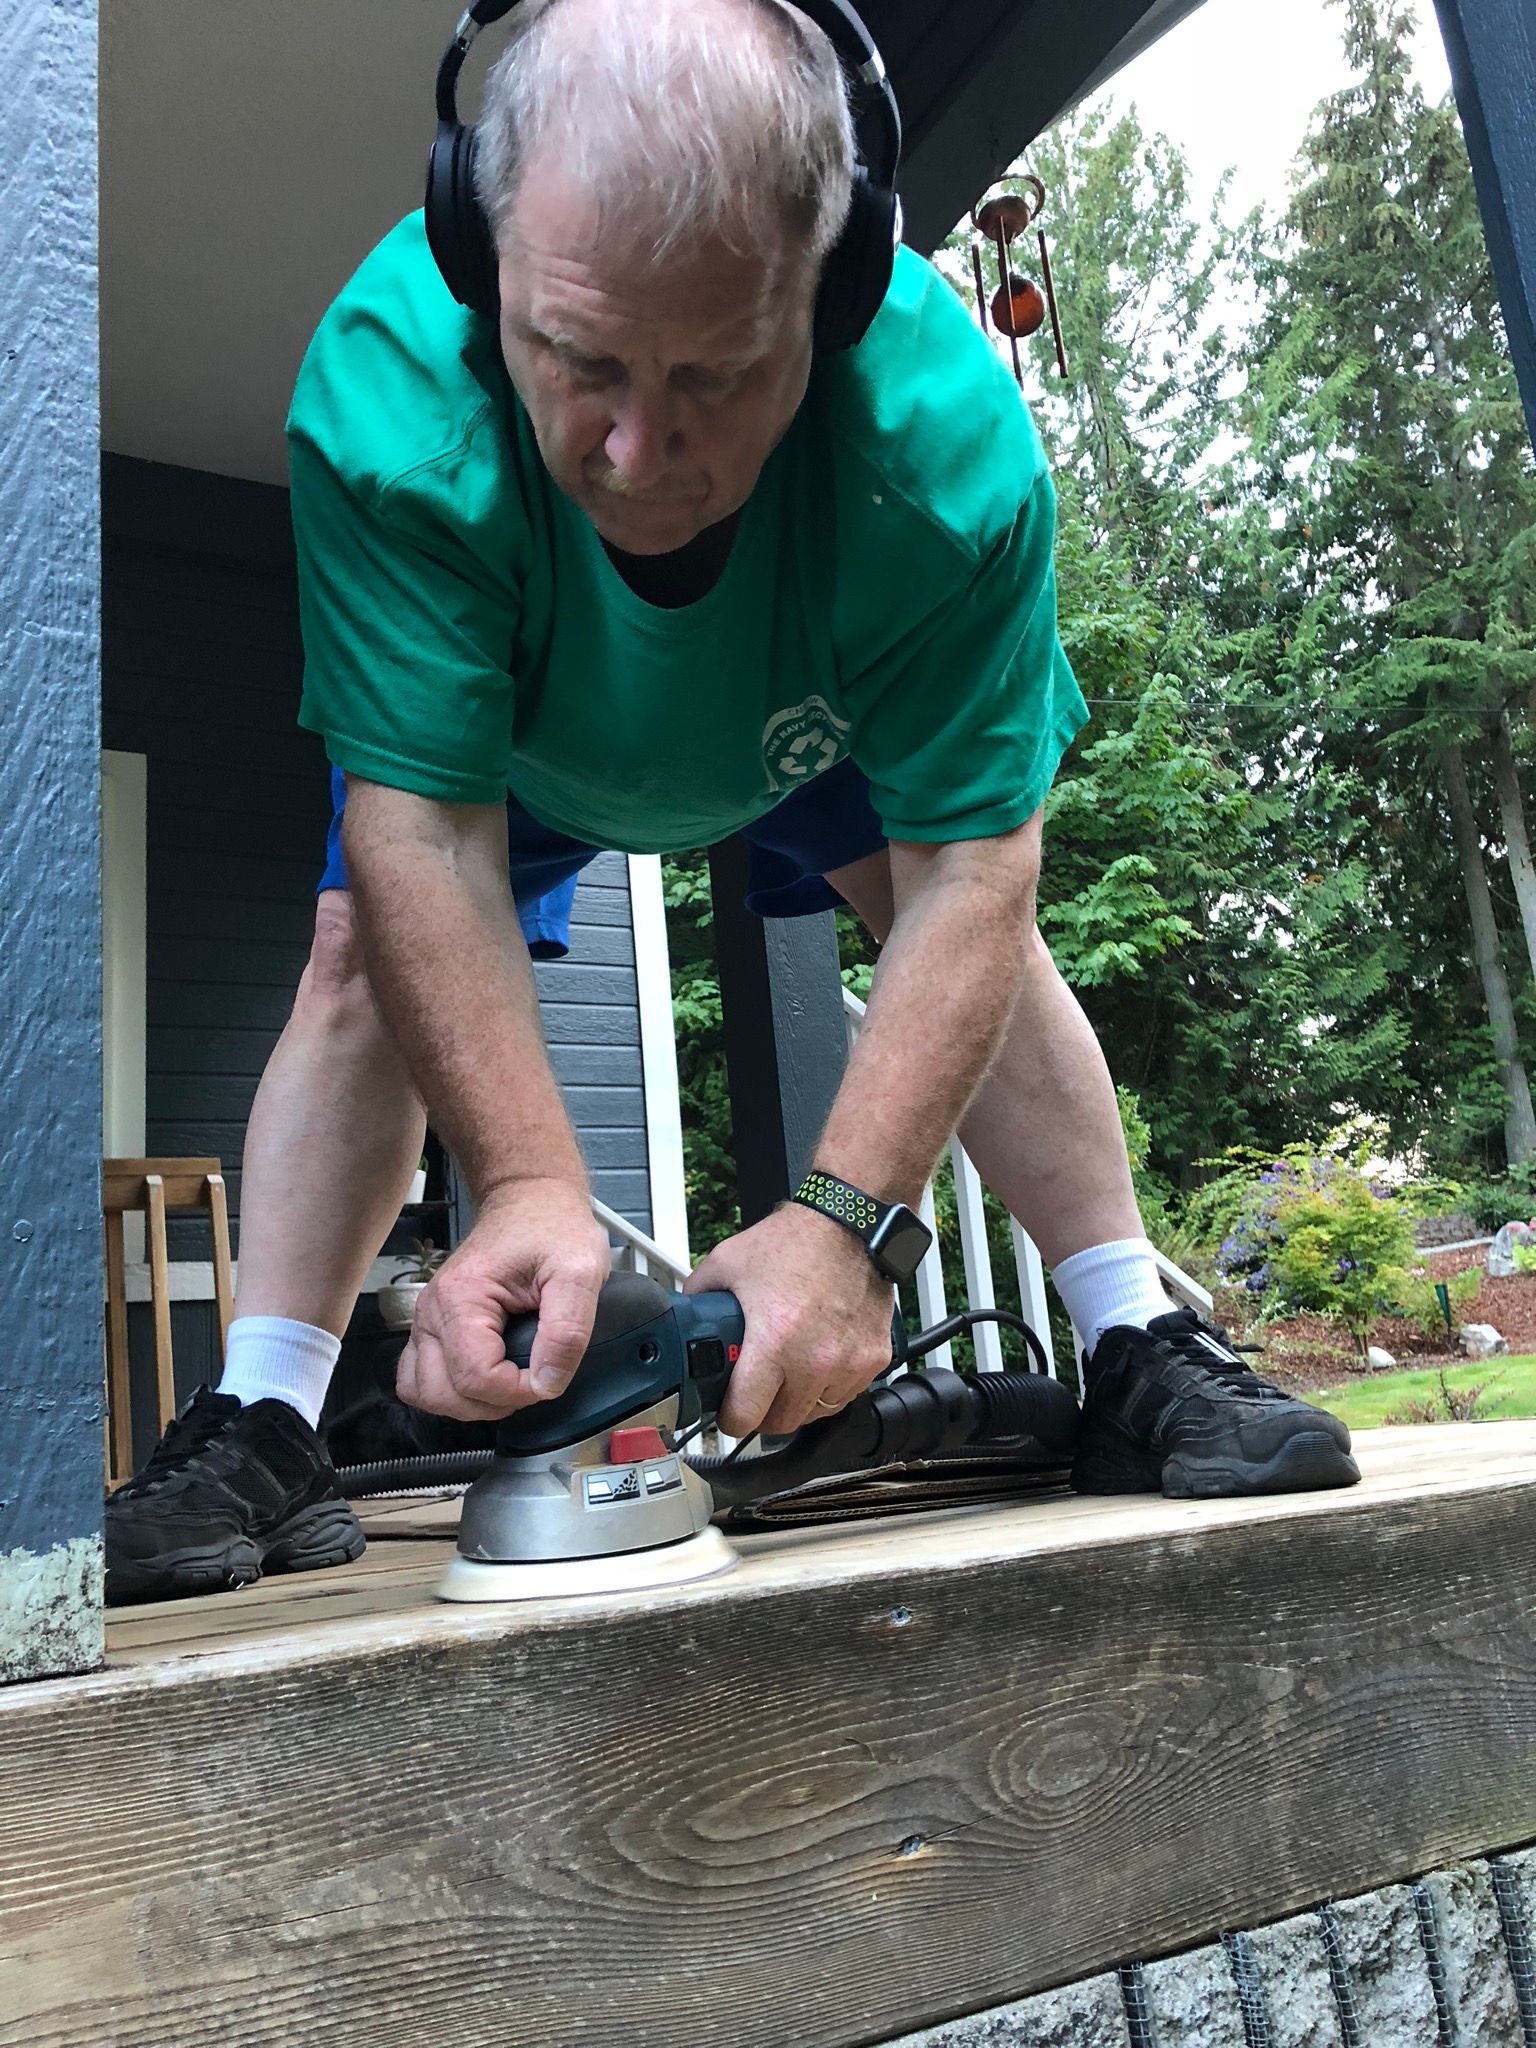
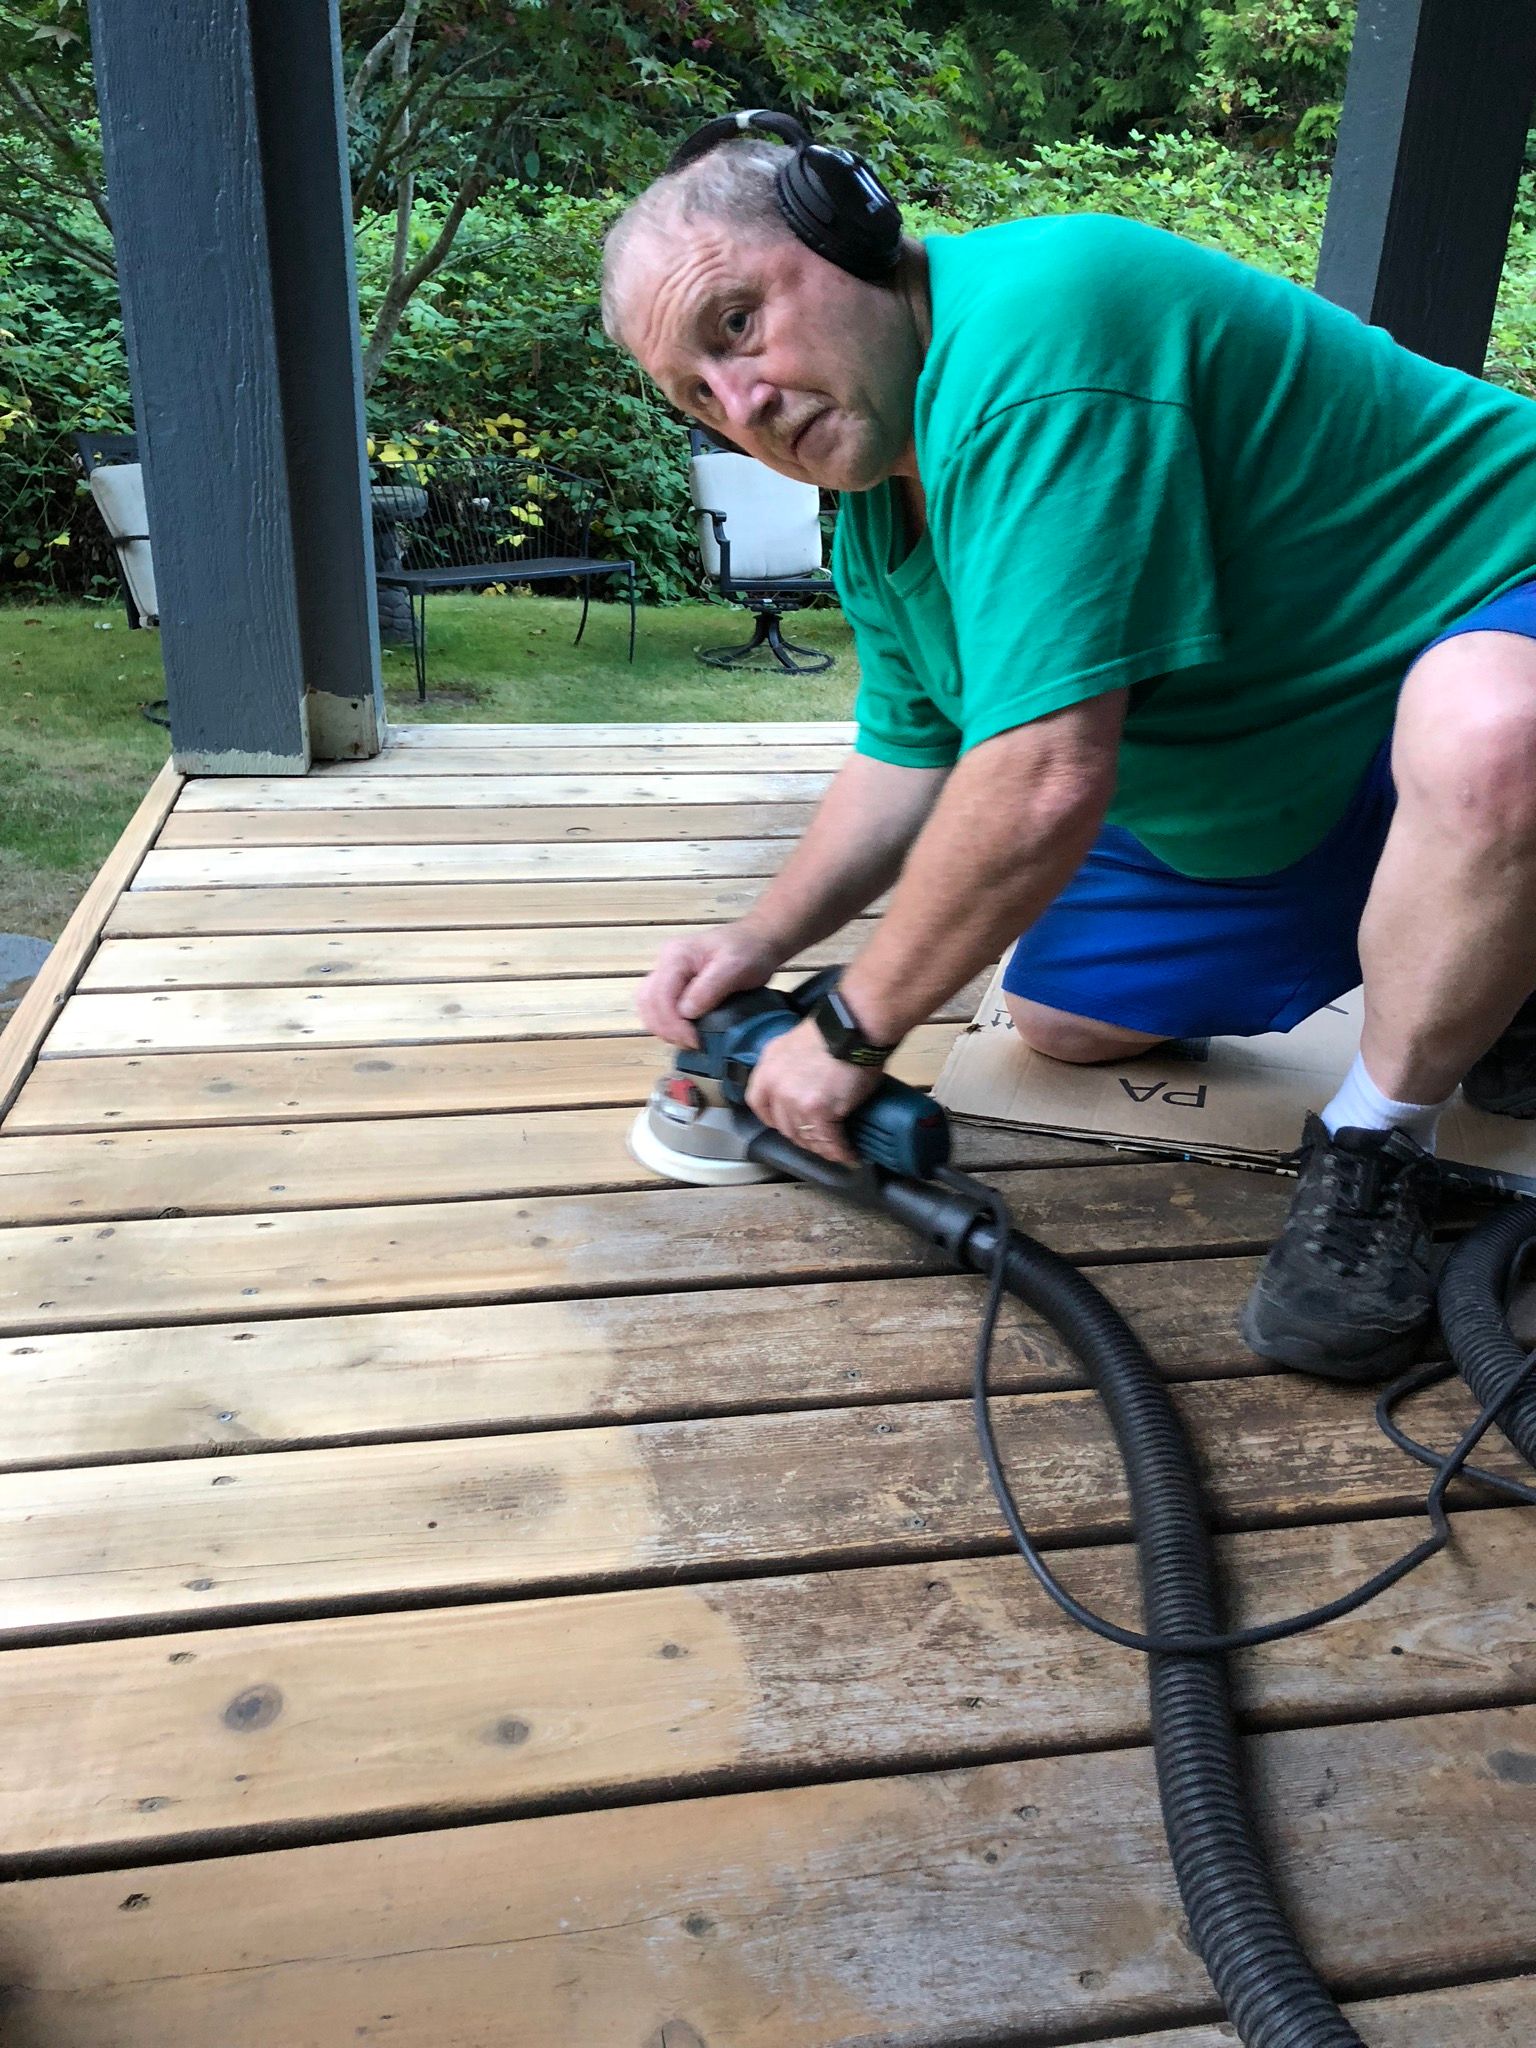
We then moved to the porch floor. The porch floor is deck-like with boards spaced a quarter inch apart from each other. It doesn’t appear to have ever been painted or stained. The crawl space for the house is beneath the flooring and because of the dampness in this area and high humidity, we decided against pressure washing it. We didn’t want all of that water collecting in the crawl space and possibly leading to mold. The only other option to prepare the floor for stain or varnish was to sand it. The porch is 15.5 x 13 feet (201 square feet). We considered renting a floor sander which would have probably been the fastest way to sand it, but we ultimately went with doing it with a 6” orbital sander made by Bosch. It took longer than a floor sander, but I will have much better control over the dust with the smaller sander, and I now own it. I picked this sander specifically after reading various reviews and its anti-vibration system which allows it to be used for a long period without making your hands numb. This sander claims to capture 93% of the dust created–and it did.

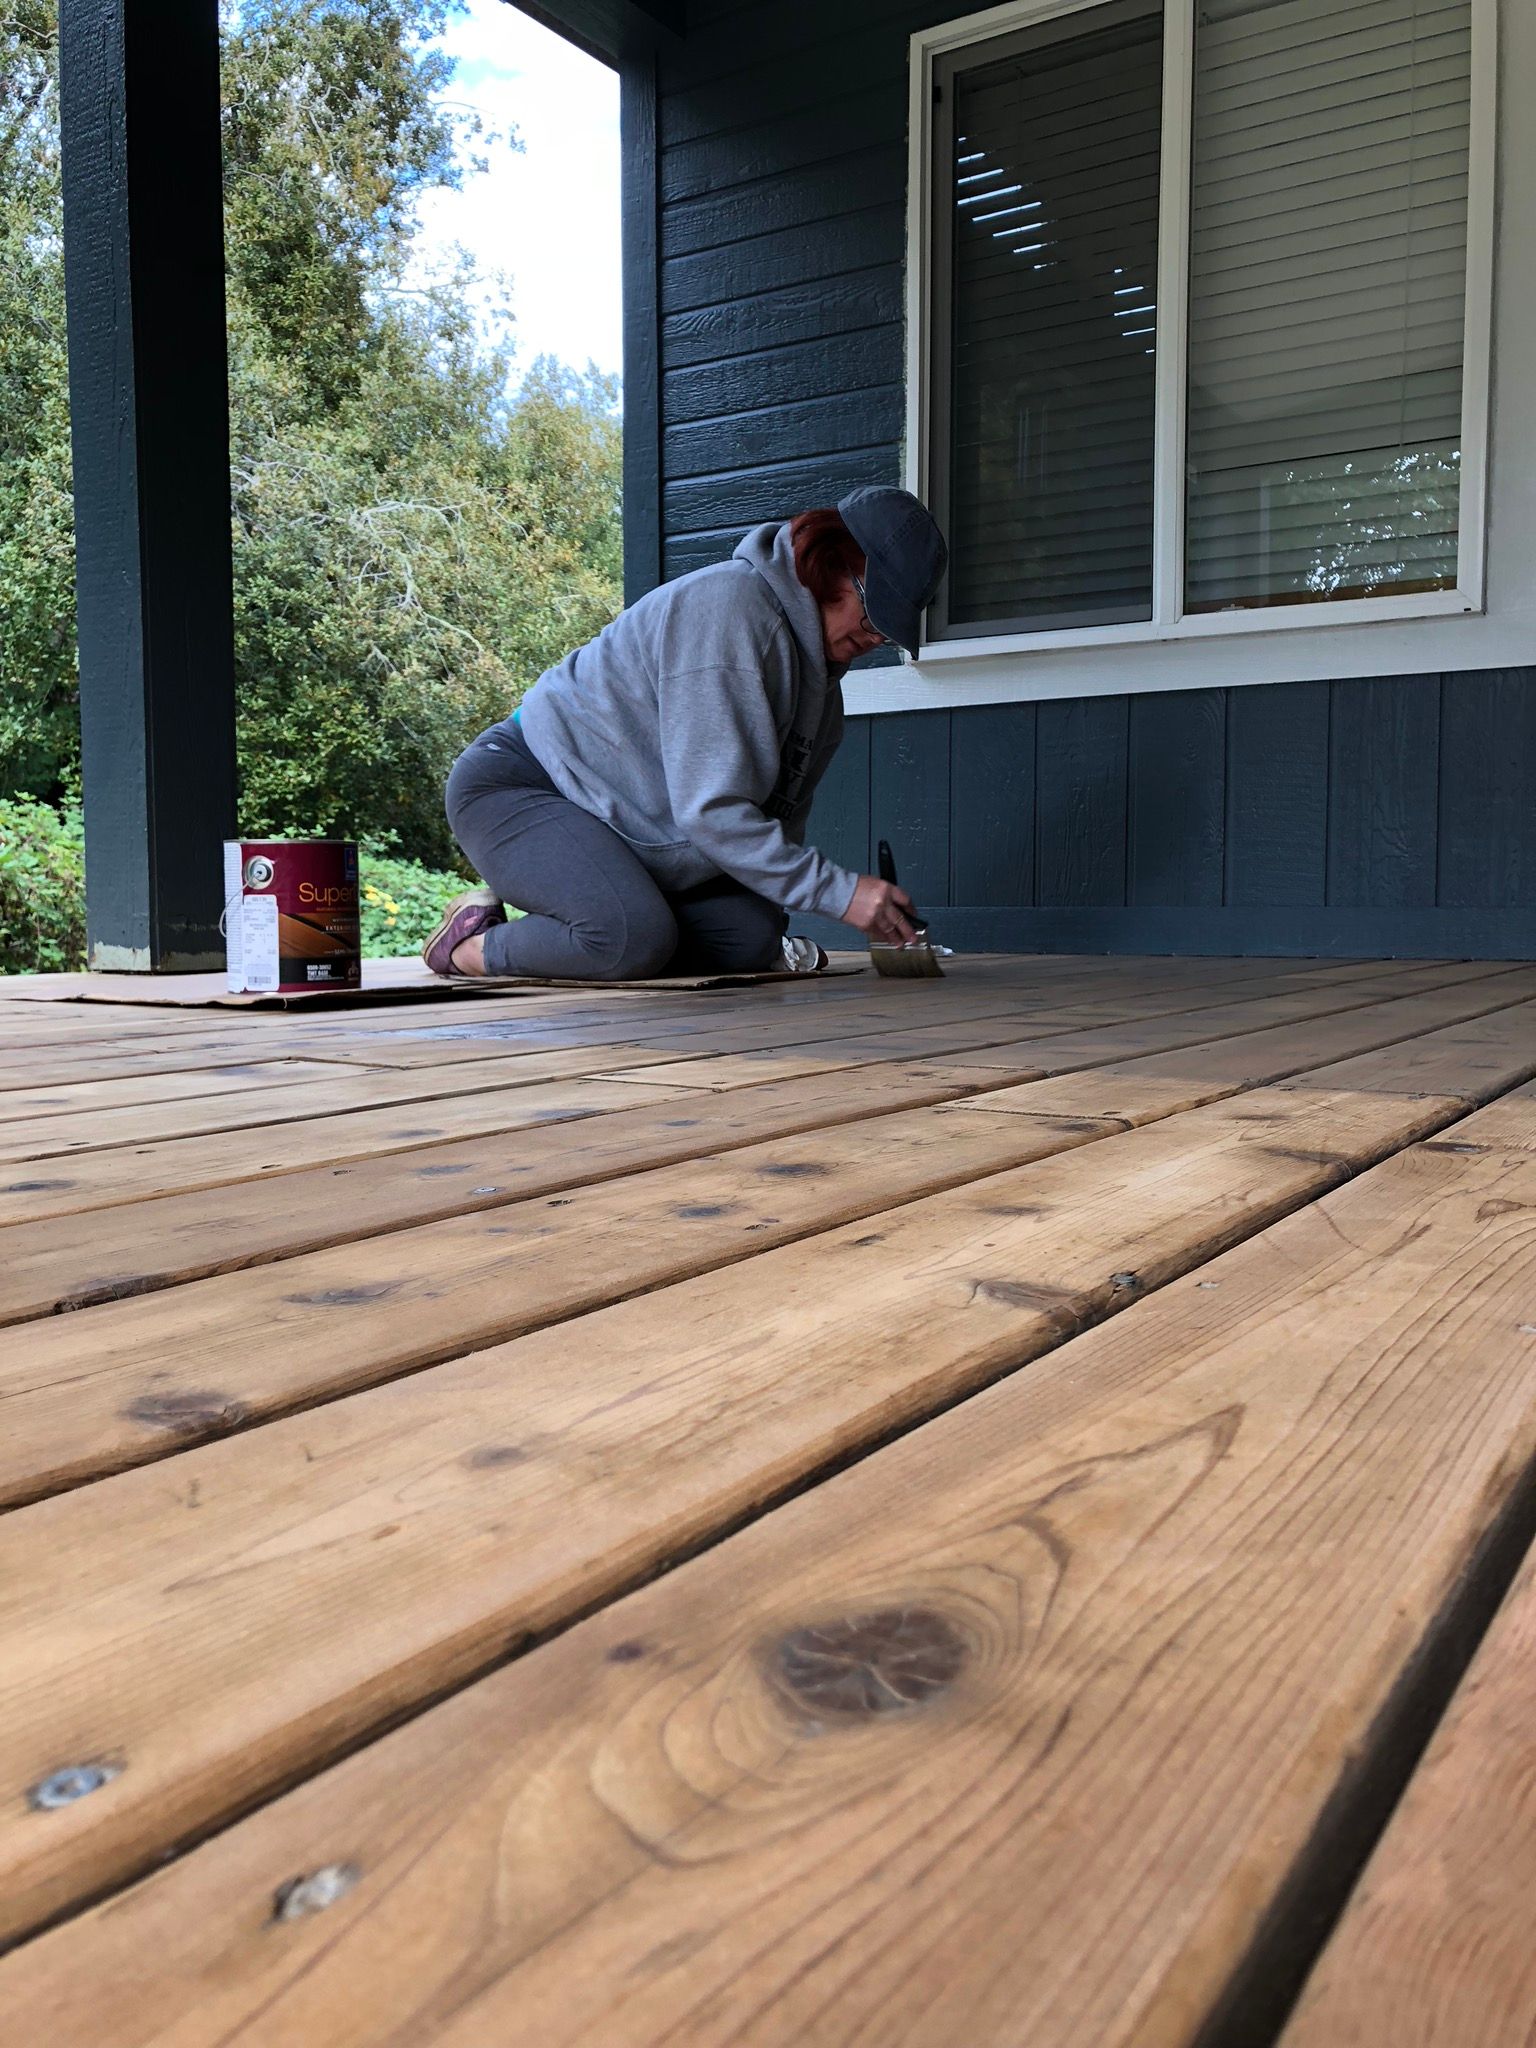
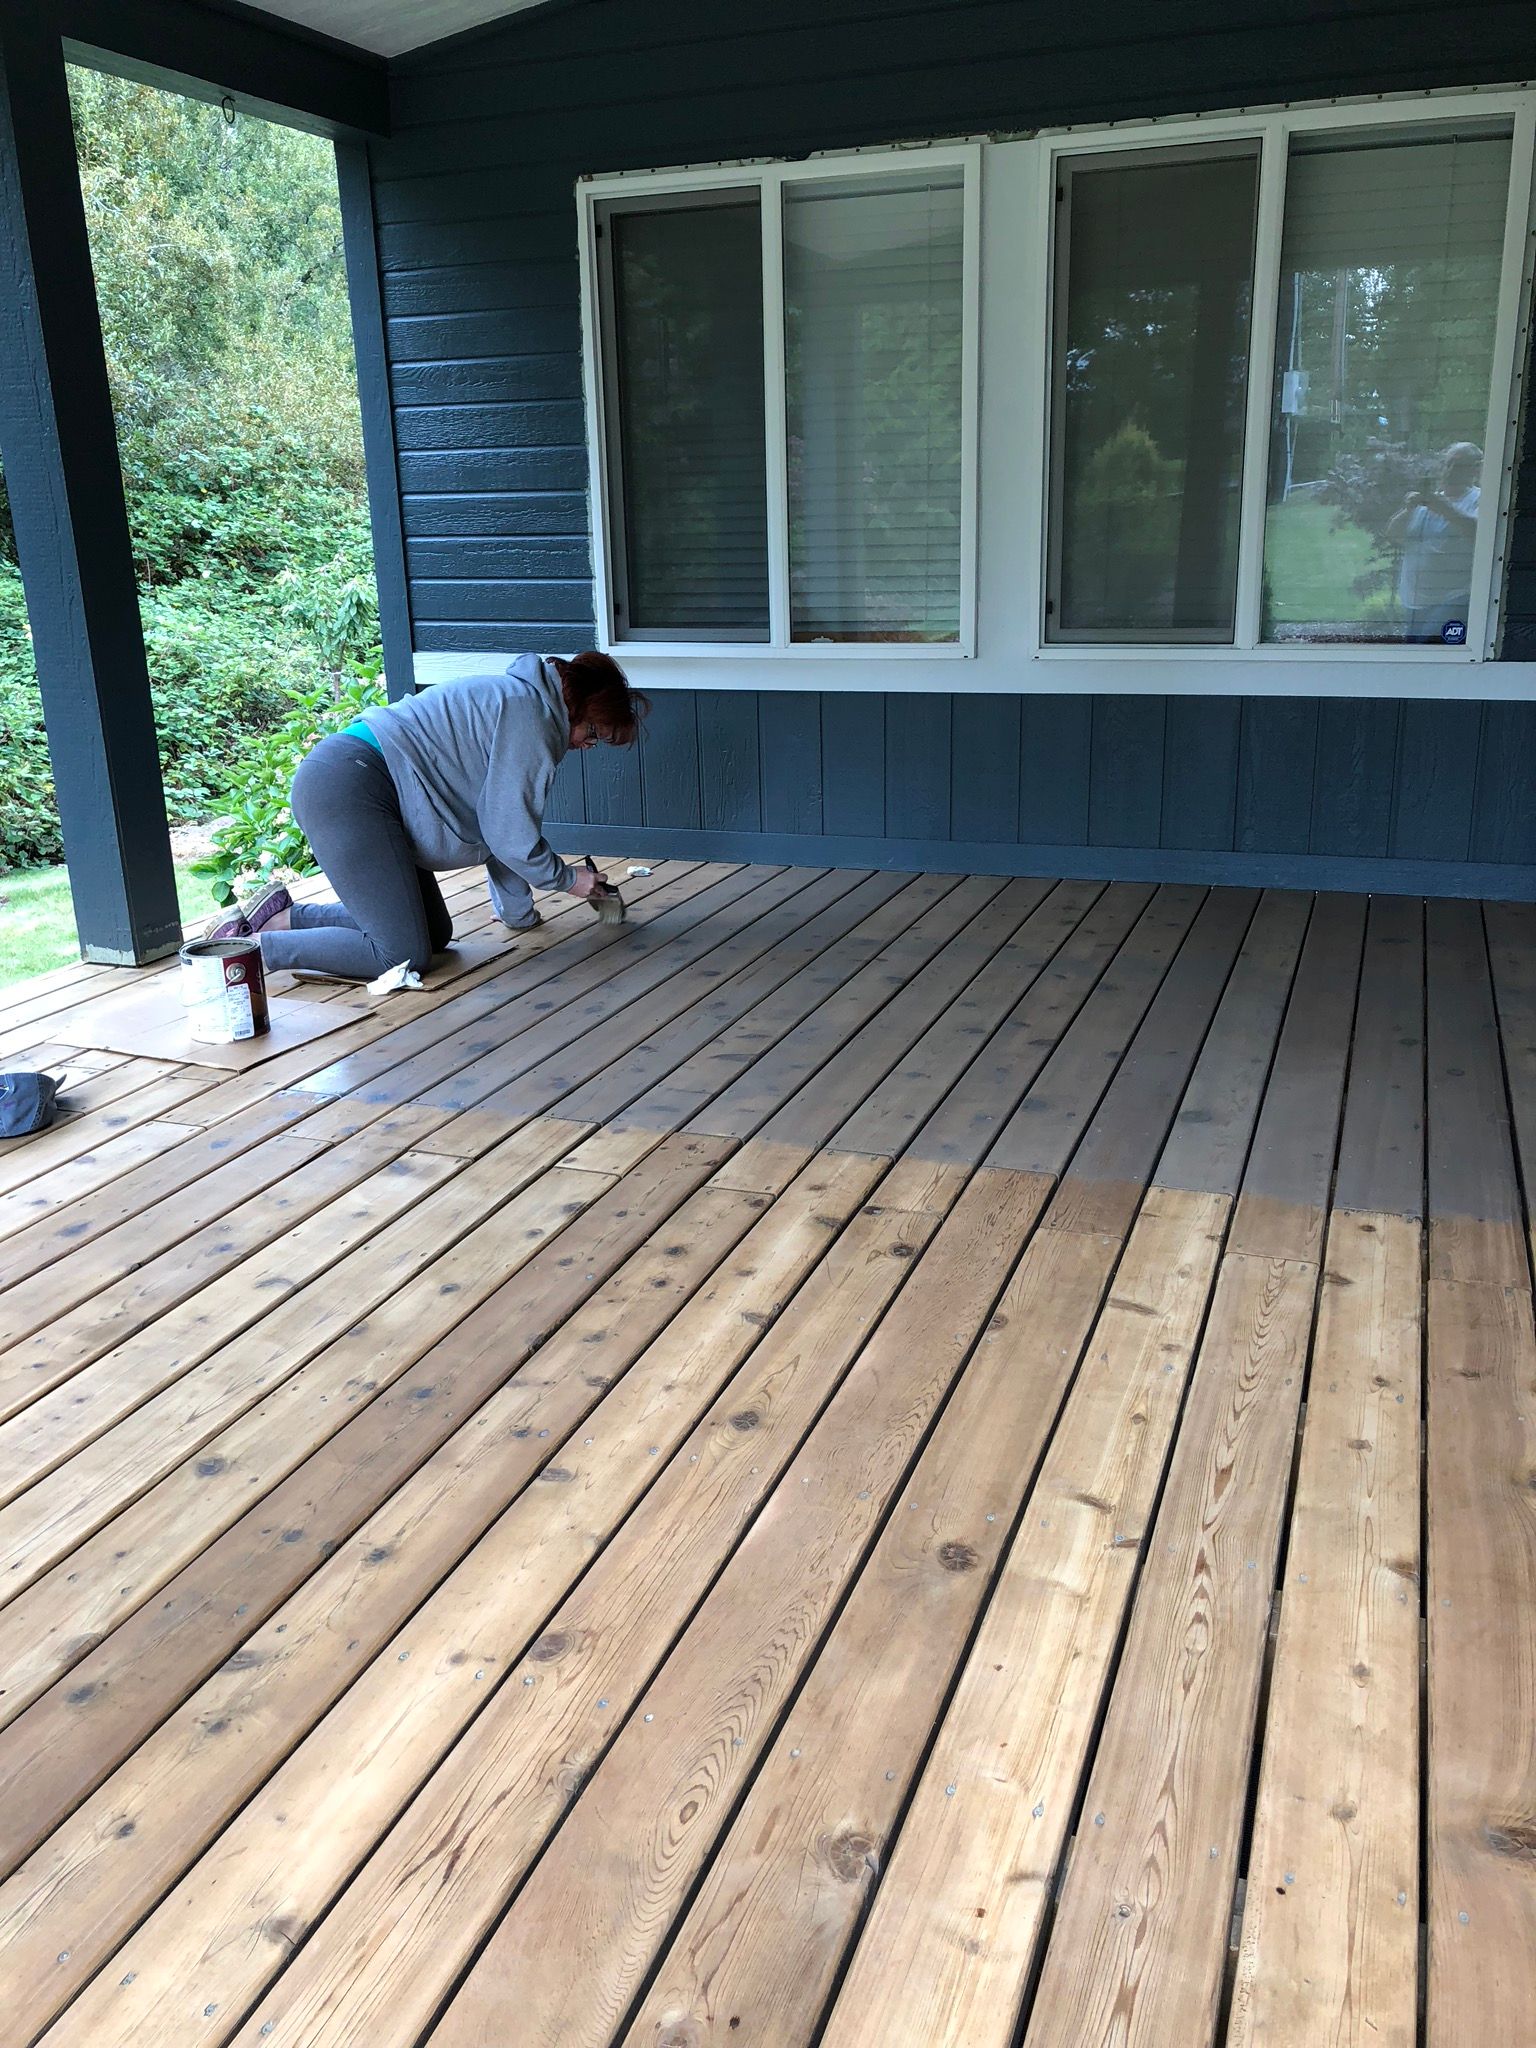
We used 80 grit for sanding the porch. Before doing research online I would have thought that we needed a less aggressive grit. The research stated a couple of things: 1) you don’t want it too smooth as it will be slippery especially if it gets wet, and 2) a coarser grit will allow more stain to penetrate the wood and provide better protection.
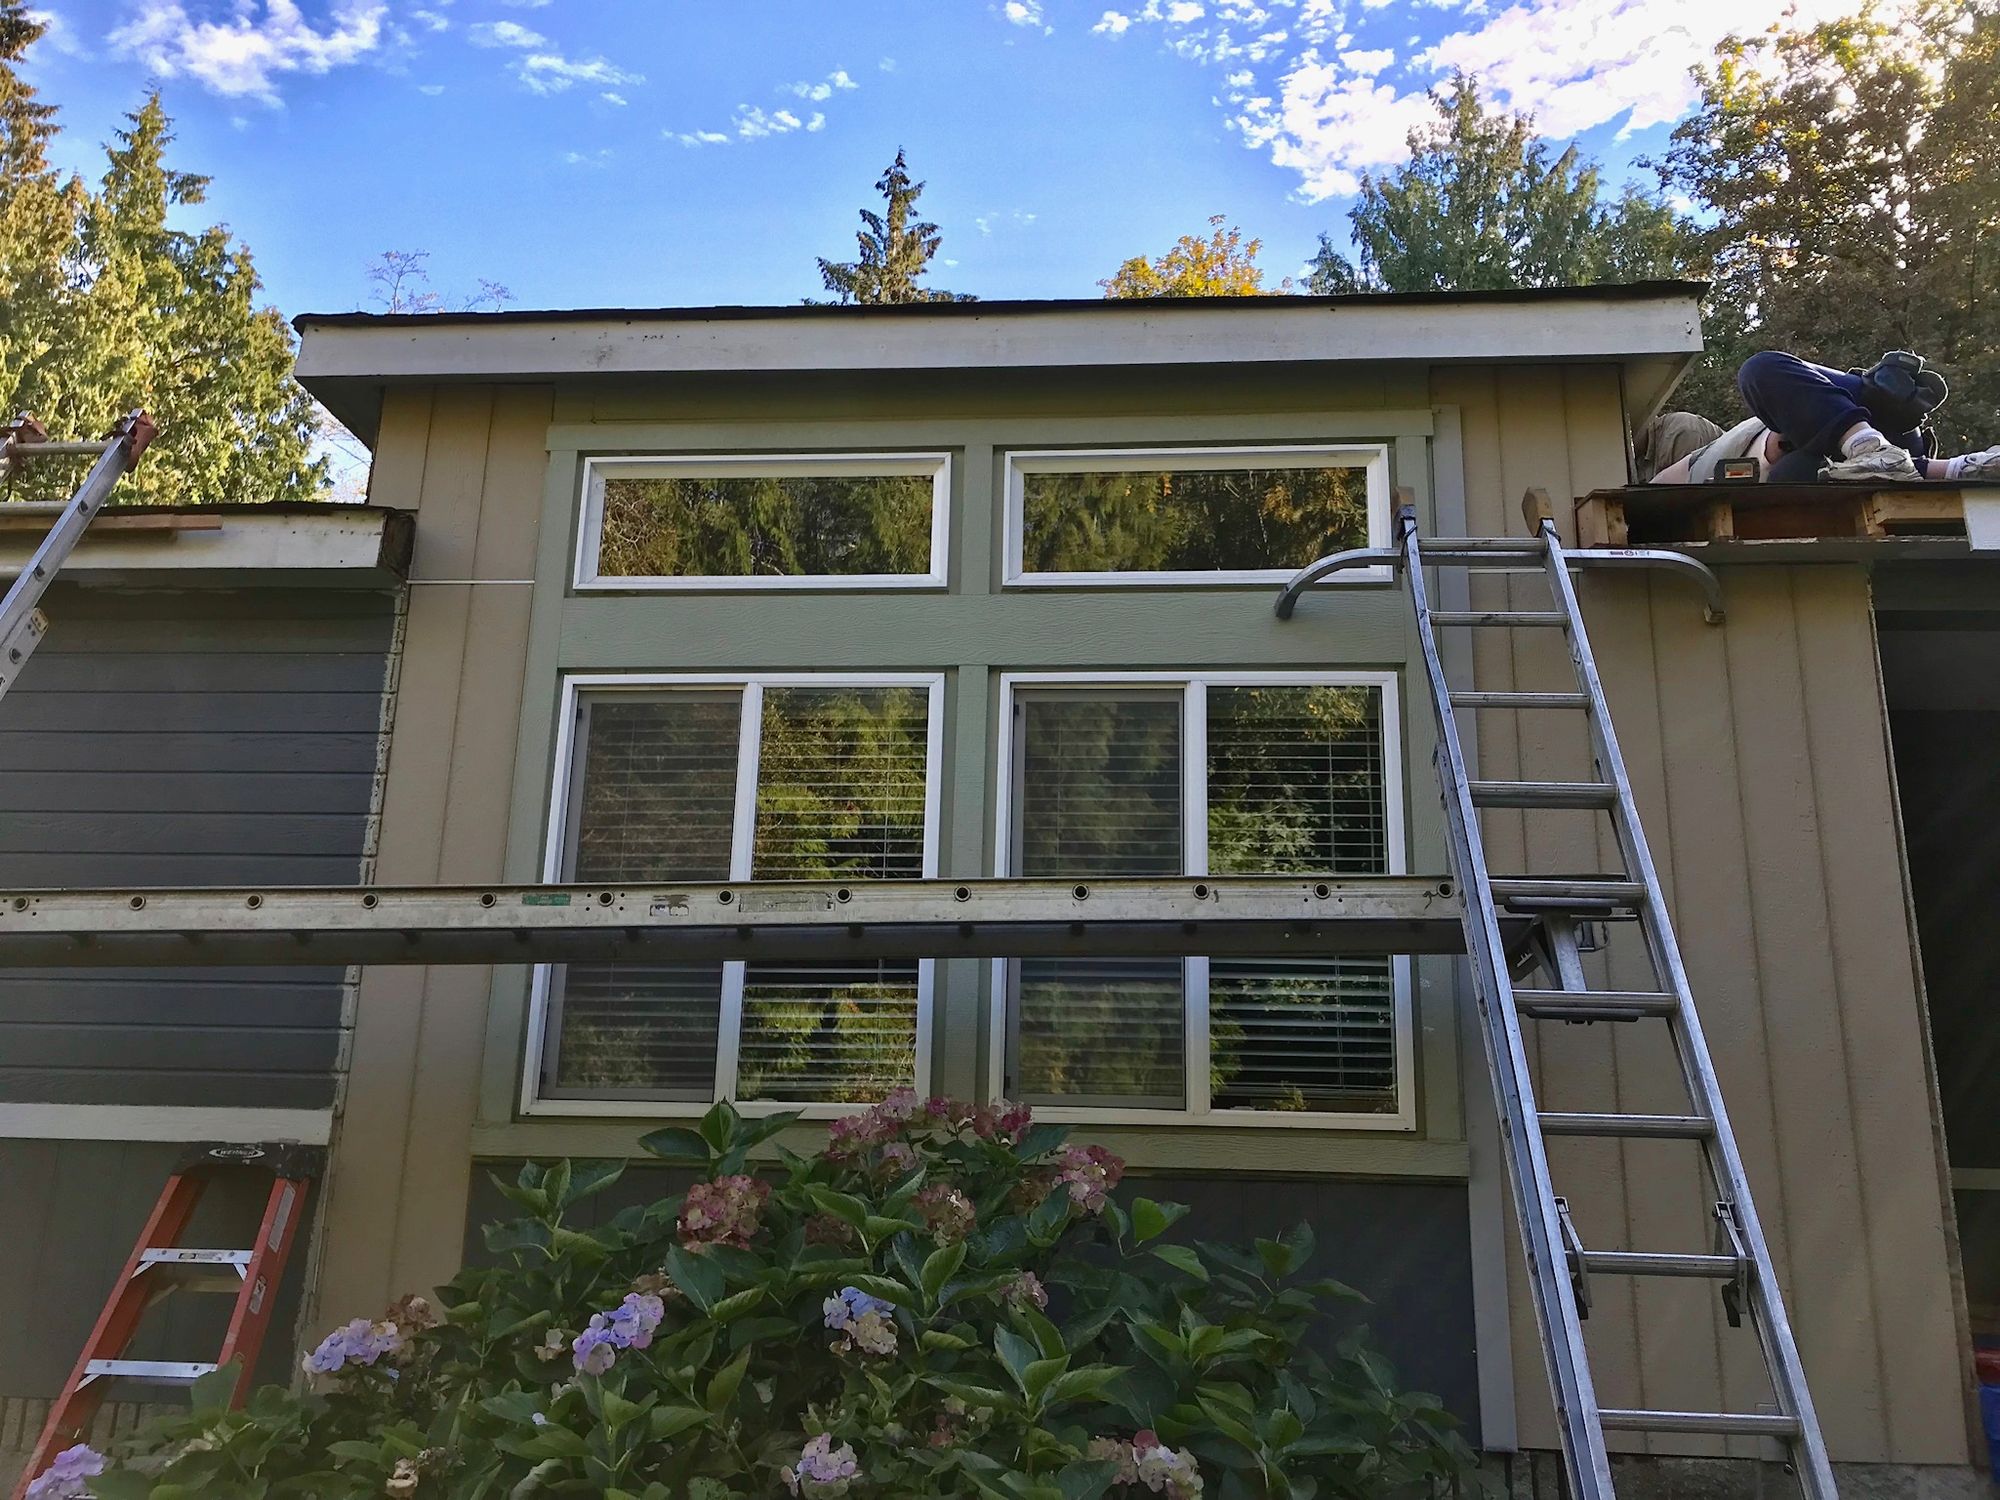
When the damaged areas on the north side were finally repaired, we painted the repairs on the next weekend and thus completed the complete painting of the house.
Some lessons learned:
- If there is a hole or gap where a bug can call home, they will live there
- The “Little Giant” ladder is awesome. While it is heavier than most single-purpose ladders, this one can do so many things and adjust easily to the uneven ground.
- That $3 paint can hook was golden and something that I almost overlooked. It made painting off the ladder easy.
It took us all summer to get this done, but we weren’t in a rush. The goal was to get the painting done by the end of September. We would have made it if not for the damaged wood that had to be replaced. We kept pretty busy doing something almost every day since we started in early July, working harder some days than others. The house now looks new and we both love the color (Harbor Gray). The gray with the white accents really pop. And next time I won’t take almost a year to post the article 🙂
Here is a list of tools and supplies we used to accomplish the painting project. Some of these are “must haves” for around your house and others are more specific and expensive for a particular job. All available from Amazon, unless indicated otherwise.
If you click on the links below and buy them through Amazon, I will receive some revenue; but you will not pay any more than if you went directly to Amazon.

Caulk Tube Caps
These things are awesome! No more having to jam a coat hanger down the tube to remove the dried caulk. These keep the caulking fresh and ready to flow. Wtat a smart idea.

Caulking Gun (no drip)
This is the best caulking gun I have ever owned and well worth the money. I have used it for caulking both inside and outside the house and it has worked well.

Paint Can Hook
I just saw this before we started and I am glad I did. It is such a simple idea but is really needed when working from a ladder. It makes securing the paint can on the ladder easy and secure.

Paint Roller Cleaner
This one costs a little more and isn’t necessarily needed, but if you plan to buy good (meaning expensive) rollers, this is a great way to clean them and use them over and over. Rose used the same two rollers to paint the entire house and shop.

Brush
We bought two of these in the 3″ version. I used only one for the entire exterior of the house and it is still in great shape for more use. I just spent the necessary time cleaning it at the end of each painting evolution.

Razor Blade Scraper and Blades
I have a few scrapers around the house, but none as good as this one. Combined with their blades, it does a better job. The Titan blades are thicker and don’t break as easily as other razor blades.

Roller
This roller has 1″ nap, which is what we needed for rolling the siding on the house. It did a good job while under Rose’s direction.

Paper Wipes
These are paper wipes, but strong. They are good for painting-related tasks and they don’t shed fibers. I always kept a couple in my pocket while painting for cleaning up a mistake or spill.

Roller Cleaning Tool
This is a must when reusing rollers. Even when you think you have removed all the paint from the roller, this tool will show you how much is trapped in the nap. Good for brush cleaning too.

Paint Stripper
We (mostly Rose) used this to remove the old paint from the railings before sanding. It did an overall good job, had no bad odors, and was easy to use.

Caulk
This is the exterior caulk we used on the exterior of the house. I initially bought a case of 12, and then had to buy three more towards the end to finish the job.

Wood Putty
I first bought this at Home Depot for use in the house and really liked the way it worked and hardened. I used this exclusively on the exterior of the house for patching holes in the wood and siding.

Little Giant Ladder (22′)
This isn’t the least expensive ladder you can buy, nor is it the lightest, but it can do so many things. We actually bought this when we first moved into the house and used it for interior painting. For the exterior house painting, I used it in “step-ladder mode” as well as “extension ladder mode”. I always felt secure on it as it is very solid.

Little Giant Plank
We purchased this at the same time as the ladder and used it with the ladder for interior painting.

Dewalt 5” Orbital Sander
We purchased this for sanding the railings. This is a great sander and one I will use around the shop. It isn’t as powerful as the Bosch and the pad size is an inch smaller.

Dewalt Cordless Oscillating Tool (and Scraping Blade)
I used this to remove old caulk, particularly around the windows where I replaced the trim boards. It did an amazing job at easily removing the caulk and was easy to control. I also purchased a scraping (rather than cutting) blade for removing the caulk.

Rockwell Oscillating Tool
I bought this when we were in Fallon and I had used it when doing the laminate flooring both here and in Fallon. It works great for that. Here we used it along with the triangular sanding pads for the tight and corner areas when we were sanding the railing.

Bosch 6” Orbital Sander
Definitely not required unless you plan to sand a lot, which we did in order to refinish the porch floor. This one has all the power and the best dust capture system when attached to a shop vac. There was virtually no dust when sanding, and we did a lot.

Mirka Sanding Discs 6″, 80 grit
We used these discs on the Bosch sander to strip the porch floor. They are very porous and allow the dust to be vacuumed into the shop-vac as you sand. They worked as advertised, leaving little to no dust.

Hearing Protection
I bought these when we were going to start sanding the porch. The sander wasn’t that loud, but with the shop vac also running it was bad on the ears. These provide protection as well as Bluetooth connectivity so I could listen to podcasts while sanding. Nice.
Exterior Paint (Sherwin-Williams) $62-$70 per gallon
We didn’t get this from Amazon but from a Sherwin-Williams store. Their paint, as is all good paint is very expensive. It always goes on sale with a 30%-40% discount. We bought most of it with the 40% discount. We used eight gallons of grey and three gallons of white for the trim.


